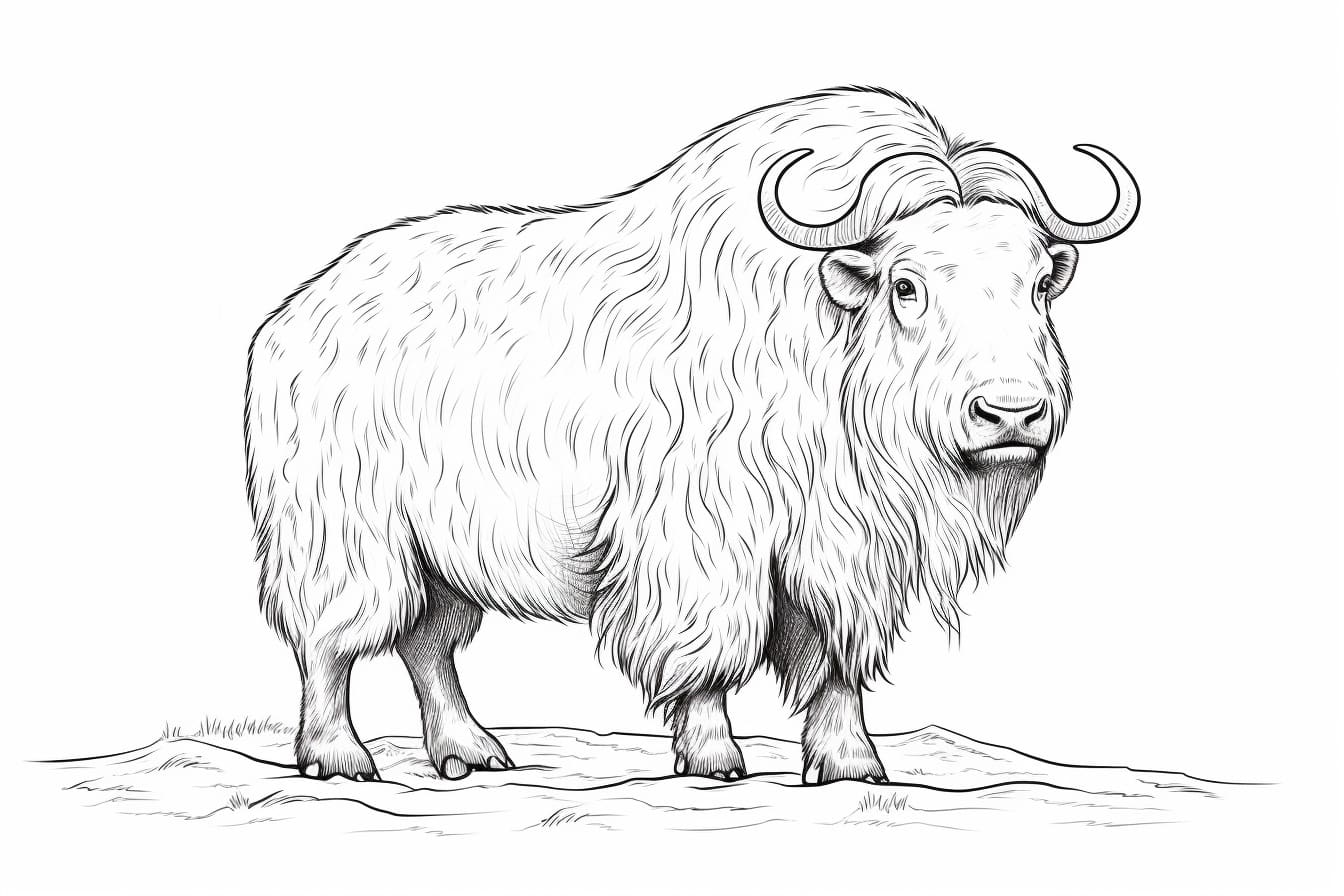
Welcome to this step-by-step guide on how to draw a musk ox! In this article, I will walk you through the process of creating a realistic and detailed representation of this magnificent creature. Whether you are a beginner or an experienced artist, I am here to help you bring your musk ox drawing to life.
Materials Required:
Before we get started, let’s gather the materials you will need:
- Pencil (preferably HB or 2B)
- Eraser
- Drawing paper
- Pencil sharpener
- Reference image of a musk ox
Now that we have our materials ready, let’s begin the drawing process!
Step 1: Basic Outline
Start by lightly sketching the basic outline of the musk ox using your pencil. Begin with a large oval shape for the body and a smaller oval shape for the head. Connect these shapes with a curved line to create the neck. Remember to keep the lines loose and light for easy erasing later on.
Step 2: Facial Details
Next, let’s focus on the facial features of the musk ox. Use reference images to guide you as you draw the eyes, nose, and mouth. Pay attention to the placement of these features and their proportions. The eyes should be slightly oval-shaped, and the nose should be wide and rectangular.
Step 3: Shaggy Mane
The musk ox is known for its long, shaggy mane. To depict this, draw a series of curved lines around the head, following the shape of the head and neck. These lines should be irregular and rough to create the appearance of fur. Take your time and add as much detail as you’d like to the mane.
Step 4: Body and Limbs
Now, let’s move on to the body and limbs of the musk ox. Use your reference image to guide you as you draw the shape of the body. Pay attention to the curves and contours of the musk ox’s form. Once you have the body shape, add the limbs by drawing thick, curved lines for the legs. Remember to draw the hooves at the end of each leg.
Step 5: Adding Texture and Detail
To make your musk ox drawing more realistic, we need to add texture and detail. Start by lightly sketching short, curved lines throughout the body and limbs to represent the fur. The musk ox has a thick coat, so don’t be afraid to add depth and dimension to your drawing. Use reference images to guide you in capturing the texture accurately.
Step 6: Fine-tuning and Shading
Once you are satisfied with the overall structure and texture, it’s time to focus on fine-tuning your drawing and adding shading. Use your pencil to carefully darken the lines and add more definition to the features of the musk ox. Pay attention to the variations in light and shadow, especially on the face and body. Use your eraser to create highlights and bring out the natural shine of the musk ox’s fur.
Step 7: Background and Final Touches
To complete your musk ox drawing, consider adding a simple background to provide context. It could be a grassy field, a mountainous landscape, or any environment you envision for your musk ox. Use your imagination and let your creativity flow. Once you are satisfied with the background, take a step back and assess your drawing. Make any final adjustments or touches you feel are necessary.
Congratulations! You have successfully drawn a musk ox. With practice and perseverance, your drawing skills will continue to improve. Keep experimenting and exploring different techniques to develop your own unique style.
Conclusion
Drawing a musk ox may seem challenging at first, but with the right guidance and practice, you can create a stunning representation of this powerful animal. Remember to start with a basic outline, focus on the facial details and shaggy mane, add texture and detail, and finish with shading and final touches. By following these steps, you will be able to capture the essence and beauty of the musk ox in your artwork.
So grab your materials, find a comfortable space, and let’s begin drawing! The musk ox is waiting to come to life on your paper.