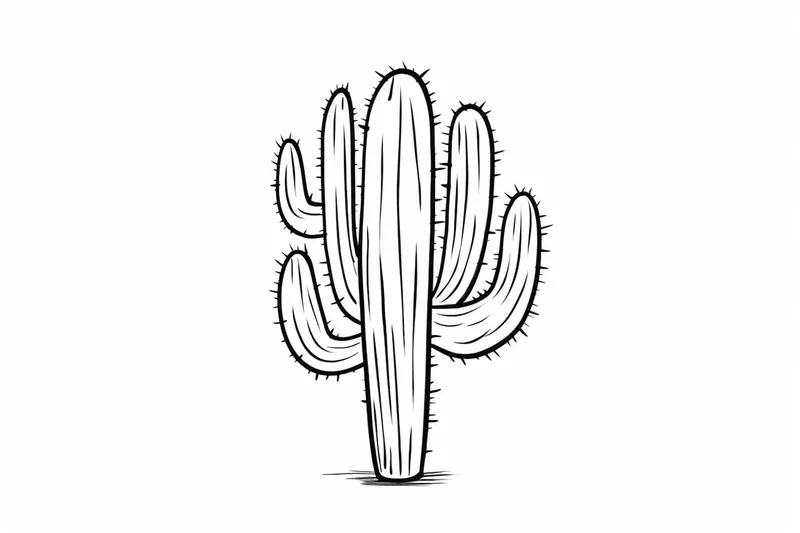
How to Draw a Cactus
Learn how to draw a cactus in this step-by-step tutorial. Capture the beauty of these desert plants on paper with clear and concise instructions.
Materials You'll Need
- Pencil
- Paper
- Eraser
Cacti are some of the most fascinating and resilient plants in the world, thriving in arid deserts and known for their unique shapes and striking silhouettes. With their spiky exteriors, lush green bodies, and occasional bursts of colorful flowers, cacti have become a popular subject in both art and design. Whether you're drawn to their symbolic meaning of endurance and adaptability, or you simply love their quirky appearance, learning how to draw a cactus can bring a touch of the wild desert landscape right into your sketchbook.
Drawing a cactus offers more than just practice in basic shapes—it's an excellent way to experiment with textures, patterns, and shading techniques. From the classic tall saguaro with its outstretched arms to the small, round prickly pear, cacti come in a variety of forms that make them ideal for artists of all levels. Beginners can enjoy the simplicity of basic cactus structures, while more experienced artists might challenge themselves with intricate details like spines, shadows, or even the subtle gradients of cactus flowers. If you're looking for a fun project that lets you play with organic forms and create lively, characterful art, this subject is a perfect choice.
In this step-by-step tutorial, you'll learn exactly how to draw a cactus, even if you're just starting out or haven't picked up a pencil in a while. We'll go over the essential materials you need, break down the process into easy-to-follow steps, and offer tips on how to add personality to your drawing—whether you want a realistic or a more whimsical cactus. Along the way, you'll practice observation, line work, and adding dimension through shading and texture, all valuable skills for any artist.
So, gather your favorite drawing supplies and get ready to bring a little bit of the desert to life on your page! Remember, every artist develops their style with practice, and the best way to improve is to have fun and experiment. Whether you're drawing for relaxation, to decorate your notes, or to build foundational skills, you're sure to enjoy this creative journey. Let's dive in and discover just how fun and rewarding drawing a cactus can be!
Materials Required:
- Paper (preferably drawing paper)
- Pencil
- Eraser
- Fine-tip marker or black pen
- Colored pencils or markers (optional)
Step 1: Basic Cactus Shape
Start by drawing a vertical line that will serve as the main stem of your cactus. This line can be as tall or as short as you'd like your cactus to be. Next, draw a horizontal line towards the top of the vertical line, creating a curved shape like an upside-down "U". This will be the top of your cactus.
Step 2: Side Branches
To give your cactus a more organic look, add a couple of side branches. These branches should start from the main stem and curve slightly in different directions. Extend the side branches outward from the main stem, making sure they are not too close together.
Step 3: Texturing the Cactus
Now let's add some texture to your cactus. Draw small, upward-pointing V-shaped lines along the main stem and side branches. These lines represent the spines of the cactus. Make the lines irregular in length and spacing, as cactus spines are not perfectly symmetrical.
Step 4: Cactus Details
To make your cactus look more realistic, let's add some details. Draw some small ovals or circles randomly on the main stem and side branches. These represent the bumps or nodes on the cactus. Again, keep the placement irregular to mimic the natural pattern of a cactus.
Step 5: Cactus Flower (Optional)
If you'd like to add a touch of color to your drawing, you can include a cactus flower. Start by drawing a smaller, curved line near the top of the main stem, slightly above the curved shape we drew earlier. This line will form the center of the flower.
Step 6: Flower Petals
Around the center line, draw several teardrop-shaped petals radiating outwards. These petals should overlap and vary in size. You can draw as many or as few petals as you like, depending on how big and elaborate you want your flower to be.
Step 7: Adding Depth and Shadows
To give your cactus drawing more depth, add some shading and shadows. Determine the direction of your light source and shade the opposite side of the cactus and its branches accordingly. You can use cross-hatching or shading techniques to create a realistic three-dimensional effect.
Step 8: Inking Your Drawing
Once you are satisfied with your pencil sketch, you can trace over the lines with a fine-tip marker or a black pen. This will give your drawing a clean and polished look. Be careful and take your time with this step, as it is not erasable like pencil.
Step 9: Coloring (Optional)
If you prefer a colored drawing, now is the time to bring out your colored pencils or markers. Choose colors that reflect the natural hues of a cactus. Shades of green, brown, and gray work well. Apply the colors lightly at first, and gradually build up intensity as needed.
Tip: When drawing a cactus, start with light pencil lines to map out the basic shape—most cacti are made up of simple cylinders, ovals, or spheres, so focus on capturing these forms first. Once your structure is in place, use short, gentle strokes to indicate the ribbed texture that many cacti have, following the curve of the plant's surface to give it a three-dimensional feel. For the spines, switch to a fine-tipped pen or a sharpened pencil, and vary the length and direction to create a more natural, organic look—spines often radiate from small bumps or clusters called areoles. Don't forget to observe where shadows fall, especially under the arms or in the grooves, and use subtle shading to add depth and make your cactus pop off the page!
Conclusion
[Drawing a cactus is a fun and rewarding exercise that allows you to explore different shapes and textures. By following these step-by-step instructions, you can create a beautiful cactus drawing that captures the essence of these unique desert succulents](https://yonderoo.com/how-to-draw-a-succulent/). So grab your drawing supplies and let your creativity bloom!
Gallery of Cactus Drawings


Fun Facts About Cactus
- There are over 1,750 species of cacti, most of which are native to the Americas, especially Mexico and the southwestern United States.
- Cacti are succulents, meaning they store water in their thick, fleshy stems to survive long periods of drought.
- The saguaro cactus can live for more than 150 years and grow up to 40 feet tall.
- Some cacti, like the prickly pear, produce edible fruits and pads that are used in cooking.
- Cactus spines are actually modified leaves that help reduce water loss and protect the plant from herbivores.
- The smallest cactus, Blossfeldia liliputiana, can be less than an inch in diameter.
- Some cacti bloom only at night, such as the night-blooming cereus, to attract nocturnal pollinators like bats and moths.
- Cacti can photosynthesize through their stems instead of leaves, a process called CAM photosynthesis.
- The word "cactus" comes from the ancient Greek word "kaktos."
Suggestions for Scenes and Settings for Cactus Drawings
- A cluster of cacti under a blazing desert sun with dramatic shadows stretching across the sand.
- An adorable cactus with a face and arms, styled as a cartoon character waving hello.
- A nighttime desert scene where a cactus is silhouetted against a starry sky and crescent moon.
- A collection of different cactus species arranged in a decorative terrarium or on a windowsill.
- A blooming cactus with vibrant flowers and a hummingbird hovering nearby.
- A cactus wearing a sombrero and poncho, surrounded by festive decorations for a playful touch.
- A macro close-up focusing on the intricate spines and textured bumps of a single cactus pad.
- A family of cacti with varying shapes and sizes, each with its own unique personality.
- An ancient cactus standing tall among scattered desert rocks and weathered animal skulls.
- [A surreal scene where cacti grow in unexpected places, like atop a mountain or floating in the sky](https://yonderoo.com/how-to-draw-the-sky/).