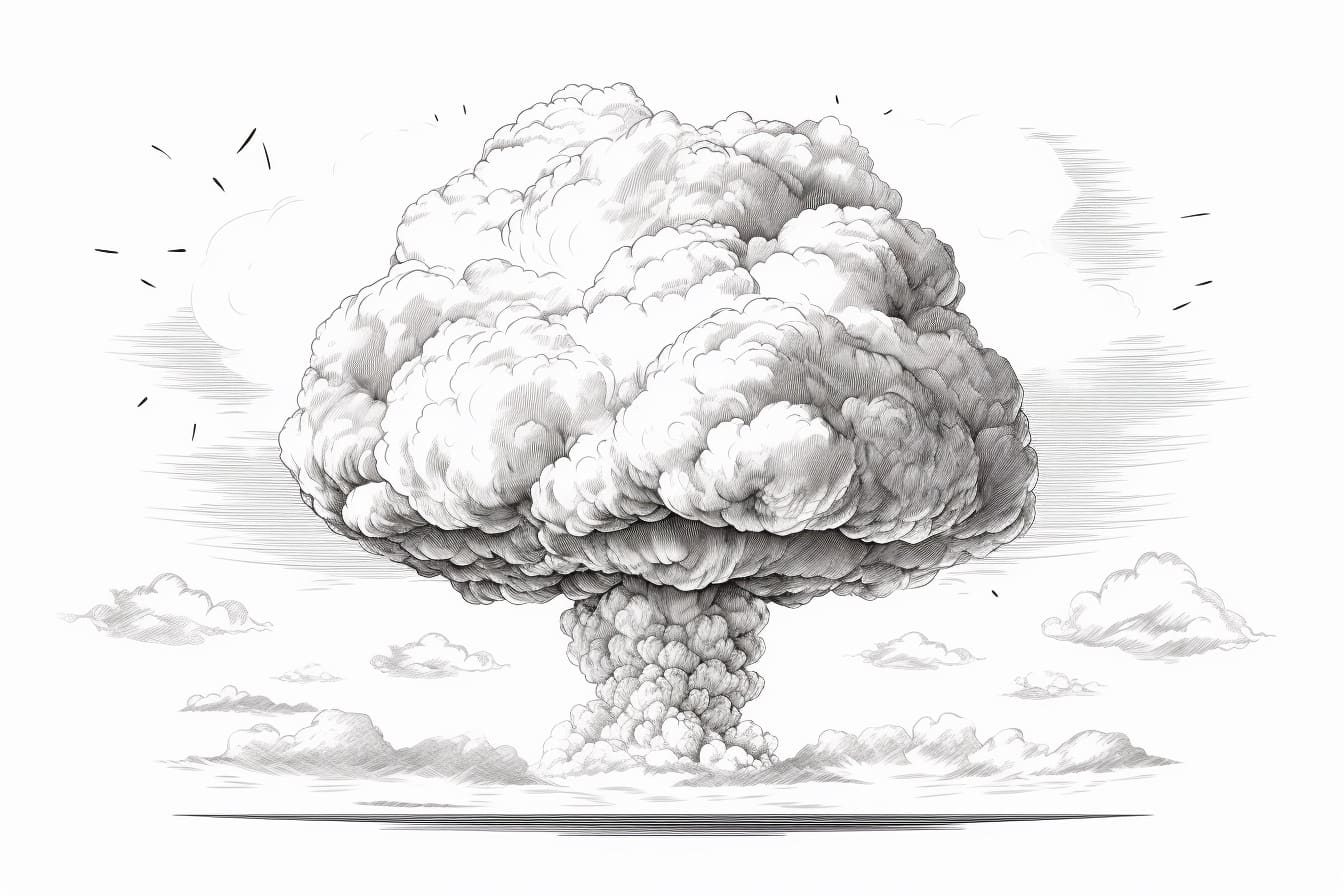
Whether you’re an artist looking to expand your drawing skills or simply interested in creating a striking visual, learning how to draw a mushroom cloud can be a fascinating and challenging endeavor. The iconic shape of a mushroom cloud is associated with explosions or atomic bombs and can convey a powerful message. In this step-by-step guide, I will walk you through the process of drawing a mushroom cloud, helping you capture its unique form and create a visually impactful image.
Materials Required
Before we begin, let’s gather the materials you’ll need to complete this drawing:
- Drawing paper or sketchbook
- Pencil
- Eraser
- Fine-tipped black pen or marker (optional)
- Coloring materials (such as colored pencils or markers) for adding depth and dimension (optional)
Now that you have your materials ready, let’s dive into the step-by-step process of drawing a mushroom cloud.
Step 1: Basic Outline
Start by lightly sketching a curved horizontal line on your paper. This line will serve as the horizon, providing a reference point for the rest of the drawing. Next, draw an elongated oval shape just above the horizon line. This oval will form the base of the mushroom cloud. Be sure to leave enough room above the oval to add the cloud’s cap later on.
Step 2: Adding Volume
To give the mushroom cloud volume and depth, start by drawing a curved line around the base oval. This line should follow the shape of the oval but with a slight curve towards the top. This will represent the outer edge of the cloud.
Next, draw another curved line inside the cloud, parallel to the first line but slightly shorter. This line should be closer to the center of the cloud.
Continue adding more curved lines in a similar fashion, gradually getting shorter and closer to the center. These lines will define the layers of the cloud and give it a three-dimensional appearance.
Step 3: Shaping the Cloud
Now, let’s shape the cloud further by adding irregular and wavy outlines. Draw a series of curved lines radiating from the center of the cloud and extending outward. These lines should be irregular and vary in length, creating a sense of movement and turbulence within the cloud.
Feel free to be creative and experiment with different patterns and shapes for the cloud. Add sharp points, twists, and additional layers to make it visually interesting.
Step 4: Detailing the Cap
The cap of the mushroom cloud is an essential part of its distinctive shape. To draw the cap, sketch a large curve extending from the top of the cloud, starting at the center and curving outward. This curve should resemble an umbrella or the top of a mushroom.
Next, add smaller, irregular curves along the edge of the cap to give it texture and dimension. These curves should be shorter and more uneven, representing the billowing smoke and debris within the cloud.
Step 5: Refining and Finalizing
Once you are satisfied with the overall shape and composition of your mushroom cloud, it’s time to refine the drawing.
Go over your pencil lines with a pen or marker to create a bold and defined outline. This step is optional but can make your drawing more impactful and visually striking.
Erase any unnecessary pencil lines, leaving only the clean and bold outlines of the cloud. Take your time and pay attention to the details to achieve a polished and professional result.
Step 6: Adding Depth and Color (Optional)
For a finished and vibrant drawing, consider adding depth and color to your mushroom cloud. Use colored pencils or markers to shade different areas of the cloud, creating highlights and shadows.
Start by adding lighter shades to the areas directly hit by light, and gradually build up darker shades as you move away from the light source. This technique will give your mushroom cloud a three-dimensional appearance and make it more visually engaging.
Experiment with different colors and shading techniques to achieve the desired effect. Remember, there are no right or wrong choices when it comes to adding color to your artwork — it’s all about personal expression and creativity.
Conclusion
Drawing a mushroom cloud can be both challenging and rewarding. By following these step-by-step instructions, you can capture the unique shape and convey the power and impact of this symbol. Remember to practice, experiment, and add your artistic touch to create a truly impressive drawing.
Now that you have learned how to draw a mushroom cloud, grab your materials and start exploring this captivating subject matter. Happy drawing!

