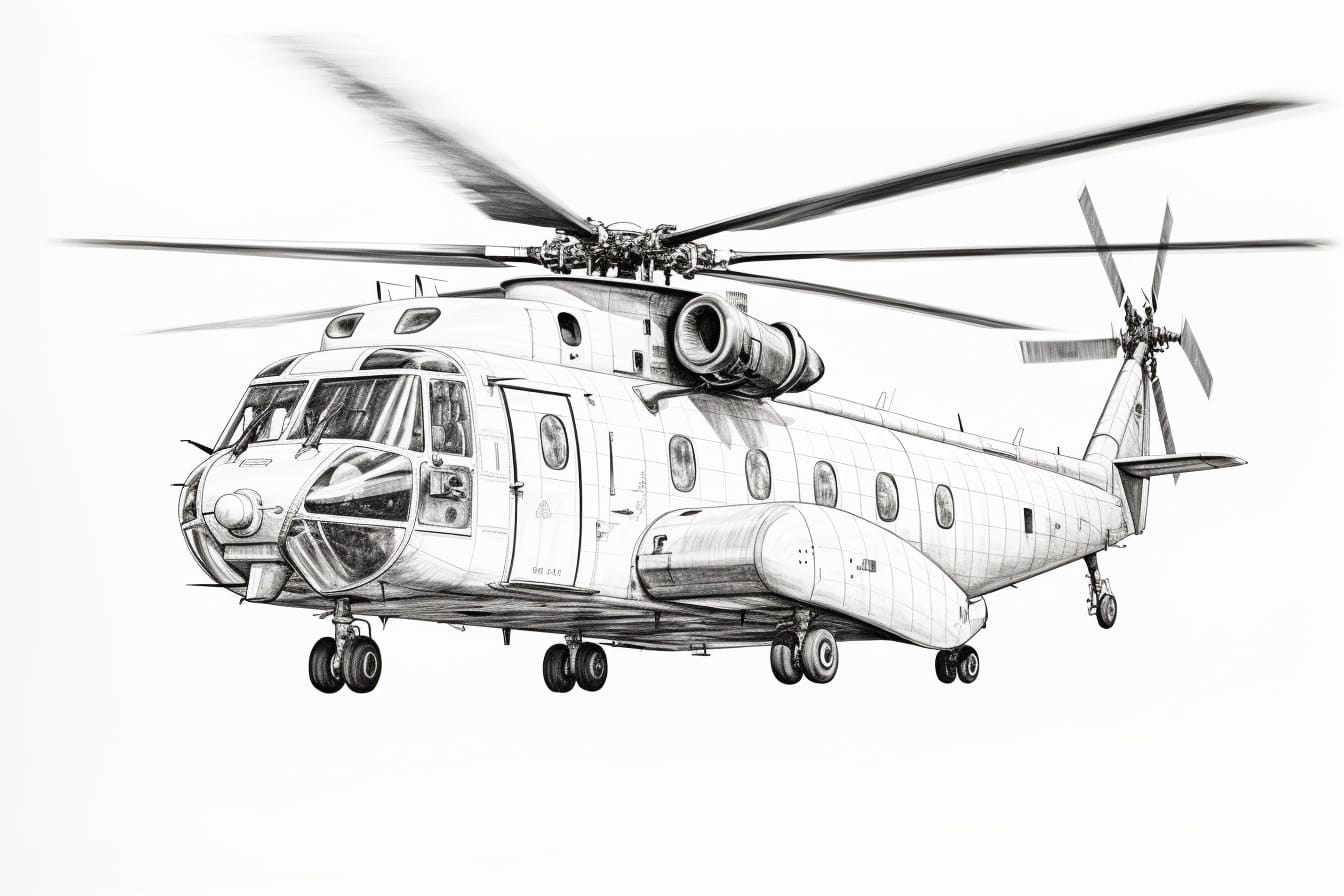
Welcome to this step-by-step guide on how to draw a military helicopter. Whether you’re an aspiring artist, a hobbyist, or just looking to improve your drawing skills, following these instructions will help you create a realistic representation of a military helicopter. So grab your art supplies and let’s get started!
Materials Required
Before we dive into the drawing process, let’s make sure you have all the necessary materials. Here’s a list of what you’ll need:
- Drawing paper or sketchbook
- Pencil (preferably an HB or 2B)
- Eraser
- Fine-tip black marker or pen
- Colored pencils or markers (optional)
Now that we have everything we need, let’s begin drawing our military helicopter!
Step 1: Start with Basic Shapes
Begin by lightly sketching the basic shapes of the helicopter. Start with a large oval shape for the main body. Then, towards the front, draw a smaller oval shape for the cockpit. Connect the two ovals with two lines, creating the helicopter’s fuselage. Finally, add two small rectangles at the bottom for the landing skids.
Step 2: Define the Body
Using the basic shapes as a guide, start adding more details to the helicopter’s body. Begin by drawing a line down the center of the main body, slightly curving it to give the helicopter a more dynamic look. Add details such as windows, panels, and rivets to the main body and the cockpit.
Step 3: Draw the Tail Boom
Next, draw the tail boom of the helicopter. Extend a line from the back of the main body, curving it upwards. At the top, draw a horizontal line to indicate the tail rotor. Add smaller details like antennas or exhaust vents to the tail boom.
Step 4: Add the Rotor System
Draw the main rotor above the main body. Start by sketching a large circle. Inside the circle, draw four evenly spaced lines extending from the center to the edge. These will be the helicopter’s rotor blades. Add smaller details like supports or hinges to the rotor system.
Step 5: Detail the Cockpit
Now it’s time to add more details to the cockpit. Sketch the windshield and side windows, giving them a slight curve to match the shape of the cockpit. Add additional panels and instruments inside the cockpit, making sure to keep them proportional to the overall size of the helicopter.
Step 6: Refine the Landing Skids
Refine the landing skids by adding more details and defining their shape. Add crossbars for support and additional structural features as needed. Make sure the landing skids are symmetrically positioned under the helicopter.
Step 7: Ink Your Drawing
Once you’re satisfied with the pencil sketch, it’s time to ink your drawing. Use a fine-tip black marker or pen to outline the final shape of the helicopter and its details. Take your time and be careful not to smudge the ink as you work. Let the ink dry completely before erasing any pencil lines.
Step 8: Color Your Drawing (Optional)
If you want to add some color to your drawing, now is the time to do so. Use colored pencils or markers to bring your military helicopter to life. Research different military helicopter color schemes for inspiration. Pay attention to the lighting and shadows to make your drawing more realistic.
Conclusion
Congratulations! You have successfully drawn a military helicopter from start to finish. By following these step-by-step instructions, you have learned how to create the basic shape, add details, and complete your drawing with ink and color. Keep practicing, experiment with different angles and perspectives, and soon you’ll be able to draw military helicopters with ease.
Remember, drawing is a skill that improves with practice, so don’t be discouraged if your first attempt doesn’t turn out as expected. Enjoy the process and have fun expressing your creativity. Happy drawing!