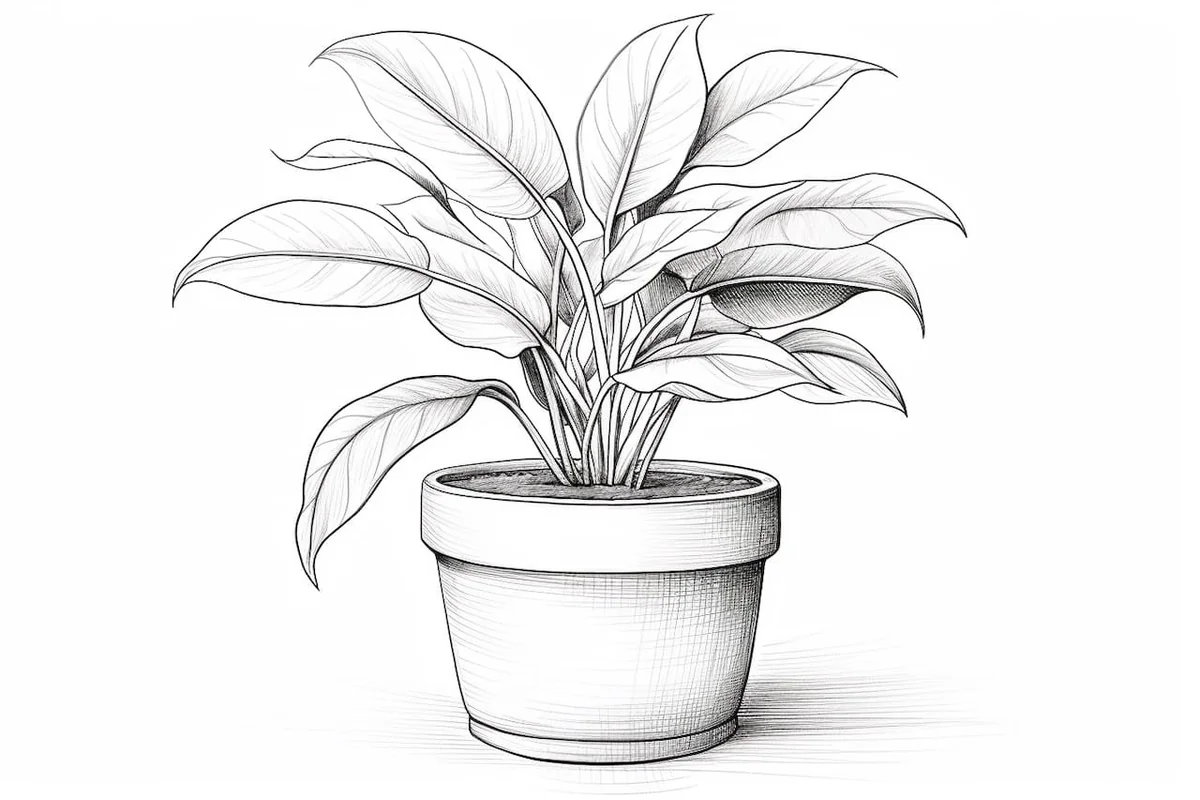
How to Draw a Plant Pot in 8 Easy Steps
Learn how to draw with this step-by-step tutorial.
Materials You'll Need
- Drawing paper
- Pencil (HB or 2B)
- Eraser
- Ruler
- Compass
- Blending stump
Welcome to this creative journey where you'll learn how to draw a plant pot that's not only realistic but also brimming with personality and charm. Plant pots are more than just containers—they're home to vibrant greenery and the foundation for countless artistic possibilities. Whether you're looking to create a sleek modern pot, a rustic terracotta piece, or a whimsical design full of character, this guide will show you how to bring your vision to life.
Whether you're picking up a pencil for the first time or have years of experience, this step-by-step tutorial will guide you through the process with ease. Together, we'll explore how to sketch the pot's structure, refine its details, and add texture and shading for a polished and dynamic finish. Grab your drawing materials, settle into a comfortable spot, and begin crafting a plant pot masterpiece that reflects your unique artistic flair!


Materials Required
Before we begin, make sure you have the following materials:
Now that you have all the necessary materials, let's dive into the step-by-step process of drawing a plant pot.
How to Draw a Plant Pot: Step-by-Step Instructions
Step 1: Establish the Base
Begin by drawing a horizontal line near the bottom of your paper. This line will serve as the foundation of your plant pot. Use a ruler for precision, ensuring that the line is straight and proportional to the size you envision for your pot. Think of this line as the solid ground your artistic creation will rest upon.
Step 2: Add Dimensional Depth to the Base
To transform this line into the base of a 3D pot, draw two diagonal lines extending upward from each end of the horizontal line. These lines should converge slightly above the original line to form a trapezoid-like shape. This step creates the illusion of depth, making your pot feel grounded and realistic.
Step 3: Build the Pot's Walls
From the ends of the trapezoid, draw two vertical lines extending upward. These lines determine the height of your pot, so adjust them to reflect a short, squat pot or a tall, elegant one. Keep these lines parallel to maintain symmetry and a polished look.
Step 4: Introduce Organic Curves
A realistic pot often has gentle curves that break away from rigid geometric shapes. Connect the tops of the vertical lines with a slightly curved line to form the rim of the pot. Below the rim, echo this curve with another line to give the pot a smooth, rounded appearance. These contours will enhance the natural and artistic feel of your drawing.
Step 5: Shape the Opening
Create the opening at the top by sketching an oval that connects the two upper ends of the pot. The oval represents the hollow mouth of the pot where plants will reside. Pay close attention to symmetry and alignment to keep your pot looking well-proportioned.
Step 6: Add Texture and Character
Make your pot come alive by incorporating texture and detail. Draw horizontal, slightly angled lines across the pot to simulate the grooves or grain found in ceramic or terracotta surfaces. Add subtle vertical lines near the edges to convey thickness and structural strength. These details will add personality to your pot, making it more visually engaging.
Step 7: Bring Depth with Shading
To elevate your drawing, add shading to give your plant pot depth and a sense of realism. Determine the light source—perhaps sunlight from the upper right—and shade the areas opposite to it. Use soft strokes for gradual shadows on one side of the pot and under the rim. Blending the shading with a blending stump or your fingertip can create a smooth, polished effect.
Step 8: Apply Final Touches
Refine your artwork by adjusting the shading, smoothing lines, and emphasizing textures. Darken the rim and base for added contrast, and ensure all lines are clean and intentional. If you want to add more detail, consider drawing cracks, chips, or decorative patterns on the pot's surface for extra charm.
Conclusion: A Pot Full of Potential
Congratulations! You've successfully drawn a plant pot that's not only realistic but brimming with character. Combining basic geometric shapes, thoughtful textures, and strategic shading brings a simple object to life on paper.
Whether your pot holds an imagined plant or is a standalone piece of art, it serves as a testament to your growing artistic skills. Remember, the key to mastering art is practice and experimentation. So, don't stop here—try sketching pots of varying shapes, sizes, and designs. Let your creativity spill over like vibrant blooms from your illustrated pots. Keep drawing and let your imagination flourish!
Tip: When drawing your plant pot, focus on the perspective to give it a three-dimensional look. Start by lightly sketching the basic shape using geometric forms—like cylinders for round pots or squares for angular designs—before adding details. Use a ruler to ensure your lines are clean, especially for the rim and base, which should be slightly wider than the body of the pot to create a realistic effect. Experiment with different shading techniques, such as hatching or stippling, to convey texture and depth; remember that light generally comes from one direction, so keep your shadows consistent. Finally, don't hesitate to add personal touches, like patterns or plants spilling out, to make your pot truly unique!
Some Common House Plants to Draw
Looking for further inspiration or reference? Here are a few common house plants in a pot that you can draw.
Gallery


