How to Draw a Halloween Cat
Learn how to draw a Halloween cat with this step-by-step tutorial. Create a spooky and adorable feline with these clear and concise instructions. Perfect for the Halloween season!
Materials You'll Need
- Pencil
- Paper
- Eraser
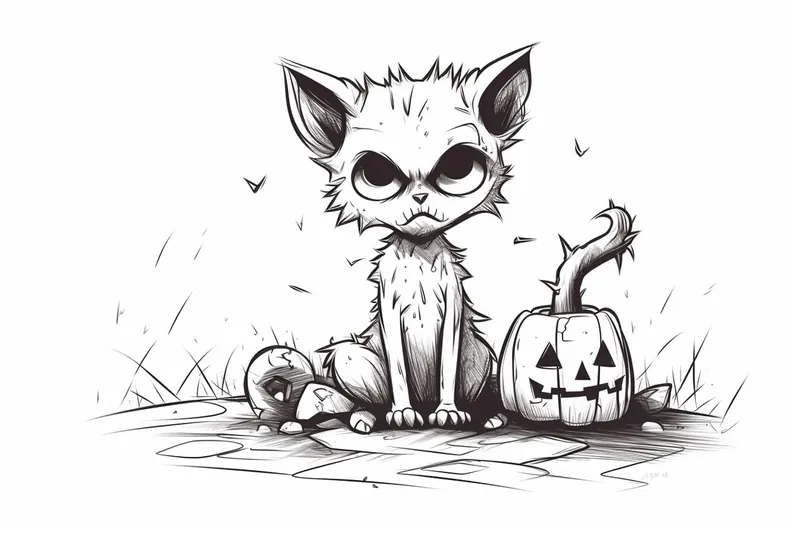
Halloween cats are iconic symbols of the spooky season, often depicted with arched backs, glowing eyes, and mysterious silhouettes perched on fences or pumpkins. These enchanting felines have long been tied to folklore and superstitions, making them a favorite subject for Halloween decorations and artwork. By learning how to draw a Halloween cat, you can capture the playful eeriness and charm that make these creatures so captivating—perfect for setting a festive mood in your sketchbook, homemade cards, or seasonal crafts.
Whether you're a beginner eager to improve your drawing skills or an experienced artist looking for fresh inspiration, this tutorial is designed to guide you through each step of the process. We'll explore basic shapes, expressive facial features, and fun Halloween elements like witch hats or pumpkins to bring your cat to life. Drawing a Halloween cat is a great way to practice techniques such as outlining, shading, and adding character to your animal drawings. Plus, it's an excellent opportunity to experiment with bold lines, dramatic poses, and creative backgrounds that highlight the mischievous spirit of Halloween.
Don't worry if you're new to drawing—this guide breaks everything down into simple, manageable steps so anyone can follow along. All you need are basic drawing materials and a bit of imagination. Remember, the most important part is to have fun and enjoy the creative process. With a little practice and patience, you'll soon have your very own Halloween cat masterpiece to share and display. Let's dive in and discover how to draw a Halloween cat that's both spooky and adorable!
Materials Required
Before we get started, make sure you have the following materials:
- Drawing paper
- Pencil
- Eraser
- Fine-tip black marker or pen
- Colored pencils or markers (optional)
Now that you have all your materials ready, let's begin drawing our Halloween cat!
Step 1: Sketching the Basic Shape
Tip: As you draw your Halloween cat, don't hesitate to let your imagination run wild by incorporating unique elements or personal touches, such as different patterns, colors, or themed accessories like witch hats or spooky backgrounds. This not only enhances your drawing but also allows you to express your creativity and make your artwork truly one-of-a-kind.
Start by drawing a large circle in the center of your paper. This will be the cat's head. Next, add two slightly curved lines coming out from the bottom of the circle to create the cat's neck. This will serve as our guide for the body proportions.
Step 2: Adding the Face Details
Now, let's focus on the cat's face. Draw two almond-shaped eyes within the circle, leaving some space between them. Add two small circles inside the eyes as highlights. Beneath the eyes, draw a small triangular nose. Then, draw a curved line to create the mouth, slightly turning it upwards to give the cat a mischievous smile.
Step 3: Ears and Whiskers
To give our Halloween cat some character, we'll add pointy ears and long whiskers. Start by drawing two triangular shapes on the top of the cat's head for the ears. Extend the lines from the top of the head, curving them slightly outward. Next, draw three long, curved lines on each side of the cat's face to represent the whiskers. Make sure to leave some space between each whisker.
Step 4: Body and Tail
Now, let's work on the cat's body. Begin by drawing a curved line that connects to the neck and extends downward to create the back. Then, draw another curved line starting from the bottom of the first line to form the belly. For the tail, draw a long, curved line extending from the back of the body. You can add some jagged edges to make it look spookier.
Step 5: Legs and Paws
To complete the body, add the cat's legs and paws. Start by drawing two sets of curved lines extending down from the bottom of the body. These will serve as the front and back legs. Following the shape of the legs, draw small circles at the ends to represent the paws. Don't forget to add some small lines within the paws to indicate the toes.
Step 6: Adding Details and Patterns
Now that we have the basic structure of our Halloween cat, let's add some details and patterns to make it more festive. You can draw some stripes or spots on the cat's body, or even add some intricate Halloween-themed designs like bats or pumpkins. Be creative and have fun with it!
Step 7: Inking the Drawing
Once you're satisfied with your pencil sketch, it's time to ink your drawing. Grab your fine-tip black marker or pen and carefully go over all the lines to make them bold and defined. Take your time and be patient to ensure clean and smooth lines. Allow the ink to dry before erasing any stray pencil marks.
Step 8: Coloring (Optional)
If you prefer, you can leave your drawing as a black and white illustration. However, if you want to add some color, grab your colored pencils or markers and start filling in the different parts of the cat. You can choose traditional Halloween colors like black, orange, and purple, or get creative with your own color scheme.
Conclusion
Congratulations! You've successfully learned how to draw a Halloween cat. By following these step-by-step instructions, you've created a spooky and adorable feline that is perfect for the Halloween season. Remember, practice makes perfect, so keep honing your drawing skills and experiment with different designs. Happy Halloween!
Fun Facts About Halloween Cat
- Black cats are a classic Halloween symbol, often associated with witches and magic in folklore.
- In the Middle Ages, people believed that black cats were witches' familiars, which contributed to their spooky reputation.
- Halloween cats are frequently depicted with arched backs and puffed tails to symbolize fear or surprise.
- In some cultures, black cats are actually considered good luck, especially in the United Kingdom and Japan.
- The association between cats and Halloween dates back to ancient Celtic festivals like Samhain.
- Halloween cat decorations often feature glowing eyes, inspired by the way real cats' eyes reflect light at night.
- Many animal shelters pause black cat adoptions around Halloween to protect them from pranks or harm.
- Cartoon Halloween cats are often shown wearing witch hats or sitting on pumpkins, blending two iconic holiday symbols—see examples at Smithsonian Magazine.
Suggestions for Scenes and Settings for Halloween Cat Drawings
- A mischievous black cat wearing a crooked witch hat, perched atop a glowing jack-o'-lantern under a full moon.
- A Halloween cat with arched back and raised fur, silhouetted against a graveyard with crooked tombstones and fog.
- A playful kitten tangled in a string of glowing pumpkin lights, surrounded by candy corn and Halloween treats.
- An elegant cat with bat wings sitting on a broomstick, flying past haunted houses and swirling ghosts.
- A curious cat peeking out from inside a bubbling cauldron, surrounded by potion bottles and spell books.
- A group of cats in Halloween costumes (vampire, mummy, pumpkin, etc.) trick-or-treating along a spooky street.
- A cat curled up on a windowsill, watching bats flutter outside while a witch's shadow passes by the moon.
- A black cat with glowing eyes hiding among autumn leaves and mushrooms in an enchanted forest at dusk.
- A magical cat with a crescent moon collar casting playful shadows on a wall filled with Halloween decorations.
- A shy cat peering out from behind a stack of carved pumpkins, startled by tiny ghostly apparitions.