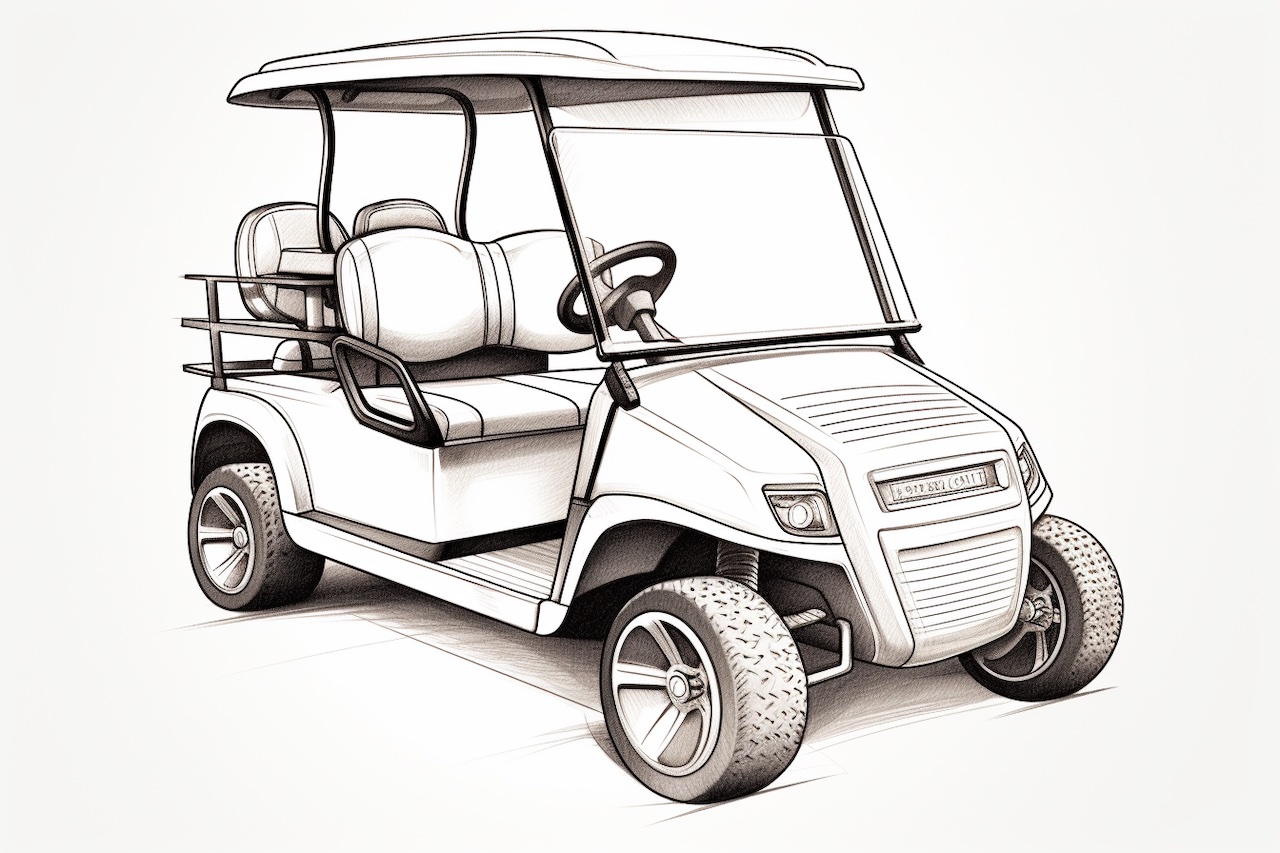
Drawing a golf cart may seem like a challenging task, but with some patience and practice, you can create a detailed and realistic illustration. Whether you’re an aspiring artist or simply want to have some fun, this step-by-step guide will walk you through the process of drawing a golf cart. So grab your pencils and let’s get started!
Materials Required
To begin drawing a golf cart, you will need the following materials:
- Drawing paper or sketchbook
- Pencils (preferably a range of hardness, such as HB, 2B, and 4B)
- Eraser
- Ruler
- Compass
- Protractor
- Colored pencils or markers (optional)
Now that you have gathered all the necessary materials, let’s dive into the step-by-step process of drawing a golf cart.
Step 1: Outline the Basic Shape
Start by lightly sketching a rectangle to represent the main body of the golf cart. This rectangle will serve as a guideline for the overall proportions and dimensions of the cart. Make sure to keep the lines faint and easily erasable, as you will be refining the shape in later steps.
Step 2: Add the Wheels
Using your compass, carefully draw two circles at the bottom of the rectangle to form the wheels of the golf cart. Ensure that these circles are evenly spaced and sized proportionally to the body of the cart. You can also use a reference image to help you achieve accuracy.
Step 3: Sketch the Roof
From the top corners of the rectangle, draw two lines curving towards each other to form the outline of the golf cart’s roof. The roof can be either flat or slightly rounded, depending on the style of the golf cart you want to draw. Experiment with different shapes until you find the one you like.
Step 4: Outline the Windshield
Next, draw a trapezoid shape above the front portion of the golf cart’s body to represent the windshield. Start by drawing the top and bottom lines parallel to each other, and then connect them with two slanted lines on either side. Remember to keep the lines light in order to make erasing easier later on.
Step 5: Define the Front and Back Sections
Using your ruler, draw two vertical lines from the top corners of the windshield to the bottom of the cart’s body. These lines will define the front and back sections of the golf cart. The front section should be slightly smaller and narrower compared to the back.
Step 6: Add the Side Panels
Sketch two rectangles on each side of the golf cart’s body, slightly slanting towards the back. These rectangles will serve as the side panels of the cart. Take into consideration the size and positioning of the wheels when drawing these shapes.
Step 7: Refine the Wheels
Using your pencil and eraser, carefully refine the shapes of the wheels. Add depth by shading the inner and outer areas of the circles. This will help create a more three-dimensional appearance. Pay attention to the light source in your drawing and add shading accordingly.
Step 8: Detail the Windshield
Add details to the windshield by drawing several horizontal lines across its surface. These lines will represent the individual glass panels. Make sure to keep the lines evenly spaced and parallel to each other. You can also draw a thin frame around the windshield for added realism.
Step 9: Enhance the Front and Back Sections
To make the golf cart look more detailed, add additional elements to the front and back sections. These can include headlights, taillights, and a bumper. Use your reference image or imagination to incorporate these features into your drawing.
Step 10: Add the Steering Wheel and Seats
In the front section of the golf cart, draw a circle to represent the steering wheel. You can add spokes to the wheel to make it more realistic. Below the steering wheel, sketch two rectangles to represent the seats of the cart. You can also add a small dashboard in front of the seats for added detail.
Step 11: Finalize the Details
Take a moment to review your drawing and make any necessary adjustments. Refine the lines and add any additional details that you feel are needed to bring your golf cart to life. Once you are satisfied with the overall appearance, you can proceed to the final step.
Step 12: Add Color (Optional)
If you prefer to add color to your drawing, now is the time to do so. Use colored pencils or markers to bring out the vibrant colors of a golf cart. Pay attention to the different materials used in the cart, such as metal and plastic, and use shading techniques to create a sense of depth and texture.
Congratulations! You have successfully drawn a golf cart from start to finish. With practice, you will be able to refine your skills and create even more detailed and realistic drawings.
Conclusion
Drawing a golf cart may seem daunting at first, but by breaking down the process into simple steps, you can achieve impressive results. Remember to take your time, practice regularly, and have fun with your artwork. Now that you have learned the fundamental steps involved in drawing a golf cart, feel free to explore different styles, perspectives, and even create your own unique designs. Happy drawing!