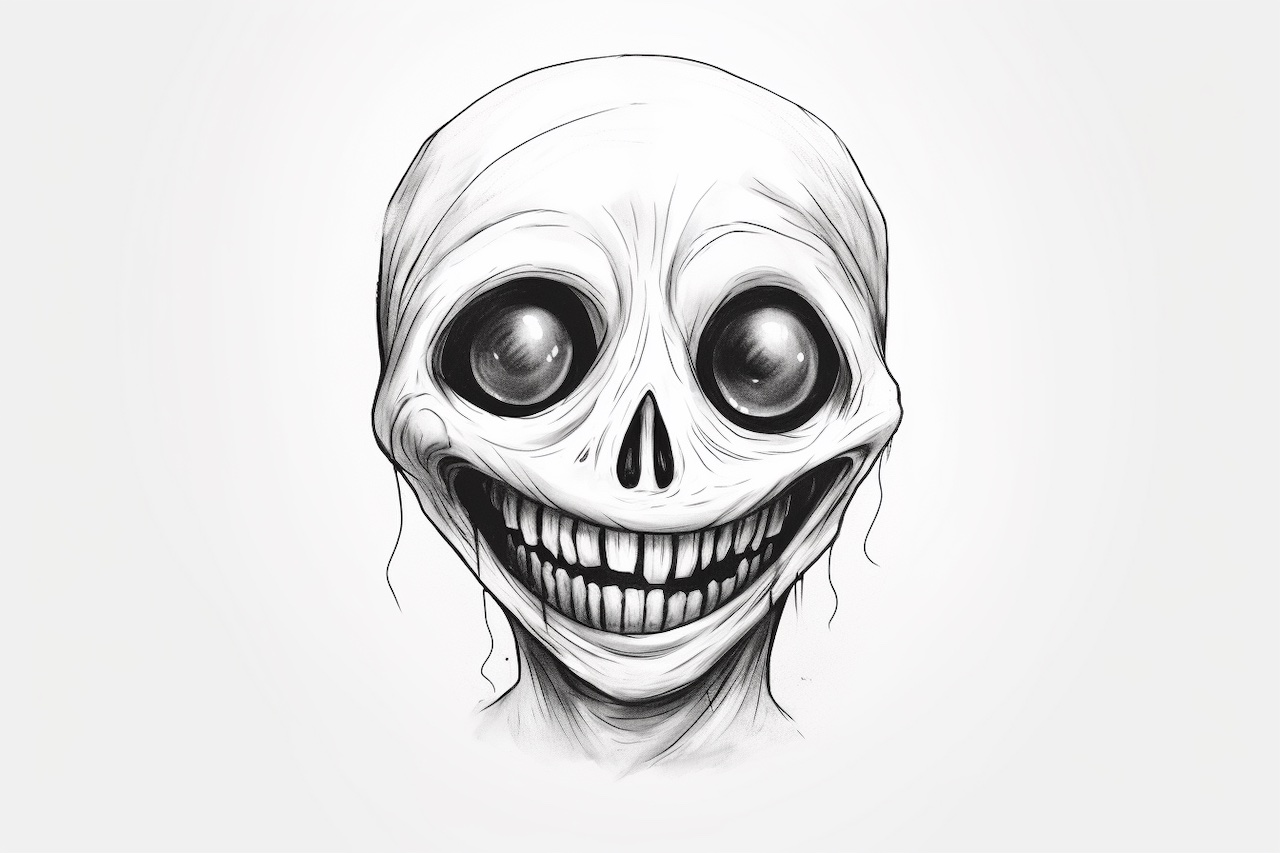
Drawing a creepy smile can add a touch of mystery and unease to your artwork. Whether you’re creating a spooky character or simply want to give your drawing an eerie vibe, mastering the art of drawing a creepy smile is a valuable skill. In this step-by-step guide, we’ll explore the techniques and tips that will help you bring a sinister smile to life on your paper.
Materials Needed
Before we dive into the process, gather the following materials to ensure a smooth drawing experience:
- Pencil: A basic pencil will be the primary tool for sketching and outlining.
- Eraser: A good quality eraser is essential for correcting mistakes and refining your smile.
- Paper: Choose a sturdy paper that can handle your drawing techniques.
- Fine-point pen: A fine-point pen can be handy for adding intricate details to your drawing.
- Markers or colored pencils (optional): If you want to add color to your creepy smile, have markers or colored pencils available.
Now that you have your materials ready, let’s begin the process of drawing a creepy smile.
Step 1: Start with a Light Sketch
Begin by lightly sketching the outline of the head or face where you want to place the creepy smile. Use light strokes to shape the basic features, focusing on the shape and size of the mouth. Remember, you can always make adjustments as you progress.
Step 2: Determine the Smile Shape
Decide on the shape of the smile you want to create. For a truly creepy effect, consider making the smile wider than usual and adding sharp, pointed ends. Play with the proportions until you find a shape that aligns with the eerie vibe you’re aiming for.
Step 3: Define the Lips
Start refining the smile by adding more definition to the lips. Begin with the upper lip, drawing a curved line that follows the shape of the smile. Ensure the upper lip is thinner and less pronounced than the lower lip, as this can contribute to the creepy appearance.
Step 4: Add the Teeth
A creepy smile is often associated with sinister teeth. Draw irregular and jagged shapes for the teeth, avoiding symmetry to maintain the unsettling vibe. Make the teeth slightly different in size and shape, enhancing the sense of unease.
Step 5: Create Shadows and Highlights
To add depth and dimension to your creepy smile, incorporate shading. Identify the main light source in your drawing and add shadows accordingly. Darken areas such as the corners of the mouth and under the teeth to create a more ominous effect. Additionally, use hatching and cross-hatching techniques to create subtle highlights.
Step 6: Refine the Details
Now is the time to refine the details of your creepy smile. Pay attention to the individual characteristics of the lips and teeth, adding texture and small imperfections. You can use a fine-point pen to define certain areas and make the drawing more precise.
Step 7: Optional – Coloring the Creepy Smile
If you want to take your drawing to the next level, consider adding color to your creepy smile. Use markers or colored pencils to add a touch of darkness and intensity. Deep shades of red, purple, or gray can enhance the eerie atmosphere.
Conclusion
Drawing a creepy smile can give your artwork a haunting allure. By following these step-by-step instructions, you can master the art of creating a sinister grin. Remember to experiment with different shapes and textures to find the perfect creepy smile for your artwork. With practice and patience, your drawings will evoke the spine-chilling atmosphere you desire.