How to Draw a Game Boy
Learn how to draw a Game Boy with this step-by-step tutorial. Capture the nostalgia of this classic gaming device in your artwork.
Materials You'll Need
- Pencil
- Paper
- Eraser
The Game Boy is a classic handheld gaming device that revolutionized portable entertainment when it was first released by Nintendo in 1989. Its simple yet memorable design, with its characteristic rectangular shape, screen, and distinct button layout, makes it an instantly recognizable icon for gamers and retro enthusiasts alike. Whether you have fond memories of playing games like Tetris and Pokémon or simply appreciate vintage tech, the Game Boy remains a beloved symbol of creativity and nostalgia in the gaming world.
Learning how to draw a Game Boy is a fantastic way to pay tribute to this legendary console while sharpening your artistic skills. This subject is perfect for beginners due to its clear geometric forms, but it also presents opportunities for more advanced artists to experiment with shading, perspective, and adding personalized details. You might want to draw a Game Boy to capture a piece of gaming history, create custom fan art, or practice rendering electronic objects with accuracy and style. Throughout this tutorial, you'll develop your observation skills and learn basic techniques like outlining, proportioning, and adding simple three-dimensional effects.
No matter your experience level, drawing a Game Boy offers a satisfying balance between straightforward shapes and the fun challenge of getting those iconic details just right. So, if you've ever wondered how to draw a game boy, you're in the right place! Grab your pencils, let your imagination run free, and get ready to bring this timeless device to life on your page. Remember, every artist starts with a single line—so have fun and don't be afraid to make it your own!
Materials Required
Before we begin, let's gather the materials you will need for this drawing:
- Drawing paper or sketchbook
- Pencil (preferably a mechanical pencil with different lead thickness options)
- Eraser
- Ruler
- Fine-tip black marker or pen (optional)
- Colored pencils or markers (optional)
Make sure you have all these materials ready, and let's dive into the drawing process!
Step 1: Basic Outline
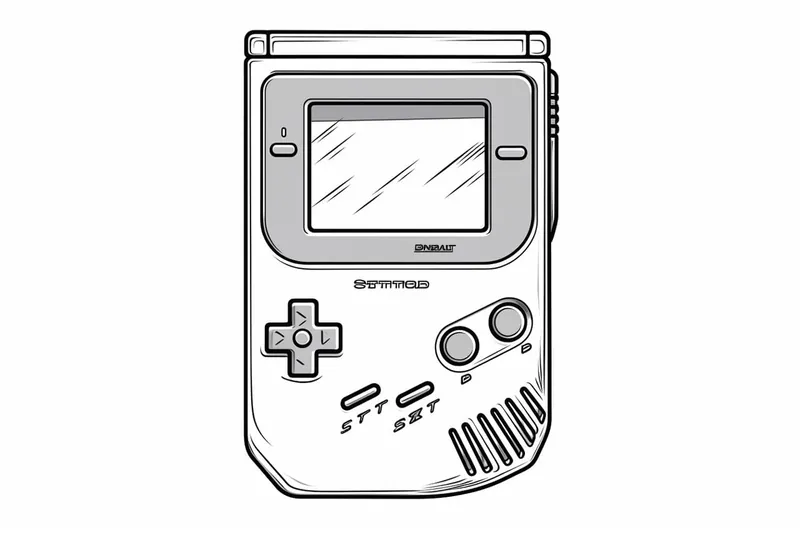
To start, let's draw the basic outline of the Game Boy. Begin by sketching a rectangular shape slightly tilted to the right. This will be the main body of the Game Boy.
Step 2: Screen and Buttons
Next, draw a smaller rectangle within the main body for the screen. Divide this rectangle into four equal parts using two vertical and two horizontal lines. These lines will guide you in placing the buttons accurately.
Now, draw a circular D-pad on the left side of the screen. Just below the D-pad, draw two small circular buttons, and on the right side of the screen, draw two small rectangular buttons. These buttons represent the A and B buttons on the Game Boy.
Step 3: Speaker and Logo
On the top left corner of the Game Boy, draw a small rectangle for the speaker. Just below the speaker, draw the iconic Nintendo logo by first drawing an elongated "N" shape, followed by a backward-facing "D" shape.
Step 4: Details and Screen Display
Let's add some details now. Draw two small rectangles on the bottom left corner of the Game Boy for the volume and contrast sliders. Then, draw a horizontal line just above the screen to represent the display border.
Now, inside the screen, draw a slightly smaller rectangle for the screen display. Divide this rectangle into several smaller squares or rectangles to create a pixelated effect. This is where you can get creative and add your own design or create a scene!
Step 5: Finishing Touches
Tip: As you work on your Game Boy drawing, remember to take breaks and step back to view your progress from a distance. This will help you better assess proportions and details, allowing you to make adjustments more effectively. Additionally, experimenting with different shading techniques can add depth and life to your drawing, so don't hesitate to try various styles until you find what best enhances your artwork!
In this final step, we will refine and finalize our Game Boy drawing. Go ahead and darken the outlines of the Game Boy using a fine-tip black marker or pen.
Erase any unnecessary pencil lines, especially those inside the screen display, as they are meant to guide you during the drawing process. Add shading and highlights to give your drawing depth and dimension. You can use colored pencils or markers to add some color to your Game Boy if you like.
Conclusion
Congratulations! You have successfully drawn a Game Boy! By following these step-by-step instructions, you are now able to recreate this iconic handheld console on paper. Remember, practice makes perfect, so don't be discouraged if your first attempt doesn't turn out exactly as you imagined. Keep practicing and exploring your artistic skills.
Drawing a Game Boy can be a fantastic way to pay homage to a classic gaming device, as well as to express your love for gaming. So grab your pencils and let your creativity flow!
Fun Facts About Game Boy
- The original Game Boy was released by Nintendo in 1989 and quickly became a global sensation.
- Game Boy is one of the best-selling handheld gaming consoles of all time, with over 118 million units sold worldwide.
- The first game bundled with the Game Boy was the iconic puzzle game Tetris, which helped drive its popularity.
- The Game Boy's display is a monochrome LCD screen, showing graphics in four shades of gray, as detailed by Nintendo.
- Powered by just four AA batteries, the original Game Boy could run for up to 30 hours on a single set.
- The Game Boy introduced the Link Cable, allowing players to connect two devices for multiplayer gaming.
- Pokémon Red and Blue, released for the Game Boy, sparked a worldwide Pokémon craze and became some of the best-selling games for the system.
- The Game Boy was designed by Gunpei Yokoi, a legendary Nintendo engineer also known for creating the Game & Watch series.
- Despite its simple hardware, the Game Boy survived a Gulf War bombing and still worked, earning a spot in the Nintendo archives.
Suggestions for Scenes and Settings for Game Boy Drawings
- Draw a Game Boy resting on a cluttered desk surrounded by classic game cartridges, pencils, and a nostalgic childhood photo.
- Illustrate a Game Boy with its screen displaying a pixelated scene from your favorite retro game, like Tetris blocks falling or a Pokémon battle.
- Design a Game Boy being held in a pair of hands, with sunlight streaming in from a nearby window, creating soft shadows and highlights.
- Sketch a "Game Boy in Space" scene, with the device floating among stars, planets, and retro pixel art aliens on the screen.
- Imagine the Game Boy as part of a time capsule, surrounded by other 90s memorabilia like cassette tapes, Tamagotchis, and comic books.
- Draw a close-up of the Game Boy from an angled perspective, focusing on the buttons and textured surface, with detailed shading and reflections.
- Show the Game Boy on a park bench with headphones plugged in and a backdrop of trees and playground equipment, capturing an outdoor gaming moment.
- Create a fantasy crossover: the Game Boy's screen acts as a portal, with beloved game characters stepping out into the real world.
- Depict a transparent Game Boy, revealing the internal circuitry, batteries, and chip details for a technical and artistic twist.
- Illustrate a group of friends huddled together, each holding a Game Boy and linked by a Game Link Cable, sharing a multiplayer adventure.