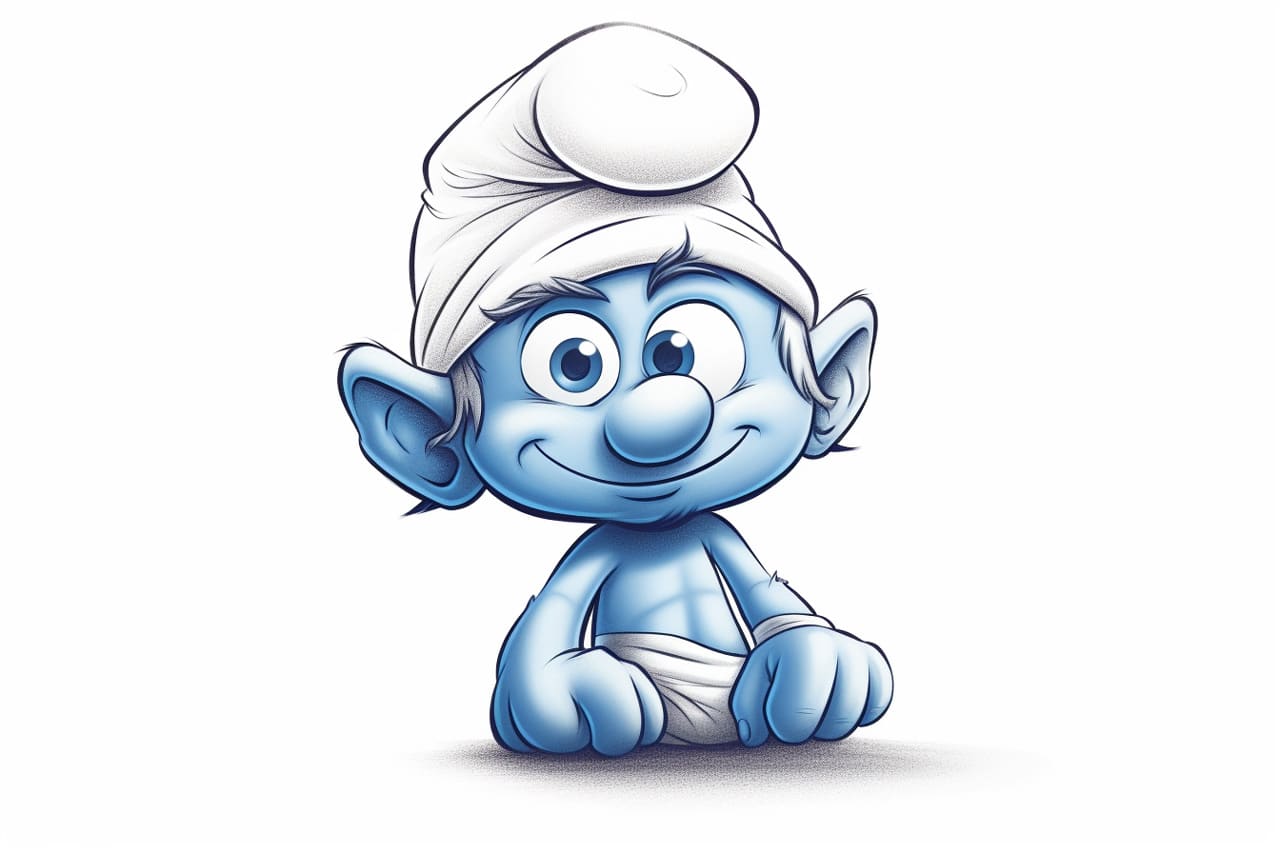
Do you love the cute and lovable characters from “The Smurfs” cartoon series? Why not try your hand at drawing your very own Smurf! In this step-by-step tutorial, we will guide you through the process of drawing a Smurf from scratch. Whether you are a beginner or an experienced artist, with a little practice, you will be able to create your very own Smurf masterpiece. So grab your art supplies and let’s get started!
Materials Required:
- Pencil
- Eraser
- Paper
- Colored pencils or markers (optional)
Step 1: Start with a Basic Framework
To begin, lightly sketch a basic framework for your Smurf. Start by drawing a circle for the head and a slightly elongated oval shape below it for the body. Next, add two lines to indicate the placement of the facial features. Finally, sketch a rectangle shape for the legs and two semi-circles for the arms.
Step 2: Define the Face
Using the guidelines you drew in the previous step, start defining the face of your Smurf. Add two large oval shapes for the eyes, leaving a small space between them. Inside each eye, draw a smaller circle for the pupil. Next, add a curved line for the smile, and a small curved line above it for the nose.
Step 3: Add the Hat
Now it’s time to give your Smurf its iconic hat. Draw a curved line above the head, following the shape of the head. Extend it on both sides to create the brim of the hat. Next, add a small rectangular shape on top of the hat and draw a tiny pompom at the tip.
Step 4: Complete the Facial Details
In this step, focus on adding more details to the face of your Smurf. Add curved lines above the eyes to indicate the eyebrows. Then, draw two small circles for the cheeks and a curved line below the nose for the mouth. Don’t forget to add a tiny dot in each eye for a touch of realism.
Step 5: Draw the Arms and Hands
Now, let’s move on to drawing the arms and hands of your Smurf. Starting from the shoulder area, sketch the shape of the arms using curved lines. For the hands, draw three small circles at the end of each arm to represent the fingers. Smurfs are known for having stubby fingers, so keep them short and simple.
Step 6: Outline the Body
To give your Smurf a more defined shape, outline the body using smooth curved lines. Start from the neck area and gradually draw downwards, following the oval shape you sketched earlier. Then, connect the body to the legs by drawing two curved lines on each side.
Step 7: Add the Legs and Feet
Now it’s time to draw the legs and feet of your Smurf. Start by extending the curved lines from the body to create the legs. For the feet, draw two rectangular shapes at the bottom of each leg. Then, add small curved lines at the bottom of the rectangles to represent the shoes.
Step 8: Refine the Details
In this step, take a closer look at your drawing and refine the details. Soften any harsh lines and add more definition where needed. Pay attention to the facial features and make any necessary adjustments to ensure that your Smurf looks just right.
Step 9: Erase the Guidelines
Now that you have completed the basic structure and details of your Smurf, it’s time to clean up your drawing. Carefully erase any visible guidelines and unnecessary pencil marks, leaving behind only the clean and refined lines of your Smurf.
Step 10: Add Some Color (optional)
If you prefer, you can add color to your Smurf using colored pencils or markers. Smurfs are typically depicted as blue with white trousers and a red hat, but feel free to get creative and add your own personal touch. Experiment with different shades and textures to bring your Smurf to life.
Conclusion
Congratulations, you have successfully learned how to draw a Smurf! With a little practice and patience, you can create your own unique Smurf characters in no time. Remember, drawing is all about expressing your creativity, so don’t be afraid to experiment and make your Smurfs your own. Happy drawing!
#