Drawing animals can be a fun and rewarding experience, and cats are a popular subject for many artists. In this article, we will guide you through the process of how to draw a cat sitting down, step by step. Whether you are a beginner or an experienced artist looking to improve your skills, this tutorial will provide you with the knowledge and techniques you need to create a realistic and captivating drawing of a cat in a seated position.
Materials Required
Before we get started, make sure you have the following materials on hand:
- Pencil: Use a regular graphite pencil with a medium hardness, such as an HB or 2B, for sketching and outlining.
- Eraser: Have a good quality eraser, like a kneaded eraser, to remove any mistakes or unwanted lines.
- Paper: Choose a smooth drawing paper that can handle pencil marks without smudging or tearing.
- Reference Image: Find a clear reference photo of a cat sitting down to use as a guide. You can search for images online or use a picture from a book or magazine.
Now that you have gathered all the necessary materials, let’s dive into the step-by-step process of drawing a cat sitting down.
Step 1: Basic Shapes
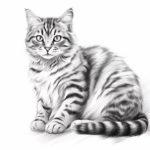
Begin by lightly sketching the basic shapes that make up the cat’s body. Start with an oval shape for the head, a larger oval for the body, and a smaller oval for the rear end. Connect these shapes with curved lines to form the cat’s back and neck.
Step 2: Legs and Tail
Next, add the legs and tail. Cats have four legs, so draw two pairs of curved lines extending from the body towards the ground. For the tail, lightly sketch a long, curved line extending from the rear end. Remember that the cat is sitting down, so the legs will appear shorter and the tail will curve in a relaxed position.
Step 3: Head and Facial Features
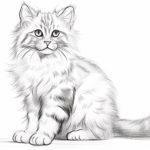
Refine the shape of the cat’s head by adding details such as the ears, eyes, nose, and mouth. Cats have pointy ears, almond-shaped eyes, and a small triangular nose. Pay attention to the proportions and position of these features to capture the cat’s likeness. Use your reference image as a guide to accurately depict the facial expressions and characteristics.
Step 4: Body and Fur Details
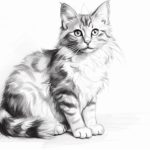
Add more details to the body, such as the chest, paws, and fur. Cats have a furry chest area, so lightly sketch some short lines to represent the fur texture. Make sure to indicate the position of the paws and their individual toes. Remember that the cat is sitting, so the paws will be resting on the ground or on a surface.
Step 5: Refine the Outline
Go over your initial sketch and refine the outline of the cat’s body and features. Use darker and more defined lines to create a clean and polished look. Pay attention to the curves and angles of the cat’s body to ensure accuracy and realism.
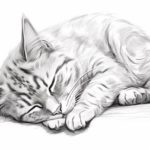
Step 6: Shading and Details
Now it’s time to add depth and dimension to your drawing. Start by shading the darkest areas, such as the shadows under the body and paws. Gradually build up the shading by using varying pressure on your pencil to create different tones. Pay close attention to the direction of the fur and use short,