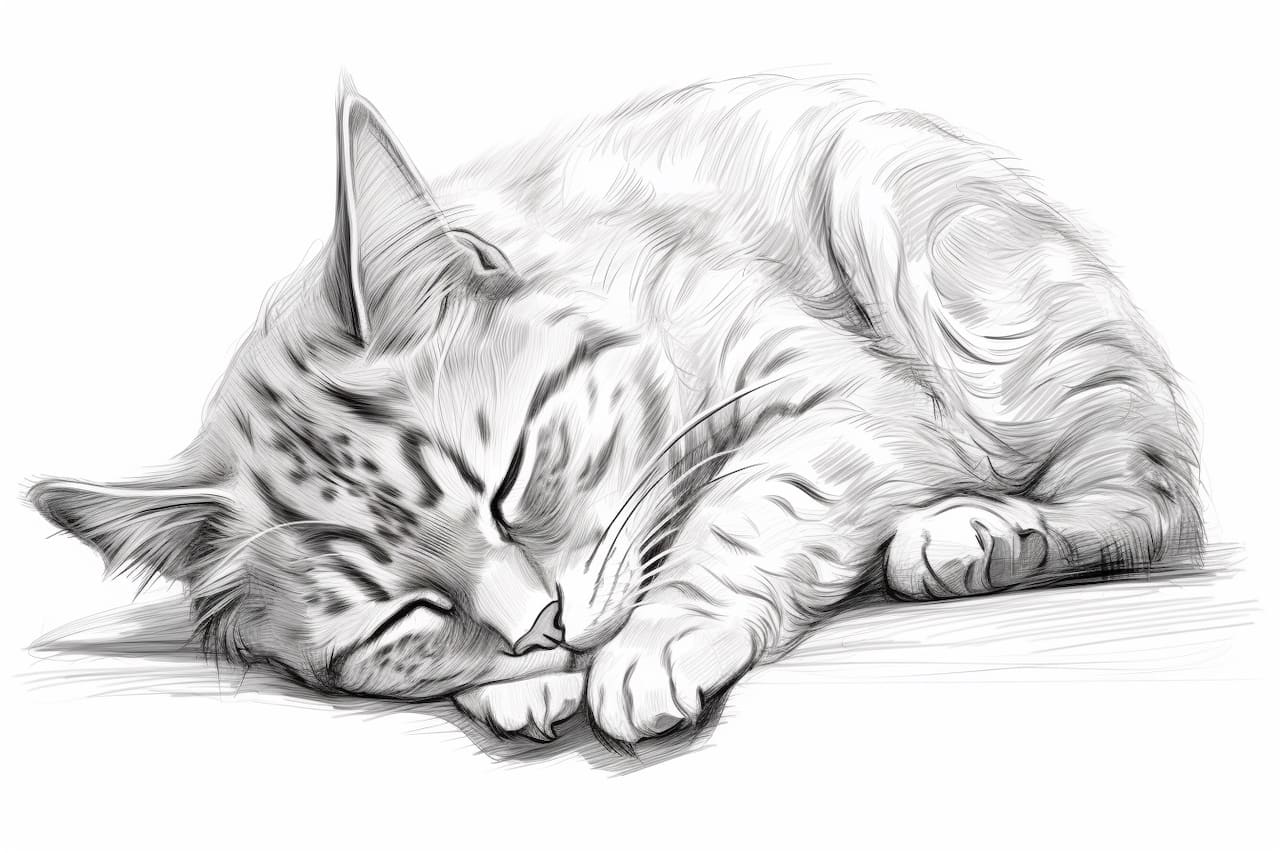
Welcome to this step-by-step guide on how to draw a sleeping cat. Whether you are a beginner or an experienced artist, this tutorial will help you create a realistic and adorable representation of a cat in a peaceful slumber. By following these simple instructions, you will be able to capture the essence of a cat’s relaxed and content state. So, let’s grab our pencils and get started!
Materials Required
Before we begin, it’s essential to gather the necessary materials for this drawing. Here’s what you’ll need:
- Drawing paper
- Pencils (HB or 2B for sketching, lighter pencils such as 2H or 4H for shading)
- Eraser
- Pencil sharpener
- Blending stump or cotton swab (optional, for blending)
Now that we have everything ready let’s dive into the steps of drawing a sleeping cat.
Step 1: Sketch the Basic Shapes
Start by lightly sketching the basic shapes that will form the cat’s body. Begin with a large oval shape for the body and a smaller circle for the head. Position the head slightly tilted to one side, as if the cat is resting. Add a small oval shape for the snout and two triangular ears on top of the head. Don’t worry about the details just yet; focus on getting the proportions and shapes right.
Step 2: Refine the Outline
Using the basic shapes as a guide, refine the outline of the cat’s body. Add gentle curves to define the contours of the body, head, and snout. Pay attention to the placement and angle of the ears, ensuring they align with the head. Use light and confident strokes to create an outline that captures the cat’s sleeping pose.
Step 3: Add Facial Features
Now that the overall outline is complete, it’s time to add the cat’s facial features. Start with the eyes by drawing two almond-shaped circles, slightly angled and partially closed to depict a relaxed state. Add the pupil in the form of a small circle near the top of each eye. Next, draw a small triangular nose at the center of the snout and a curved line for the mouth. Keep the features soft and gentle to convey the cat’s tranquility.
Step 4: Detail the Ears and Whiskers
Give the ears more definition by adding curved lines to represent the inner structure. Draw some fine lines extending from the sides of the snout to depict the cat’s whiskers. Feel free to add more or fewer whiskers, depending on the level of detail you desire. Remember to keep the lines light and delicate to maintain the overall softness of the drawing.
Step 5: Develop the Fur Texture
To create a realistic representation of a sleeping cat, we must capture the texture of its fur. Start by adding short and curved strokes around the head, body, and ears, following the contours of the cat’s form. Gradually build up the density of the strokes as you move outward from the focal point, which is usually the head. Use lighter pencils such as 2H or 4H, applying gentle pressure to achieve a soft and subtle effect.
Step 6: Shade the Eyes and Nose
To bring life to the cat’s face, we need to add shading. Darken the areas around the eyes using a softer pencil like 2B, creating a contrast with the highlighted fur. Shade the nose with light strokes, leaving a small highlight near the tip to suggest a glossy surface. Remember, the key to realistic shading is to observe the light source and replicate the shadows accordingly.
Step 7: Refine the Details
Now it’s time to refine the details and add more depth to the drawing. Pay attention to the subtle variations in the cat’s fur color and texture. Use a combination of short and long strokes to create a sense of depth and movement. Pay particular attention to the contours of the body and the transitions between light and shadow. Take your time during this step, as it is crucial in achieving a realistic portrayal of a sleeping cat.
Step 8: Finalize the Drawing
Once you are satisfied with the overall appearance of the drawing, it’s time to finalize it. Go over the outline with a darker pencil to make it more prominent. Gradually erase any visible sketch lines, ensuring that you only retain the essential details. If desired, you can use a blending stump or a cotton swab to gently blend the shading and achieve a smoother look. Step back and observe your work to make any necessary adjustments or refinements.
Conclusion
Congratulations on completing your drawing of a sleeping cat! By following these step-by-step instructions, you have learned how to capture the tranquil and adorable nature of a cat in repose. Remember to practice regularly to improve your skills and experiment with different poses and expressions. With time and dedication, you will continue to develop your artistic abilities. Enjoy the process of bringing these furry companions to life on paper!