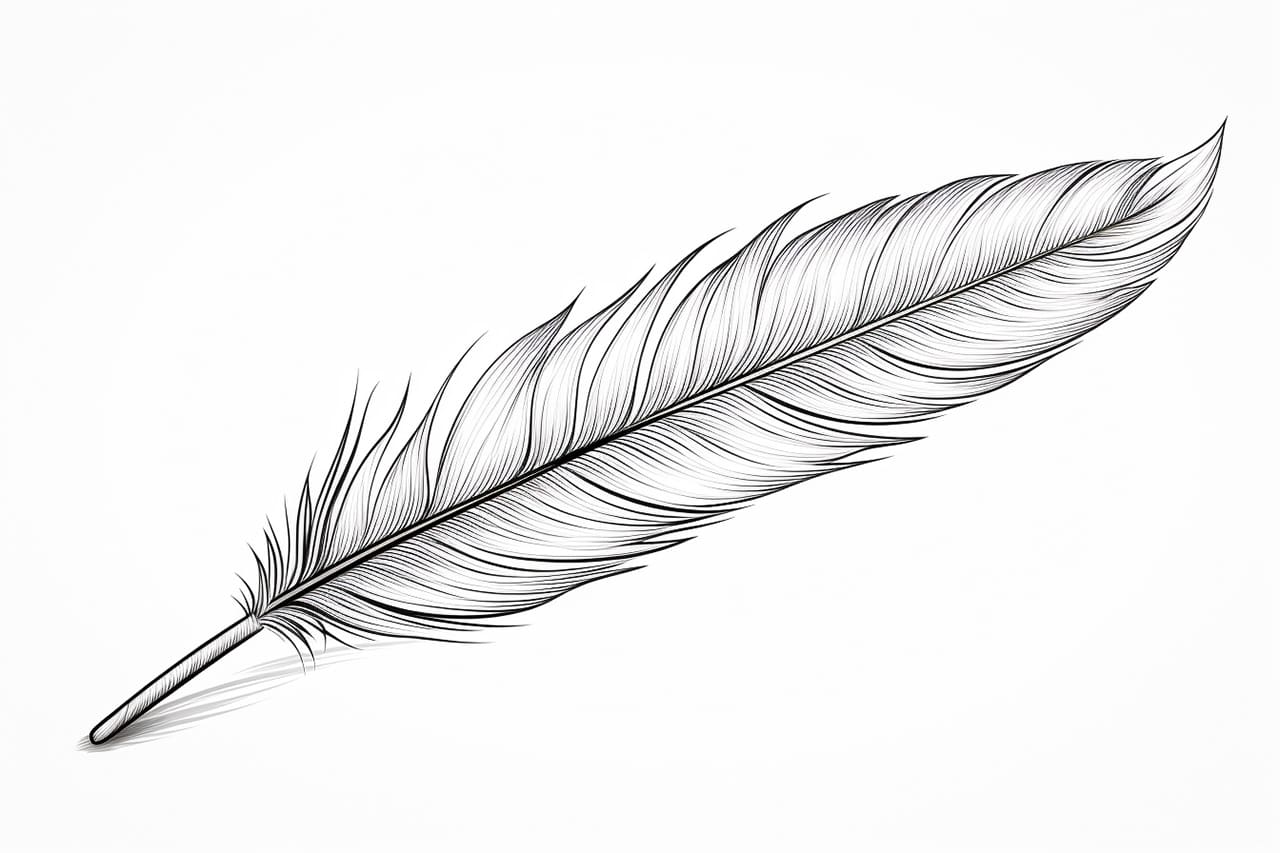
Feathers are beautiful and intricate objects found in nature, and they can also be a delightful subject for artists to draw. Whether you are a beginner or an experienced artist, this step-by-step guide will walk you through the process of drawing a feather. By following these instructions and using your creativity, you will be able to create a stunning and realistic representation of a feather.
Materials Required
Before we begin, gather the following materials:
- A pencil
- Eraser
- Drawing paper
- Fine-tip pens or markers (optional)
- Colored pencils or watercolor paints (optional)
Now that you have everything you need, let’s dive into the artistic process of drawing a feather.
Step 1: Outline the Shape of the Feather
Start by lightly sketching the basic shape of the feather using your pencil. Feathers come in various shapes, so you can choose to draw a long, slender feather or a more rounded one. It’s helpful to observe reference images or real feathers as you outline your drawing.
Step 2: Add the Shaft
Inside the outline, draw a straight line that represents the central shaft of the feather. This line will serve as your guide as you add the feathery details in the following steps.
Step 3: Draw the Barbs
On each side of the central shaft, draw curved lines that extend outward. These lines should be evenly spaced and gradually taper as they move away from the central shaft. The barbs on a feather create its distinctive shape and texture.
Step 4: Define the Barbs with Barbles
Within each barb, draw small, curved lines called barbules. These lines should extend from one side of the barb to the other. Keep the barbules relatively evenly spaced, but don’t worry about making them perfectly uniform. This variation will add a touch of realism to your drawing.
Step 5: Detail the Barbs
To give your feather drawing more depth and texture, add smaller barbs along the edges of the main barbs. These secondary barbs add complexity and intricacy to the feather’s overall appearance. Be mindful of the direction and angle of the barbs as you draw them.
Step 6: Shade and Add Shadows
Now that you have drawn the basic structure of the feather, it’s time to add shading and dimension. Observe the light source in your reference image or imagine a light source in your mind. Shade one side of the feather to create a sense of depth and form. Use your pencil to add light, even strokes to build up the shading gradually.
Step 7: Refine and Add Details
Take a step back and evaluate your feather drawing. Look for any areas that need refinement or additional details. Pay attention to the intricate patterns and textures found within the feather. You can use a fine-tip pen or marker to outline and define certain areas, if preferred. Don’t be afraid to experiment and let your creativity shine.
Step 8: Optional Coloring
If you want to add color to your feather drawing, you can use colored pencils or watercolor paints. Study your reference image or imagine the colors found in the feathers you are drawing. Carefully layer the colors, starting with lighter shades and gradually adding darker tones to create a realistic effect.
Conclusion
Drawing a feather may seem challenging at first, but with practice and attention to detail, you can create a visually stunning artwork. By following the step-by-step instructions in this guide, you will be able to capture the delicate beauty of a feather on paper. Remember to be patient with yourself and allow your creativity to guide you. Enjoy the process as you bring the intricacies of nature to life through your art.

