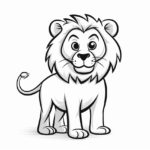
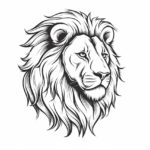
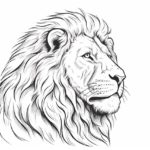
Welcome to this step-by-step guide on how to draw a face of a lion. As an expert artist and drawing instructor, I will walk you through the process of creating a detailed and realistic lion face drawing. Lions are majestic creatures known for their strength and beauty, and capturing their essence on paper can be an exciting artistic challenge. With a few simple materials and a bit of patience, you’ll be able to create a stunning lion face drawing that showcases your artistic skills.
Materials Required
Before we begin, let’s gather the materials you’ll need for this drawing:
- Pencil: Start with a medium-soft graphite pencil. A 2B or 4B pencil would work well.
- Paper: Choose a smooth drawing paper that can handle shading and blending.
- Eraser: Have a kneaded eraser or a soft vinyl eraser handy for corrections.
- Blending Tools: You can use a blending stump, a tortillon, or even a cotton swab to create smooth transitions and shading.
- Reference Image: Find a clear and detailed reference image of a lion face to help you with proportions and details.
Now that you have your materials ready, let’s dive into the step-by-step process of drawing a lion face.
Step 1: Basic Shapes
Start by lightly sketching the basic shapes of the lion’s head. Begin with a large oval shape, slightly tilted to one side. This oval shape will represent the main structure of the lion’s face. Then, within the oval, draw a smaller circle for the lion’s snout. Add two straight lines to mark the centerline of the face and another horizontal line to indicate the position of the eyes.
Step 2: Eyes and Nose
Using the guidelines from the previous step, draw the eyes and the nose of the lion. Pay attention to the placement and proportion of these features. Lions have distinct almond-shaped eyes, so try to capture that shape accurately. Add details such as the iris and the eyelids. For the nose, draw a triangular shape at the bottom of the snout and add nostrils for a realistic touch.
Step 3: Mouth and Ears
Next, sketch the lion’s mouth and ears. Begin by drawing a curved line below the nose to outline the mouth. Then, add the upper and lower lips, keeping in mind the contours of a lion’s face. Moving on to the ears, draw two pointy shapes on either side of the head, slightly above the eyes. Lions have tufts of hair at the top of their ears, so make sure to include those details.
Step 4: Mane
One of the most distinctive features of a lion is its magnificent mane. Start by lightly sketching the general shape of the mane around the lion’s face. Lions have thick and flowing manes, so use curved lines to represent the hair. Pay attention to the direction and flow of the mane. Once you’re satisfied with the overall shape, add more details by drawing individual strands of hair to create a realistic texture.
Step 5: Facial Details
To bring your lion drawing to life, focus on the finer details of the face. Carefully observe your reference image to accurately depict the lion’s muzzle, whiskers, and fur patterns. Pay attention to the shape of the eyes and add eyelashes for a more realistic look. Use short, curved lines to indicate the texture and patterns of the fur, especially around the face and mane.
Step 6: Shading and Texturing
Now that the main features of the lion face are complete, it’s time to add shading and texture to give depth and dimension to your drawing. Start by identifying the light source in your reference image. This will help you determine where the highlights and shadows fall on the lion’s face. Use your pencil to create light and dark areas, gradually building up values to achieve a realistic appearance. Remember to blend the shading using your blending tool for smooth transitions.
Step 7: Final Touches
Take a step back and evaluate your drawing as a whole. Make any necessary adjustments and refine the details. Erase any remaining guidelines and stray marks that are no longer needed. Add any additional details, such as whiskers or facial expressions, to enhance the overall look of your lion face drawing. Take your time with this step to ensure a polished and finished piece of art.
Conclusion
Congratulations! You have successfully learned how to draw a face of a lion. By following these step-by-step instructions and utilizing your artistic skills, you have created a stunning lion face drawing. Remember to practice regularly and experiment with different techniques to further improve your abilities as an artist. Drawing animals can be a rewarding endeavor, and the lion’s majestic features make it an excellent subject to explore. So, grab your pencils and unleash your creativity!

