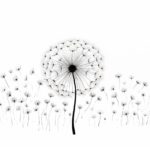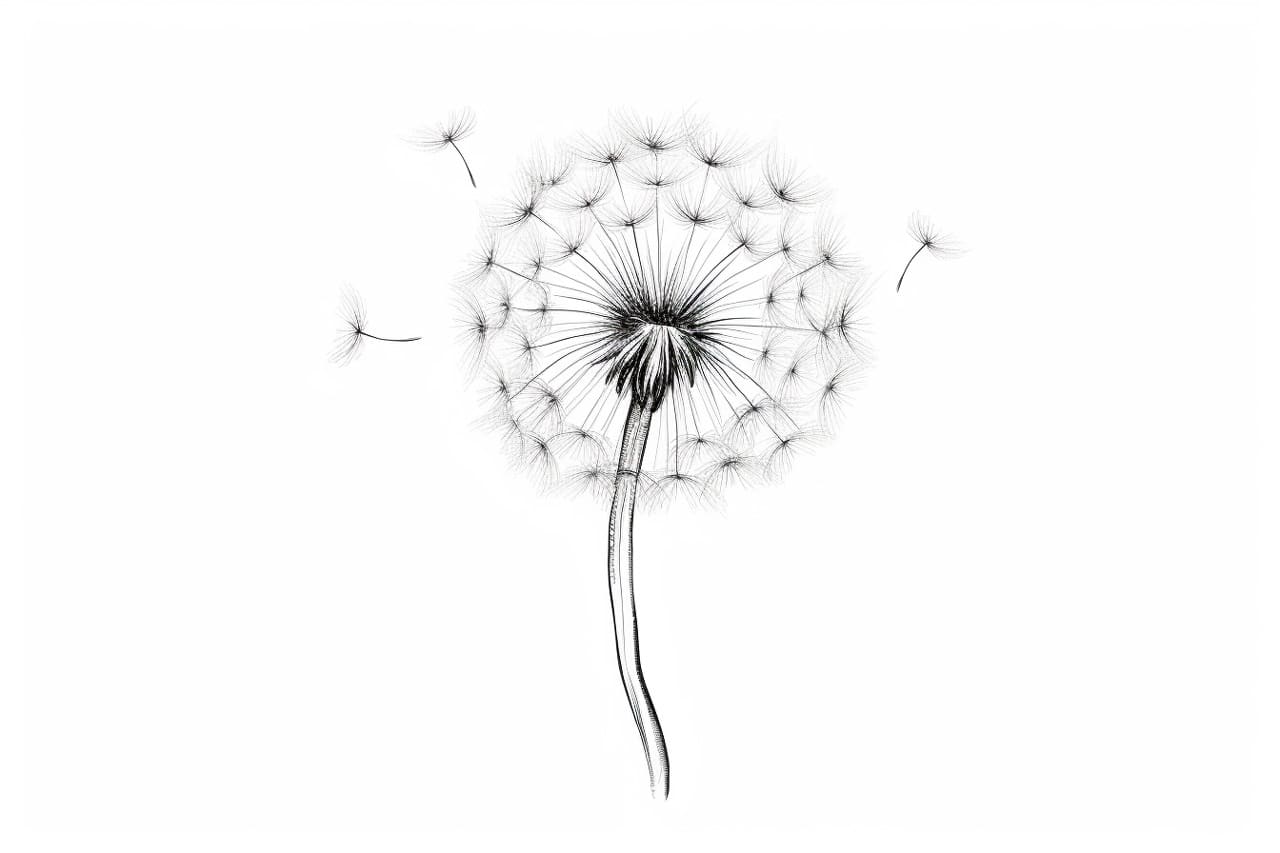
Dandelions are delicate and beautiful flowers that can be found in many fields and gardens. One of the most fascinating parts of a dandelion is its puff, which scatters its seeds when blown. In this tutorial, you will learn how to draw a dandelion puff step by step. Let’s get started!
Materials Required:
To begin drawing a dandelion puff, you will need the following materials:
- Paper (preferably drawing paper)
- Pencil
- Eraser
- Fine-tip black pen or marker
- Colored pencils or markers (optional)
Now that you have gathered your materials, let’s move on to the step-by-step instructions.
Step 1:
Start by drawing a small circle in the center of your paper. This will be the base of your dandelion puff.
Step 2:
Extend several slightly curved lines from the sides of the circle, creating a sun-like shape. These lines will represent the initial seeds of the dandelion puff.
Step 3:
Next, draw additional curved lines branching out from the initial seeds. These lines should be longer and thinner than the previous ones. Make sure to vary their lengths and directions to add a natural and fluffy appearance to the dandelion puff.
Step 4:
Continue extending more curved lines from the base, gradually increasing their length as you move away from the center of the dandelion puff. Remember to keep the lines thin and delicate to capture the essence of the puff.
Step 5:
Add more layers of curved lines to further develop the dandelion puff. Keep in mind that the lines should get fainter and lighter as you move towards the outer edges of the puff.
Step 6:
Once you have added enough layers of curved lines, use your eraser to gently remove any visible pencil marks within the dandelion puff. This will give your drawing a clean and polished look.
Step 7:
Now it’s time to outline your drawing with a fine-tip black pen or marker. Trace over the pencil lines, making them bolder and more defined. Pay attention to the natural flow of the lines and the overall shape of the puff.
Step 8:
Once the ink is dry, carefully erase any remaining pencil marks from your drawing. Be gentle to avoid smudging the ink.
Step 9 (Optional):
For an extra touch of creativity, you can use colored pencils or markers to add some vibrancy to your dandelion puff. Experiment with different colors and shading techniques to create a visually appealing artwork.
Conclusion:
Drawing a dandelion puff may seem challenging at first, but with practice and patience, you can create a beautiful representation of this captivating natural phenomenon. Remember to start with simple shapes and gradually build up the layers to achieve a realistic and fluffy look. Don’t be afraid to add your own creative flair and experiment with colors. Happy drawing!