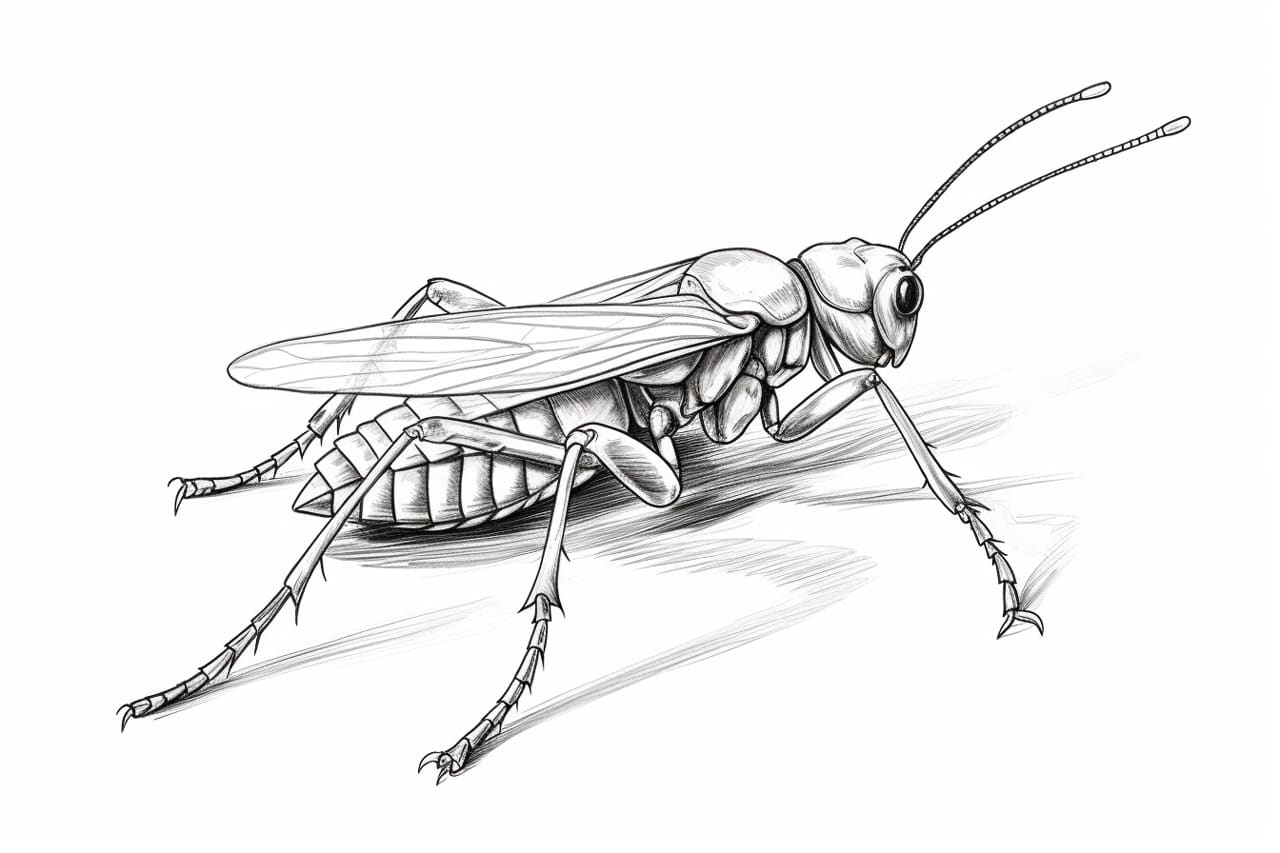
Are you interested in learning how to draw a cricket? Crickets are fascinating creatures known for their unique appearance and distinctive sound. In this step-by-step guide, I will teach you how to draw a realistic cricket using simple and easy-to-follow instructions. So, grab your drawing materials and let’s get started!
Materials Required:
- Pencil
- Eraser
- Drawing paper
- Fine-tipped black pen or marker
- Colored pencils or markers (optional)
Step 1: Outline the Body
Start by drawing a small circle near the center of your paper. This will be the cricket’s head. Then, draw an oval shape beneath the head for the body. Connect the head and the body with a curved line to create the cricket’s neck.
Step 2: Draw the Eyes and Antennae
Inside the head, draw two large oval-shaped eyes. Leave a small white circle in the corner of each eye to give them a shiny look. Above the eyes, add two long, thin antennae by drawing two slightly curved lines on either side of the head.
Step 3: Sketch the Legs
Crickets have long and slender legs, which are an important part of their body structure. Start by drawing two front legs extending from the bottom of the head. These legs should be slightly longer than the cricket’s body. Then, draw two middle legs just below the first pair, and two hind legs on the other side of the body. Make sure the hind legs are the longest.
Step 4: Add Details to the Head
To give your cricket a more realistic look, it’s important to add details to its face. Draw a small “W” shape inside the head to represent the cricket’s mouth. Then, add a few short lines near the mouth to indicate the mandibles. Draw a small dot inside each eye to depict the pupils.
Step 5: Define the Body
Now, it’s time to refine the shape of the cricket’s body. Start by adding segments to the oval-shaped body. Draw curved lines across the body, dividing it into several sections. These segments will give your drawing a more insect-like appearance.
Step 6: Draw the Wings
Crickets have wings that are located on their back. To draw the wings, start by sketching two small elongated shapes on each side of the body. These shapes should be slightly larger than the body segments. Next, add veins to the wings by drawing a series of parallel lines within the shapes.
Step 7: Erase Unnecessary Lines
Take your eraser and carefully erase any unnecessary pencil lines from your drawing. Keep the outline of the cricket’s body and important details, such as the eyes, legs, and wings.
Step 8: Ink Your Drawing
Once you’re happy with your pencil sketch, it’s time to ink your drawing. Take your fine-tipped pen or marker and carefully trace over the pencil lines. Be patient and take your time to ensure smooth and controlled lines. Ink the most important features, such as the eyes, antennae, legs, and body segments.
Step 9: Add Shading and Texture (optional)
If you want to take your drawing to the next level, you can add shading and texture to your cricket. Use a light source as a reference and add shading to the body segments, legs, and wings. You can also experiment with different pencil strokes to create a textured effect. If desired, use colored pencils or markers to add vibrant colors to your drawing.
Conclusion
Drawing a cricket may seem challenging at first, but by following these step-by-step instructions, you can create a realistic and detailed representation of this fascinating insect. Remember to take your time, be patient, and enjoy the process of bringing a cricket to life on paper. Happy drawing!