How to Draw a Stegosaurus
Learn how to draw a Stegosaurus in easy steps. This step-by-step guide will show you the process of creating a detailed and accurate drawing of this magnificent dinosaur.
Materials You'll Need
- Pencil
- Paper
- Eraser
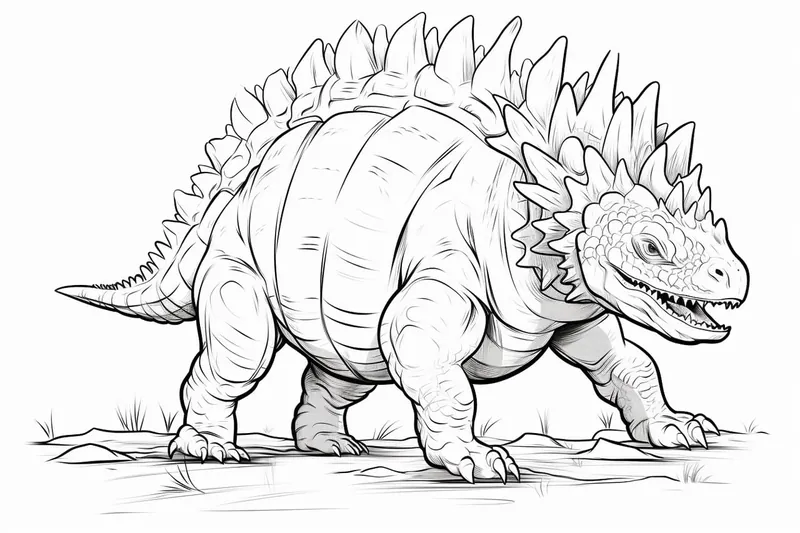
![]() If you have a fascination for dinosaurs, you're not alone! These magnificent creatures have captured the imaginations of people of all ages for generations. Among them, the Stegosaurus stands out with its unique appearance, characterized by the iconic bony plates along its back and its distinctive tail spikes. Whether you're a seasoned artist or just starting, learning how to draw a Stegosaurus can be a fun and rewarding experience that allows you to explore your creativity while learning more about this incredible dinosaur.
If you have a fascination for dinosaurs, you're not alone! These magnificent creatures have captured the imaginations of people of all ages for generations. Among them, the Stegosaurus stands out with its unique appearance, characterized by the iconic bony plates along its back and its distinctive tail spikes. Whether you're a seasoned artist or just starting, learning how to draw a Stegosaurus can be a fun and rewarding experience that allows you to explore your creativity while learning more about this incredible dinosaur.
In this step-by-step guide, we will walk you through the process of creating your very own Stegosaurus illustration from scratch. You'll learn the fundamental techniques for sketching the body and adding details that make this dinosaur so memorable. So, gather your materials, sharpen those pencils, and get ready to dive into an artistic adventure that will not only thrill you but also deepen your appreciation for one of nature's most fascinating reptiles. Let's embark on this journey together and bring the Stegosaurus to life on paper!
Materials Required
To start drawing your Stegosaurus, make sure you have the following materials on hand:
With these materials readily available, you'll be well-equipped to bring your Stegosaurus to life on paper.
Step 1: Basic Shapes
To begin, let's lay the foundation for our Stegosaurus by sketching some basic shapes. Start by drawing a large oval in the center of your paper. This oval will serve as the body of our dinosaur. Next, add a smaller oval towards the rear end of the bigger oval. This will be the head of our Stegosaurus. Finally, draw a smaller oval at the end of the body for the tail.
Step 2: Body Outline
Using the ovals as a guide, we can now start outlining the body of our Stegosaurus. Begin by drawing a curved line from the top of the head oval down to the body oval. This line will form the back of our dinosaur. From the back, draw two parallel lines that extend towards the tail, gradually curving downwards.
Step 3: Legs and Feet
Now it's time to add some legs and feet to our Stegosaurus. Start by drawing two long, curved lines that extend from the bottom of the body oval. These lines will form the front legs of our dinosaur. Repeat this step to add two more curved lines for the hind legs. At the end of each leg, draw small ovals for the feet.
Step 4: Plates on the Back
One of the distinctive features of a Stegosaurus is the row of bony plates that run along its back. Let's add these plates to our drawing. Begin by drawing several small, diamond-shaped ovals along the back of the Stegosaurus, following the curve of the body. Make sure the plates are evenly spaced and gradually decrease in size towards the tail.
Step 5: Head and Neck Details
Next, let's focus on the head and neck of our Stegosaurus. Starting from the front of the head oval, draw a long, curved line downwards to form the snout. At the end of the snout, add a small, peanut-shaped oval for the nostril. Just above the snout, draw a curved line for the mouth, with a small triangular shape for the upper jaw. To create the eye, draw a large, circular shape on the side of the head.
Step 6: Tail Details
Now, let's add some details to the tail of our Stegosaurus. Begin by drawing a series of triangular shapes along the top of the tail, gradually decreasing in size as you move towards the tip. These triangles will represent the bony spikes found on the Stegosaurus's tail. Finally, draw a line down the center of the tail to give it a segmented appearance.
Step 7: Refining and Erasing
With the basic outline and details in place, it's time to refine your drawing. Use a darker pencil or a pen to go over the lines, making them more defined and distinct. Pay close attention to the curves and contours of your Stegosaurus, as these details will bring it to life. Once you're satisfied with the refined lines, carefully erase any remaining pencil marks.
Wrapping It Up
Congratulations on completing your Stegosaurus drawing! You have successfully brought this magnificent dinosaur to life on paper by following these step-by-step instructions and using your creativity. Remember, practice makes perfect, so feel free to experiment with different poses, sizes, and colors to enhance your artwork further. Happy drawing!
Fun Facts About Stegosauruses
- Brain the Size of a WalnutDespite its massive body, the stegosaurus had a surprisingly small brain—about the size of a dog's or even a walnut.
- Plates with a PurposeThe large, bony plates along its back may have helped with temperature regulation, defense, or even attracting mates.
- Tail with a NameIts spiked tail was so iconic that paleontologists gave it a nickname: the "thagomizer"—a term humorously coined by a cartoonist but later adopted by scientists!
- Not Built for SpeedStegosauruses walked on all fours and had short front legs, giving them a distinctive downward-sloping back and a slow, lumbering gait.
- Plant-Based DietThese gentle giants were herbivores, feeding on low-lying plants like ferns and cycads.
- Jurassic CelebStegosaurus lived about 150 million years ago during the Late Jurassic period—before Tyrannosaurus rex ever roamed the Earth.
- Big, But Not the BiggestThey could grow up to 30 feet long and weigh up to 5 tons—but were still dwarfed by some of their dinosaur neighbors.
- Tiny TeethWith small, peg-like teeth, they weren't munchers or chewers—they likely snipped and swallowed plants whole.
- Possibly Colorful PlatesSome scientists think the plates may have been covered with skin and blood vessels, possibly allowing them to blush or change color.
- **Brains… or Backup Brains?**An enlarged spinal cavity near the hips led to the myth of a "second brain," though it's now believed to be a nerve center to control the hind legs and tail.
Tip: When drawing your Stegosaurus, start with light pencil strokes to outline the basic shapes, focusing on the dinosaur's proportions—the body should be robust and the tail short but prominent. Use simple geometric forms to establish the head, torso, and limbs. Pay special attention to the unique plates along the back; sketch them as elongated triangles that taper at the ends to capture their distinctive look. Once you're satisfied with the overall structure, gradually add details, such as skin texture and facial features, and remember to layer your shading to create depth, especially on the plates and underbelly. Finally, don't hesitate to reference images or models for accuracy, but allow your personal style to shine through in the final touches!
Suggested Scenes for Stegosaurus Drawings
- Stegosaurus in a Fern JungleSurrounded by giant ferns and cycads, a stegosaurus munches peacefully under dappled sunlight.
- Sunrise with Stegosaur SilhouettesA herd of stegosaurs walks along a ridge as the sun rises, their plates casting dramatic shadows.
- Stegosaurus vs. AllosaurusAction shot: a stegosaurus swinging its thagomizer to defend itself from a charging predator.
- Rainy Day RefugeA stegosaurus huddled beneath a massive fallen log as rain pours down, creating puddles and ripples.
- Stegosaurus Crossing a RiverA group wades cautiously through a slow-moving stream, with reflections of their plates shimmering on the surface.
- Nighttime Scene Under the StarsA lone stegosaurus rests in a clearing, the Milky Way glowing above—plates catching the moonlight.
- Stegosaurus Among VolcanoesSet against a dramatic, active volcanic backdrop, a stegosaurus navigates the ash-covered terrain.
- Family Scene: Adult and JuvenileA baby stegosaurus curiously nudges a flower while its towering parent stands protectively nearby.
- Stegosaurus in a Rocky CanyonTrekking through narrow, rocky paths, their plates peek just above the ledges as they pass.
- Stegosaurus and Other HerbivoresA peaceful panorama: stegosaurs grazing alongside camptosaurs or diplodocids in a wide Jurassic valley.