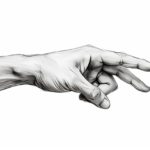
Welcome to this step-by-step tutorial on how to draw a thumb! As an expert artist and drawing instructor, I will guide you through the process of creating a realistic thumb on paper. Whether you are a beginner or an experienced artist looking to improve your drawing skills, this tutorial is for you.
Materials Required
Before we begin, let’s gather the materials you’ll need for this drawing tutorial:
- Drawing paper
- Pencil (preferably a mechanical pencil or a set of graphite pencils)
- Eraser
- Blending stump (optional, but helpful for shading)
Now that we have our materials ready, let’s get started!
Step 1: Outline the Basic Shape
Begin by lightly sketching an oval shape at the top portion of your paper. This will serve as the base for the thumb. Remember, this is just a rough outline, so don’t worry about making it perfect at this stage.
Step 2: Add the Joint and the Base
Next, draw a curved line that represents the joint connecting the thumb to the hand. From the joint, draw a wide and slightly curved shape that forms the base of the thumb. This shape should be wider at the bottom and narrower towards the top.
Step 3: Define the Thumbpad
Now, let’s add some details to the thumb. Sketch a small oval shape at the top of the thumb base. This oval represents the thumbpad, which is an essential characteristic of a thumb.
Step 4: Outline the Thumb’s Segments
To create a realistic thumb, we need to define its segments. Lightly draw curved lines to divide the thumb into three sections: the proximal phalanx (closest to the hand), the middle phalanx, and the distal phalanx (the tip of the thumb).
Step 5: Add Guidelines for the Folds
Folds and creases are an important part of creating a realistic thumb drawing. Use light, curved lines to indicate where the skin folds occur on the thumb. Pay attention to the areas where the thumb bends and creases, such as the joint and the base.
Step 6: Refine the Thumb Shape
Now that we have the basic structure in place, it’s time to refine the shape of the thumb. Use your pencil to carefully smooth out any rough areas and adjust the curves as needed. Pay close attention to the overall shape and proportions of the thumb.
Step 7: Draw the Nail
No thumb is complete without a nail! At the tip of the distal phalanx, draw a curved line to represent the nail. Be sure to make it slightly rounded and not too long.
Step 8: Adding Details
To make your thumb drawing more realistic, it’s important to add some details. Start by shading the areas where the shadows fall, such as underneath the joint and the folds of the skin. Use your pencil or a blending stump to create smooth transitions between light and dark areas.
Step 9: Refine the Thumbpad
Now, let’s refine the thumbpad. Add some lines and shading to create a textured appearance. Pay attention to the curves and contours of the thumbpad, making it look soft and pliable.
Step 10: Final Touches
Take a step back and evaluate your drawing. Make any necessary adjustments to refine the details and proportions. Erase any unwanted lines or smudges, and darken the lines that need to be more prominent.
Conclusion
Congratulations! You have successfully learned how to draw a thumb. By following these step-by-step instructions, you should now have a realistic and well-proportioned thumb drawing. Keep practicing and exploring different techniques to improve your drawing skills further. Remember, patience and practice are key to becoming a skilled artist.