Dragonflies are beautiful and delicate creatures, and capturing their essence in a drawing can be a rewarding experience. In this step-by-step guide, you will learn how to draw a dragonfly with ease. Whether you’re a beginner or a seasoned artist, follow these instructions to create your own stunning dragonfly masterpiece.
Materials Required
To create your dragonfly drawing, you will need the following materials:
- Drawing paper
- Pencil
- Fine tip black marker or pen
- Colored pencils or markers (optional)
Make sure you have these materials ready before you begin so that you can fully immerse yourself in the creative process.
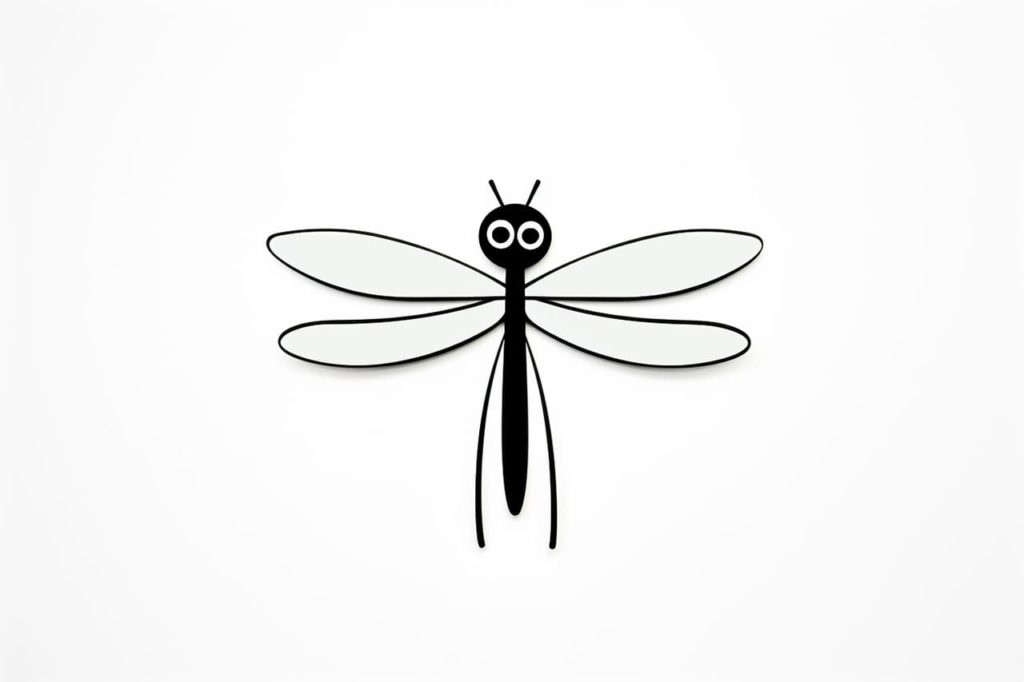
Step 1: Head and Thorax
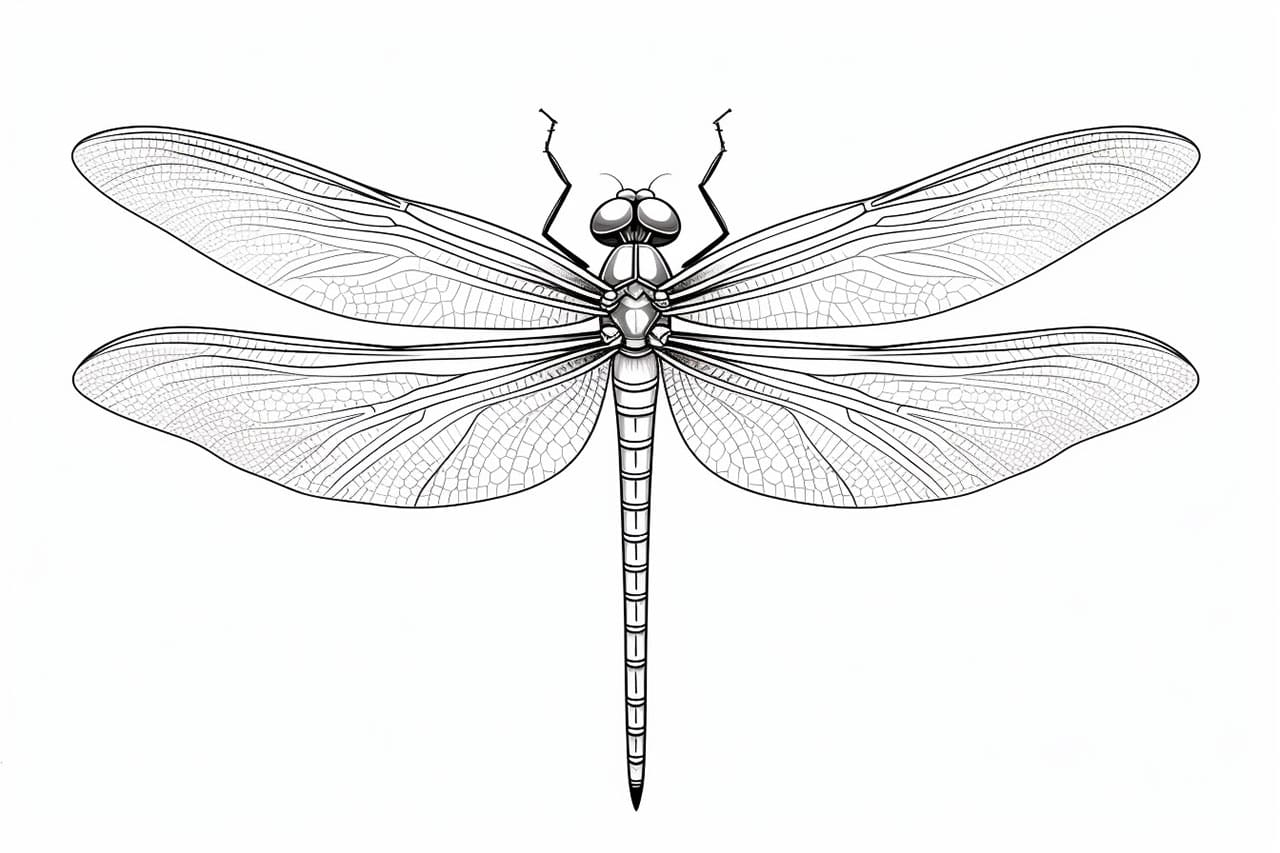
Start by drawing an oval shape for the dragonfly’s head. This will be the central point of your drawing. Then, extend a slightly elongated and curved shape beneath the head for the thorax. The thorax should be narrower than the head and resemble a water drop shape.
Step 2: Eyes and Antennae
Within the head, draw two large compound eyes on either side. These eyes are usually round or oval in shape. Just above the eyes, add two thin, curved lines for the antennae. Dragonfly antennae are typically short and delicate.
Step 3: Wings
Extend two pairs of large, elongated wings from the thorax. Dragonfly wings are transparent and have a delicate veined pattern. To draw the wings, start by sketching the basic shape, and then add curved lines to represent the veins. Remember to make the wings symmetrical on both sides of the thorax.
Step 4: Add Details to Wings and Thorax
Within the wings, add more intricate details by drawing smaller veins that connect to the main veins. These secondary veins should branch out and get thinner as they reach the wing’s edges. Additionally, add a few curves and lines to the thorax to give it a more realistic appearance.
Step 5: Legs
Extend three pairs of legs from the lower part of the thorax. Dragonfly legs are long and delicate with small joints. Each leg should have two segments, with a thin and pointed end.
Step 6: Tail
At the end of the abdomen, draw two long and thin tails that curve outward. The tails consist of tiny segments that get thinner towards the end. Make sure the lengths of the tails are symmetrical and proportional to the rest of the dragonfly’s body.
Step 7: Finalize the Outline
Now, using a fine tip black marker or pen, trace over the pencil lines to create a more defined and finished look. Start with the outline of the dragonfly’s body, then move on to the wings, legs, and tails. Erase any unnecessary pencil marks and smudges.
Step 8: Coloring (optional)
If you wish to add color to your dragonfly drawing, you can use colored pencils or markers. Dragonflies come in a variety of vibrant hues, so feel free to get creative with your color choices. You can color the body in shades of blue, green, or even red. The wings can be lightly shaded to give a translucent effect.
Conclusion
Drawing a dragonfly allows you to appreciate the intricacies of its unique features while expressing your creativity. By following these step-by-step instructions, you can create a beautiful and lifelike representation of this marvelous creature. So grab your materials and dive into the world of dragonfly art!