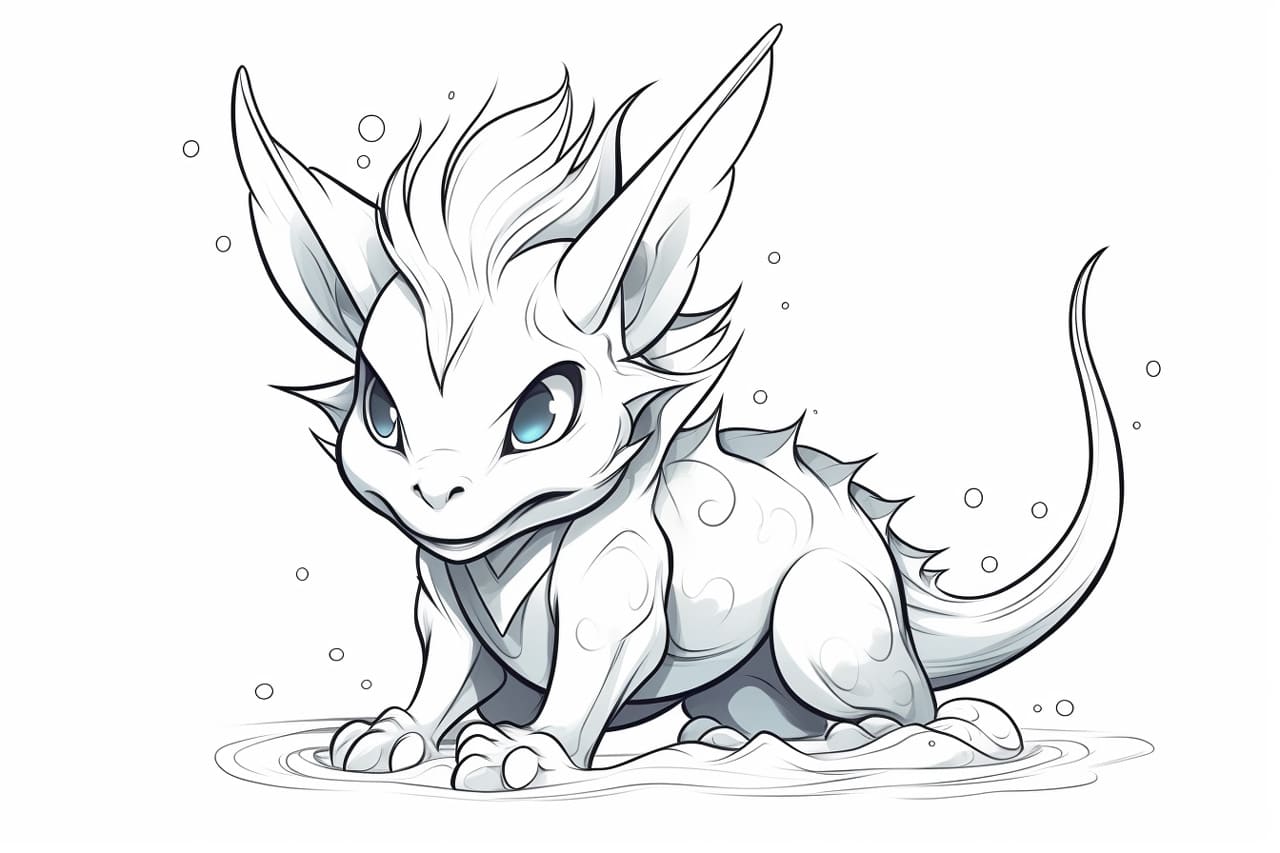
Are you a fan of Pokémon and want to learn how to draw your favorite characters? In this step-by-step tutorial, we’ll draw Vaporeon, the Water-type Pokémon known for its graceful appearance and aquatic abilities. You can bring this majestic creature to life on your paper by following these instructions. So, let’s grab our pencils and get started!
Materials Required:
- A blank sheet of paper
- Pencils (HB and 2B)
- Eraser
- Fine-tip black pen
- Colored pencils or markers (optional)
Step 1: Sketch the Basic Shapes
Begin by lightly sketching the basic shapes that makeup Vaporeon’s body. Start with a large oval shape for the head, followed by a smaller oval shape beneath it for the body. Add two medium-sized circles on each side of the body for the forelegs and two longer ovals at the bottom for the hind legs.
Step 2: Define the Face
Using the guidelines you just created, outline Vaporeon’s face. Add a small triangular shape on top of the head for the ear and a larger, curved shape below it for the main body of the ear. Draw two almond-shaped eyes, leaving a small gap between them for the nose. Finally, add a curved line to indicate the mouth.
Step 3: Add the Details
Now it’s time to add more details to Vaporeon’s face. Sketch the inner details of the ear by adding a series of small curved lines. Next, draw the pupils within the eyes and add a small highlight on each to bring them to life. Complete the face by drawing Vaporeon’s signature fin-like crest on its head.
Step 4: Outline the Body
With the head and face complete, it’s time to outline the rest of Vaporeon’s body. Carefully trace the body’s shape, following the initial guidelines you sketched. Pay close attention to the curves and proportions, ensuring that the forelegs are slightly shorter than the hind legs. Add in the details of the paws, including the individual toes.
Step 5: Define the Tail
Vaporeon is known for its beautiful, mermaid-like tail. Start by outlining the shape of the tail from the base of the body, curving it upward, and tapering it at the end. Add a series of curved lines within the tail to represent the segments. Make sure to keep the lines smooth and flowing to maintain the fluidity of Vaporeon’s tail.
Step 6: Refine and Clean Up
At this stage, take a moment to evaluate your drawing and make any necessary adjustments. Use an eraser to remove any unwanted lines and refine the shape and details of Vaporeon. Take time with this step to ensure your drawing looks clean and polished.
Step 7: Ink the Drawing
Once you’re satisfied with your pencil sketch, it’s time to ink the drawing. Use a fine-tip black pen to review the final lines, making them bold and crisp. Take care to follow the contours of Vaporeon’s body and add any more minor details that may have been lost during the sketching process.
Step 8: Add Color (Optional)
If you prefer to add color to your drawing, now is the time to do so. Use colored pencils or markers to bring Vaporeon to life. Vaporeon is primarily blue, with accents of white and black. Shade the body with different tones of blue, leaving the underside lighter for a 3D effect. Use white to highlight specific areas, such as the fin-like crest and the tail segments. Finally, add black to define the features and add depth to the drawing.
Conclusion
Congratulations, you have successfully drawn Vaporeon! By following these step-by-step instructions and using your creativity, you were able to bring this beautiful Water-type Pokémon to life on paper. Remember to take time, practice, and have fun with your drawings. With each new drawing, your skills will continue to improve.
I hope you enjoyed this tutorial on how to draw Vaporeon. Stay tuned for more Pokémon drawing tutorials, and let your artistic journey continue. Happy drawing!