Drawing is a wonderful way to express your creativity and imagination. If you’re interested in interior design or simply want to practice your drawing skills, learning how to draw a closet can be a fun and rewarding project. In this step-by-step guide, I will show you how to capture the details of a closet in a simple and visually appealing manner. So grab your sketchbook and let’s get started on this artistic journey!
Materials Required:
Before we begin, gather the following materials:
- Drawing paper or sketchbook
- Pencils (preferably a range of graphite pencils such as 2B, 4B, and 6B)
- Eraser
- Ruler
- Sharpener
Now that we have our materials ready, let’s dive into the process of drawing a closet.
Step 1: Establish the Basic Structure
Start by lightly sketching the basic shape of the closet. Determine the height and width of the closet and draw a rectangular outline to represent its outer frame. Use a ruler to ensure straight lines and maintain proportion. Remember, this is just a rough sketch, so don’t worry about adding too much detail at this stage.
Step 2: Add Details to the Doors
Next, focus on the closet doors. Decide whether the closet has one or multiple doors and add them to your sketch. Pay attention to the paneling or grooves on the doors, as they can add visual interest. Use your ruler to create straight lines for the edges of the doors and the panels within.
Step 3: Draw the Door Handles and Hardware
Draw the handles or knobs on the closet doors. These can be simple or ornate, depending on the style you want to capture. Additionally, add any other hardware details, such as hinges or locks, to give your drawing a more realistic touch. Take your time with this step, as small details can make a big difference in the overall look of your drawing.
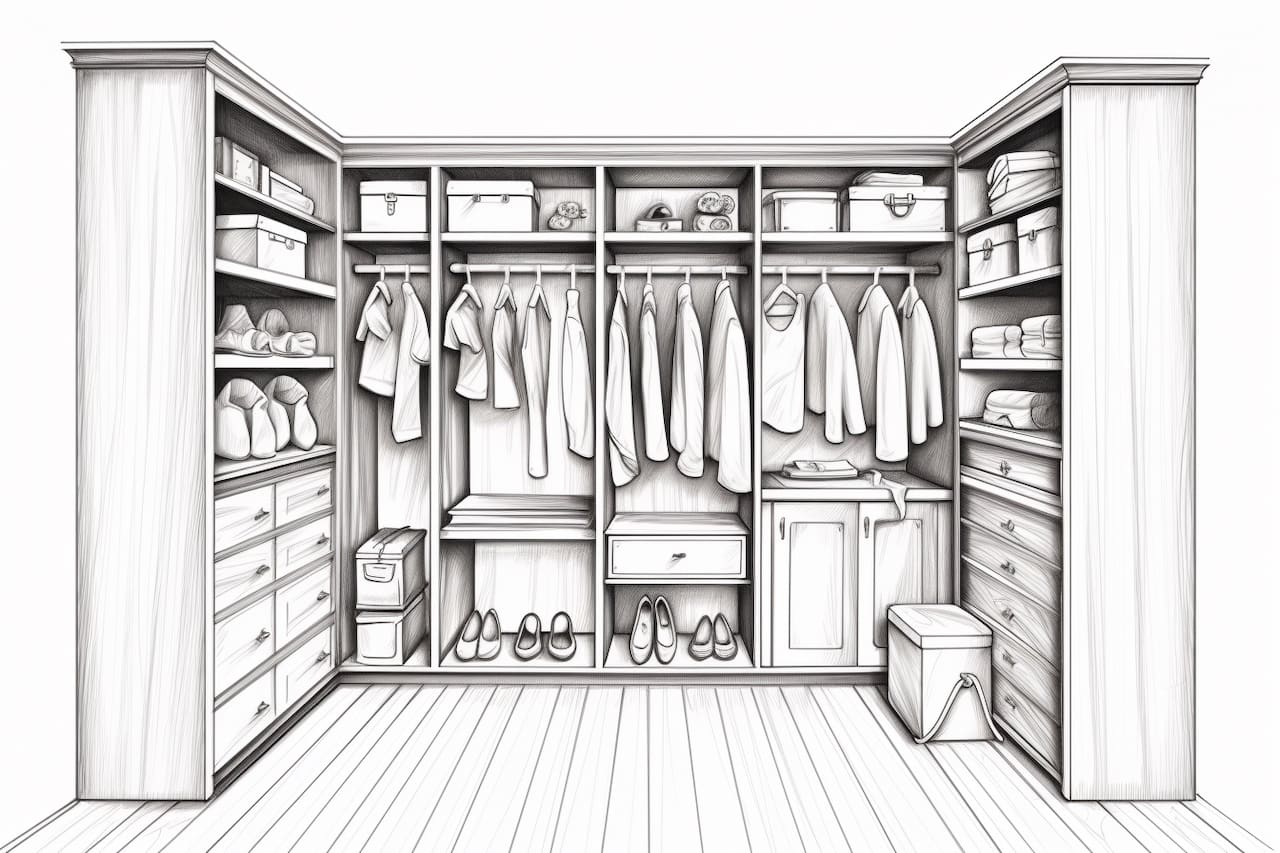
Step 4: Sketch the Interior Shelves and Rods
Now it’s time to focus on the inside of the closet. Begin by drawing the shelves and rods. Use your ruler to create straight lines for the shelves, ensuring they are evenly spaced. Consider the size and number of shelves based on the type of closet you are drawing. If the closet has a rod for hanging clothes, draw a horizontal line across the closet to represent it.
Step 5: Add Clothes and Accessories
A closet isn’t complete without clothes and accessories. Draw clothes hanging on the rod or neatly stacked on the shelves. You can depict various types of clothing, such as shirts, pants, dresses, or shoes. Pay attention to the folds and wrinkles in the fabric to add realism to your drawing. Feel free to experiment with different poses and arrangements to make your closet more visually appealing.
Step 6: Shade and Add Depth
To give your drawing depth and dimension, it’s important to add shading. Determine the direction of the light source, and shade the areas accordingly. Use your range of graphite pencils to create different values of darkness. Start with a lighter shade and gradually build up the darker areas. Pay attention to the shadows cast by the clothes and shelves to create a more realistic representation.
Step 7: Refine and Detail
Take a step back and evaluate your drawing so far. Look for any areas that need refinement or additional detail. Use your eraser to correct any mistakes or smudges. Add texture to the wood grain or fabric details, using light hatching or crosshatching techniques. Take your time during this step, as it is crucial for bringing your drawing to life.
Conclusion
Congratulations! You have successfully learned how to draw a closet. By following these step-by-step instructions and using your creativity, you were able to capture the details of a closet in a visually appealing manner. Remember, practice is key, so keep sketching and exploring your artistic abilities. Whether you’re interested in interior design or simply enjoy drawing, this skill will undoubtedly come in handy. So grab your sketchbook and start creating your own unique closets with confidence!