Welcome to this step-by-step guide on how to draw a map of a city. Whether you’re an aspiring artist, a hobbyist, or even someone looking to document your own neighborhood, this tutorial will provide you with the techniques and tips needed to create a detailed and visually appealing city map. So, let’s grab our drawing tools and get started!
Materials Required
Before we begin, let’s gather the materials you’ll need for this project. Here’s a list of what you’ll need:
- Paper: Choose a size that suits your preference. A heavier-weight paper, such as drawing paper or watercolor paper, is recommended for durability.
- Pencil: Use a mechanical pencil or a regular pencil. Make sure it’s sharp for fine details and easy erasing.
- Eraser: A kneaded eraser or a regular eraser will work well for this project.
- Ruler: A straight edge ruler is essential for creating straight lines and precise measurements.
- Fine-tipped pens or markers: These will be used for adding the final details to your map. Choose pens or markers that have a variety of line thicknesses.
Now that we have our materials ready, let’s dive into the step-by-step process of drawing a city map.
Step 1: Plan and Research
Start by brainstorming the layout and the key elements you want to include in your city map. Consider the landmarks, roads, parks, and any other features that define the city. It may be helpful to gather reference images or use Google Maps for inspiration and accuracy.
Step 2: Sketch the Basic Outline
Begin by lightly sketching the basic shape of the city on your paper using a pencil. Use simple geometric shapes, such as squares, rectangles, and circles, to represent the different areas of the city. Don’t worry about adding details at this stage; focus on getting the overall layout right.
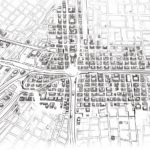
Step 3: Add Major Roads and Landmarks
Using your reference images or knowledge of the city, start adding the major roads and landmarks to your map. Use your ruler to draw straight lines for roads and buildings. Remember to keep your lines light, as you will be refining them later. Add major landmarks like parks, rivers, or mountains as necessary, ensuring they are proportionately represented on your map.
Step 4: Create a Grid System
To ensure accuracy and consistency when drawing the smaller details, it’s helpful to create a grid system. Divide your map into a grid of squares or rectangles. This will help you maintain proper proportions and spacing as you add more elements to your city map.
Step 5: Add Streets and Buildings
Using your ruler and pencil, begin adding the streets and buildings within the city. Start with the main streets and work your way down to the smaller side streets. Use the grid system you created in the previous step to help maintain proper proportions. Pay attention to the spacing between buildings to ensure a realistic representation.
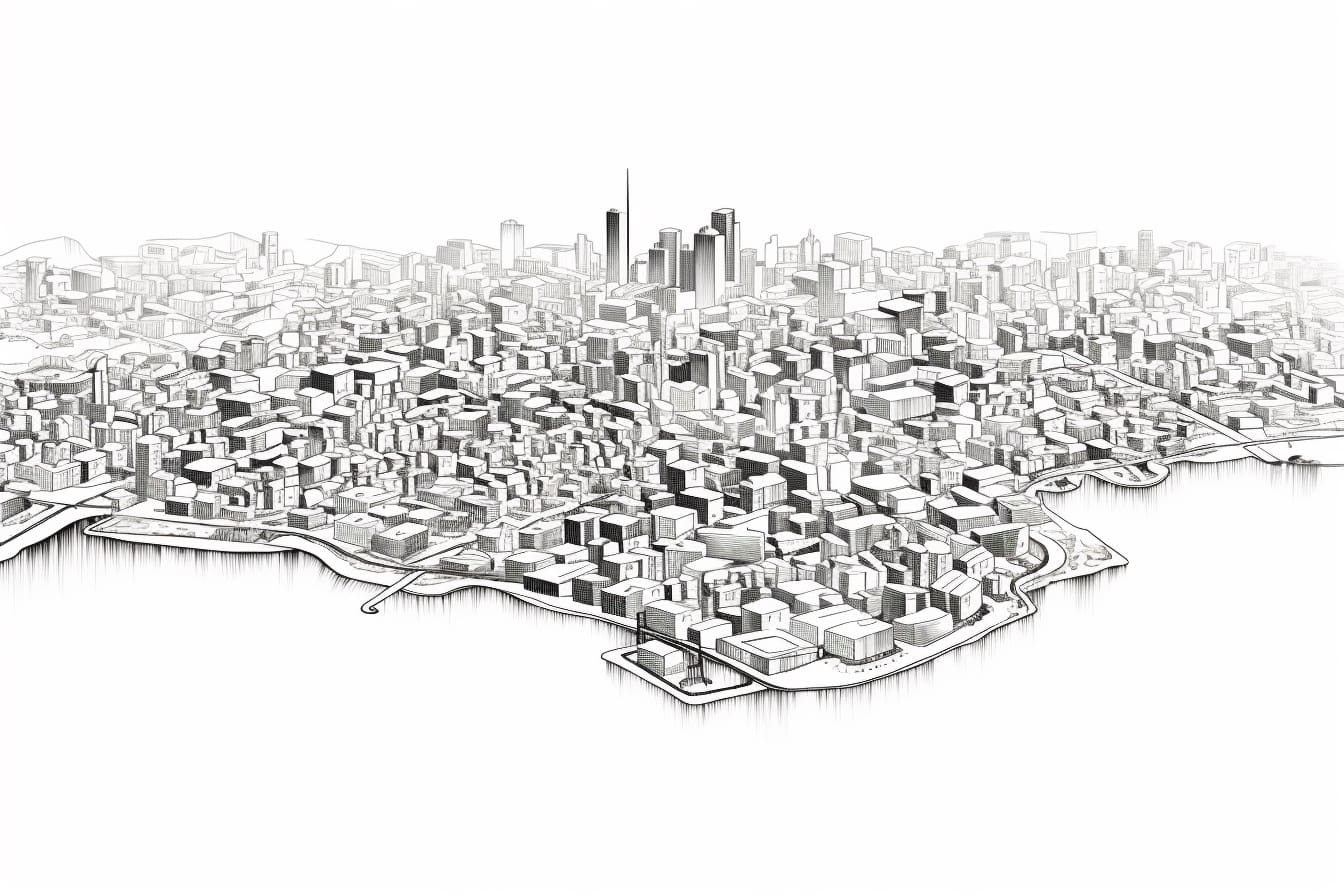
Step 6: Refine the Details
Now that you have the basic structure of your city map in place, it’s time to refine the details. Use your eraser to remove any unnecessary lines and clean up the sketch. Add more details to the buildings, such as windows, doors, and architectural features. Don’t forget to add green spaces, trees, and other elements that give character to your city.
Step 7: Ink Your Drawing
Once you are satisfied with the pencil sketch, use your fine-tipped pens or markers to go over the lines and add final details to your city map. Start with the main features, such as roads and buildings, and then move on to smaller details. Vary the line thickness to create depth and interest in your drawing.
Step 8: Add Color (Optional)
If you prefer a colorful city map, you can add color using colored pencils, markers, or watercolors. Use a light touch and build up the colors gradually, considering light and shadows to create a realistic effect. Remember to let each layer of color dry before adding additional layers.
Conclusion
Congratulations! You have now learned how to draw a map of a city. Whether you’re drawing a fictional city or a real-life location, these step-by-step instructions will help you create a visually appealing and accurate representation. Remember to be patient and have fun throughout the process. So grab your materials, let your creativity flow, and start mapping out your own city!