Do you have a fascination with architectural details or an interest in drawing? In this step-by-step guide, we will explore how to draw a balcony. Whether you are a beginner or an experienced artist, this tutorial will help you create a realistic and visually appealing representation of a balcony. So grab your pencils and let’s get started!
Materials Required:
To complete this drawing, you will need the following materials:
- Drawing paper: Select a smooth and sturdy paper suitable for sketching. A standard sketchbook or drawing pad will work well.
- Pencils: You will need a range of graphite pencils with different lead hardness (HB, 2B, 4B, 6B) to achieve different tones and shading.
- Eraser: A kneaded or soft eraser will allow you to remove or lighten any mistakes or unwanted lines without damaging the paper.
- Ruler: A straight-edged ruler will help you create precise lines and measure proportions accurately.
- Blending tools: You may choose to use blending stumps, cotton swabs, or tissue paper to smudge and blend graphite for smooth shading effects.
Now that you have your materials ready, let’s begin drawing a balcony!
Step 1: Sketch the Basic Structure
Start by lightly sketching the basic structure of the balcony. Use the ruler to create straight lines and maintain proper proportions. Begin with the outer edges, such as the vertical support columns or pillars, and the horizontal base of the balcony. Pay attention to the perspective if you want to add depth to your drawing.
Step 2: Add Details to the Architecture
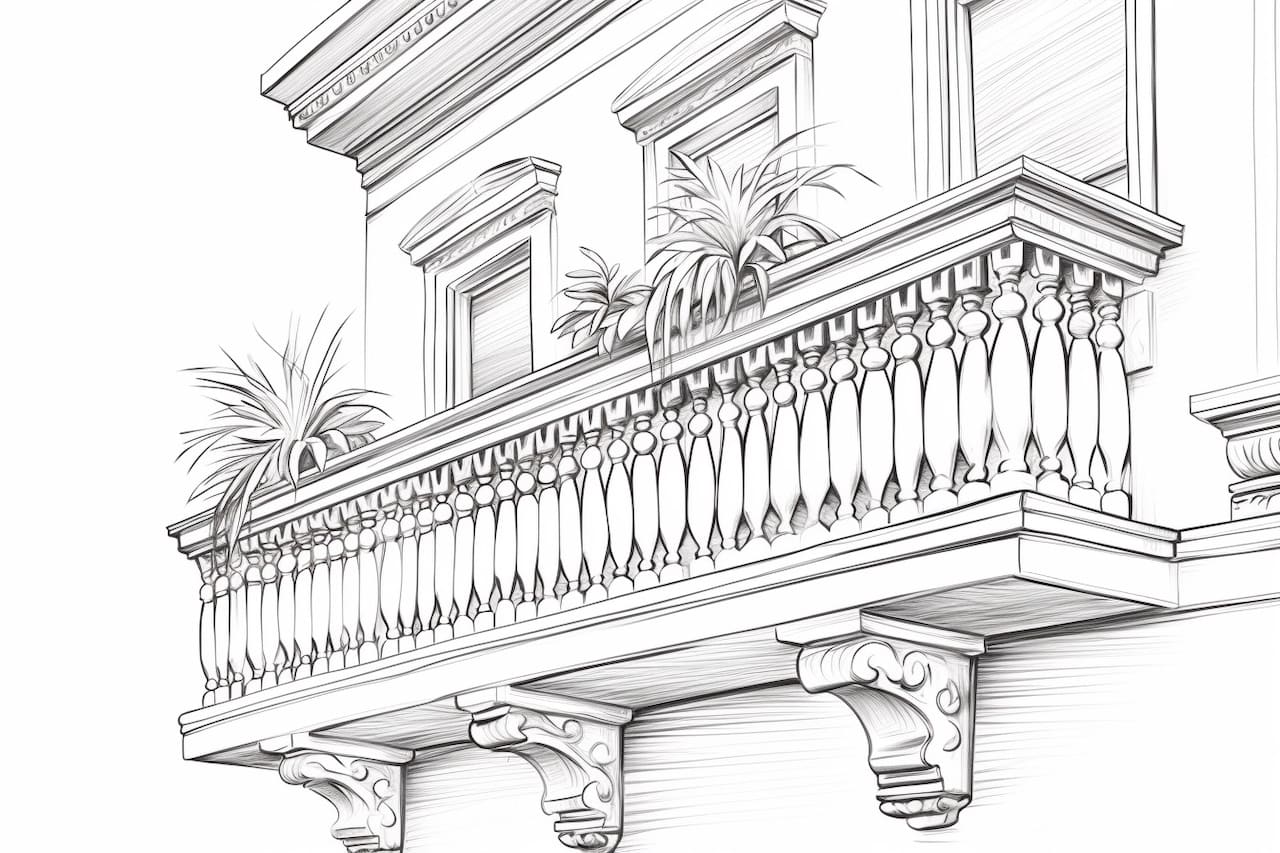
Next, start adding more intricate details to the balcony structure. Observe reference images or real-life balconies for inspiration. Draw the balustrades, railings, and any decorative elements like columns, arches, or ornamental patterns. Take your time to create clean and accurate lines, ensuring that everything is symmetrical and visually appealing.
Step 3: Outline the Features of the Balcony
Now, focus on the features of the balcony such as doors, windows, or French doors that lead to the balcony itself. Carefully sketch these elements, paying attention to their position and perspective. Use the ruler to create straight lines and maintain accuracy, especially for rectangular doors or window frames.
Step 4: Develop the Balcony Flooring and Ceiling
In this step, draw the balcony flooring and ceiling. Depending on the architectural style, the flooring can be made of wood, stone, or tiles. Use light pencil strokes to capture the texture and add shading to create a sense of depth. Similarly, draw the ceiling, which is often a continuation of the balcony’s architecture.
Step 5: Refine the Details and Add Shading
Now, spend some time refining the details of the balcony. Pay attention to any additional decorative elements, such as flower pots, hanging plants, or intricate patterns. Use your reference images as a guide to ensure accuracy.
Once you are satisfied with the details, start adding shading to your drawing. Shade the areas that are in shadow, using different pencil grades to create a range of tones. Pay attention to the direction and intensity of the light source to create a realistic and three-dimensional effect.
Step 6: Blend and Smudge for Smoothness
To achieve a smoother and more realistic look, use blending tools such as blending stumps, cotton swabs, or tissue paper to blend and smudge the graphite. This will soften the edges and create a seamless transition between light and shadow areas. Be mindful of not over-blending, as it may result in a loss of detail.
Step 7: Finalize the Drawing
Review your drawing and make any necessary adjustments or corrections. Erase any unwanted lines or smudges carefully, using a kneaded eraser for precision. Take this opportunity to add any final touches or details that will enhance the overall drawing.
Conclusion
Congratulations! You have successfully learned how to draw a beautiful balcony. By following these step-by-step instructions and using your creativity, you have created a realistic representation of an architectural structure. Keep practicing and experimenting with different techniques to further refine your skills. Enjoy the process of drawing and let your artistic abilities flourish!