Welcome! In this step-by-step tutorial, you will learn how to draw a circus scene. Through clear and concise instructions, you will be guided in creating a lively and colorful illustration that captures the excitement of a circus. So grab your drawing materials and let’s get started!
Materials Required
Before we begin, make sure you have the following materials at hand:
- Paper: A medium-sized drawing paper will work well for this project.
- Pencils: A set of drawing pencils with a range of hardness (HB, 2B, 4B, etc.) will be useful for shading and adding details.
- Eraser: A kneaded or vinyl eraser will help you make corrections and add highlights to your drawing.
- Colored pencils or markers (optional): If you want to add color to your circus illustration, have some colored pencils or markers ready.
Now that you have your materials ready, let’s dive into the steps for drawing a circus!
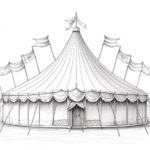
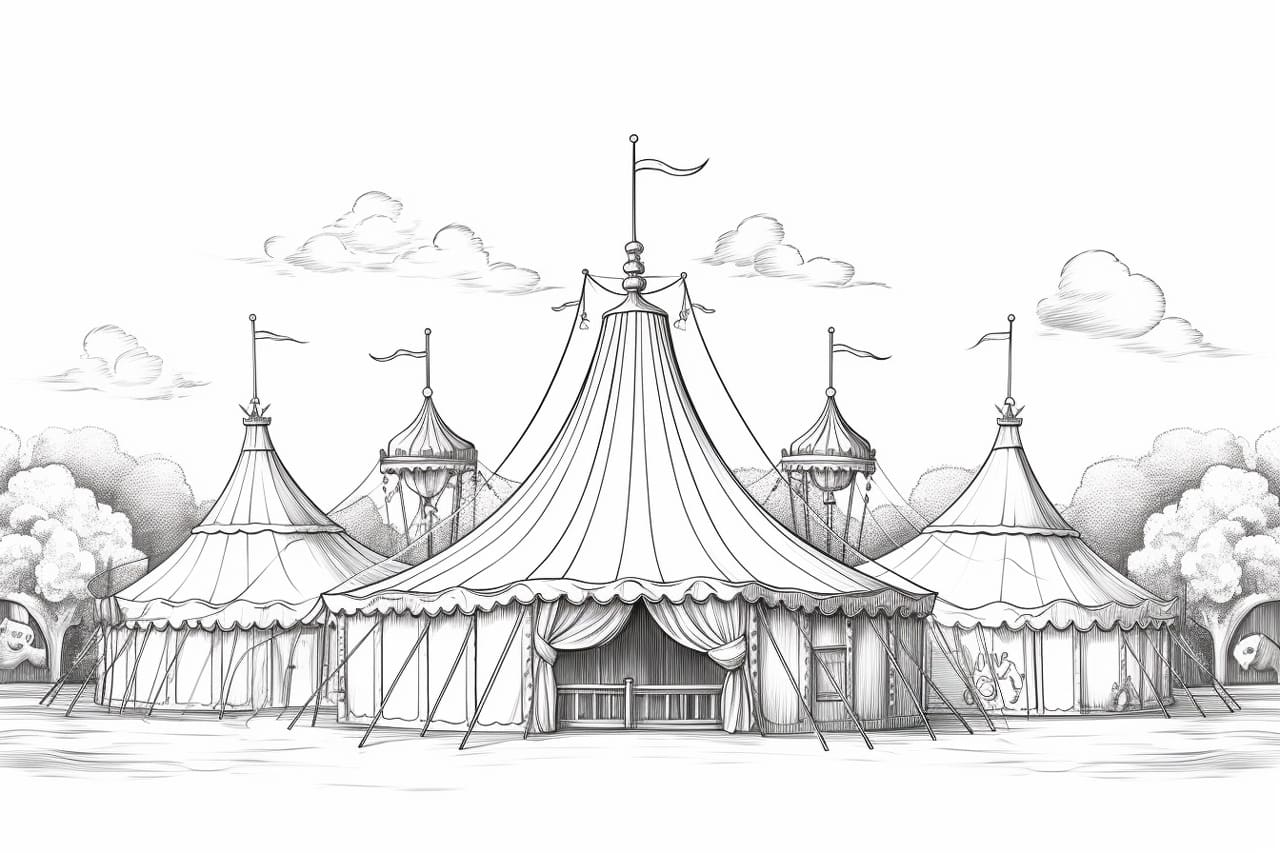
Step 1: Sketching the Circus Tent
To begin, we will create the central element of our circus scene, the tent. Start by drawing a large triangle shape in the middle of your paper, slightly slanted to one side. This will resemble the top of the tent. Then, draw two vertical lines extending downwards from each side of the triangle to form the tent’s support poles. Finally, add some curves at the bottom to represent the ground around the tent.
Step 2: Adding Details to the Tent
In this step, we will add some details to make the tent more interesting. Start by drawing a scalloped edge along the bottom of the tent. This will give it a festive look. Next, draw horizontal lines across the tent to represent different layers of fabric. Add some patterns or stripes if you like, to make it more appealing. Finally, draw a flag at the top of the tent by adding small rectangles and triangles.
Step 3: Drawing the Circus Ring
Now, let’s draw the circus ring inside the tent. Draw a smaller circle in the center of the tent, leaving enough space around it for performers to move. This circle will define the stage where all the circus acts take place.
Step 4: Adding Circus Props
To make our circus scene more vibrant, let’s add some props around the circus ring. Draw a big barrel on one side of the ring and a wooden ladder on the other side. These props are often used by circus performers to showcase their skills. You can also draw additional props like juggling clubs, hoops, or even a trapeze, depending on your preference.
Step 5: Sketching Circus Performers
In this step, we will start adding circus performers to our scene. Feel free to get creative and draw different types of performers such as acrobats, clowns, jugglers, or animal trainers. Start by sketching their basic shapes and poses. Pay attention to proportions and balance, as these are important elements in capturing the dynamism of the circus.
Step 6: Adding Details to the Performers
Now it’s time to add details to our circus performers. Define their facial features, hair, and costumes. Use reference images or your imagination to add unique features and accessories that reflect the essence of each performer. Pay attention to small details such as buttons, ribbons, or ruffles that will make your drawing more delightful.
Step 7: Outlining and Refining
Once you are satisfied with the overall composition and details of your circus scene, it’s time to refine your drawing. Go over your initial sketches with a darker pencil or pen to create a bold outline. This will make your drawing stand out and give it a more finished look. Pay attention to important lines and features, ensuring they are well-defined and visually appealing.
Step 8: Adding Color (Optional)
If you prefer a colorful circus scene, now is the time to grab your colored pencils or markers. Start by adding a base color to each element of your drawing, keeping in mind light and shadow. Then, gradually layer on additional colors to create depth and dimension. Experiment with different color combinations to make your circus illustration vibrant and eye-catching.
Conclusion
Congratulations! You have successfully created a lively circus scene through this step-by-step drawing tutorial. By following the instructions and adding your own creative touches, you have brought the excitement of the circus to life on paper. Remember to experiment and have fun as you explore the world of drawing. Now go showcase your masterpiece and let your imagination run wild!