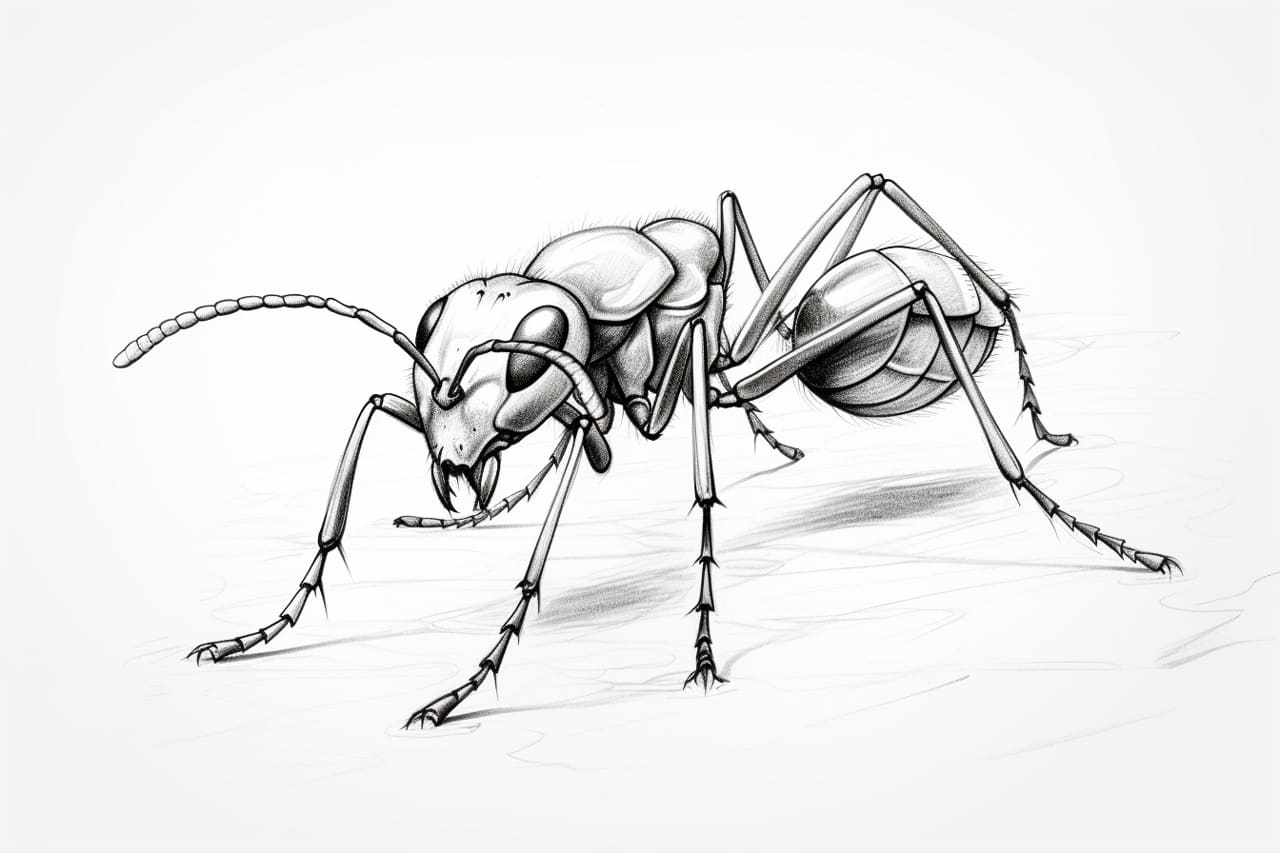
Ants are fascinating and industrious creatures that can be found in various parts of the world. They come in different shapes and sizes, making them an interesting subject to draw. In this article, we will guide you through the process of how to draw an ant step by step. Whether you are a beginner or an experienced artist, this tutorial will help you bring these tiny insects to life on paper.
Materials Required
Before we begin, make sure you have the following materials ready:
- Paper: Choose a good quality drawing paper that is suitable for your preferred medium. A smooth surface will allow for better detailing.
- Pencil: Use a pencil for the initial sketch and outlining. Choose one that is easy to erase, such as an HB or 2B pencil.
- Eraser: Keep a soft eraser handy to correct any mistakes or smudges.
- Fine-tip Pen: A fine-tip pen or a fine liner will be useful for adding intricate details and defining the outlines.
- Colored Pencils or Markers (Optional): If you want to add some color to your drawing, have colored pencils or markers of your choice available.
Now that you have gathered your materials, let’s get started on drawing an ant.
Step 1: Basic Shapes
Begin by lightly sketching the basic shapes that make up the body of the ant. Start with a large oval shape for the thorax, which is the middle part of the ant’s body. Then, draw a smaller oval shape for the head, attached to the thorax. Finally, add a smaller oval shape at the rear end of the thorax for the abdomen.
Step 2: Legs and Antennae
Next, we will draw the legs and antennae of the ant. From the lower part of the thorax, extend six straight lines for the legs. Make sure to vary the length and angles of the lines to create a natural pose. At the end of each leg, draw small ovals for the feet.
For the antennae, starting from the upper portion of the ant’s head, draw two curved lines that gradually taper as you move outward. Add small ovals at the tips of the antennae to represent the sensory receptors.
Step 3: Eyes and Mouthparts
Now, we will add the eyes and mouthparts of the ant. On the ant’s head, draw two small circles for the eyes. Position them slightly towards the sides to give the ant a wide field of vision. Within each eye, draw a smaller circle to represent the pupil.
Below the eyes, draw a small curved line to indicate the ant’s mouth. Add a few short lines within the mouth to suggest the mandibles.
Step 4: Body Details
To give the ant more definition, we will add some details to its body. Starting from the upper portion of the thorax, draw curved lines that follow the contour of the oval shape. These lines represent the segments of the ant’s exoskeleton. Repeat this step for the abdomen as well. Add smaller curved lines within each segment to indicate the division.
Step 5: Texturing
To add texture to the ant’s body, gently shade the segments using light strokes. This will create a subtle illusion of depth and dimension. Pay attention to the areas where the segments meet, as they tend to be darker. Leave some areas lighter to achieve a contrast.
Step 6: Outline and Refine
Now that the main structure of the ant is complete, go over your sketch with a fine-tip pen or fine liner. Trace the outlines of the body, legs, antennae, and other details. Be mindful of the thickness and consistency of your lines, as they can greatly impact the overall appearance of your drawing.
After outlining, erase any unnecessary guidelines and smudges. This will give your drawing a clean and polished look.
Step 7: Color (Optional)
If you prefer a colored drawing, this is the step where you can bring your ant to life. Use colored pencils or markers to add color to different parts of the ant. Observe the colors of ants in real life or use your imagination to give your ant a unique color scheme.
Experiment with different shading techniques and layering to create depth and variation in the colors. Pay attention to light and shadow to make your drawing more realistic.
Conclusion
Drawing an ant may seem challenging at first, but by breaking it down into simple steps, you can create a detailed and accurate representation. Remember to take your time, observe the characteristics of ants, and enjoy the process of bringing these fascinating creatures to life on paper.
In this tutorial, we discussed the step-by-step process of drawing an ant, from sketching the basic shapes to adding details and color. By following these instructions and using your creativity, you can create a beautiful drawing of an ant that showcases your artistic skills.
So, grab your materials, get ready to draw, and let your imagination soar as you bring an ant to life on paper!