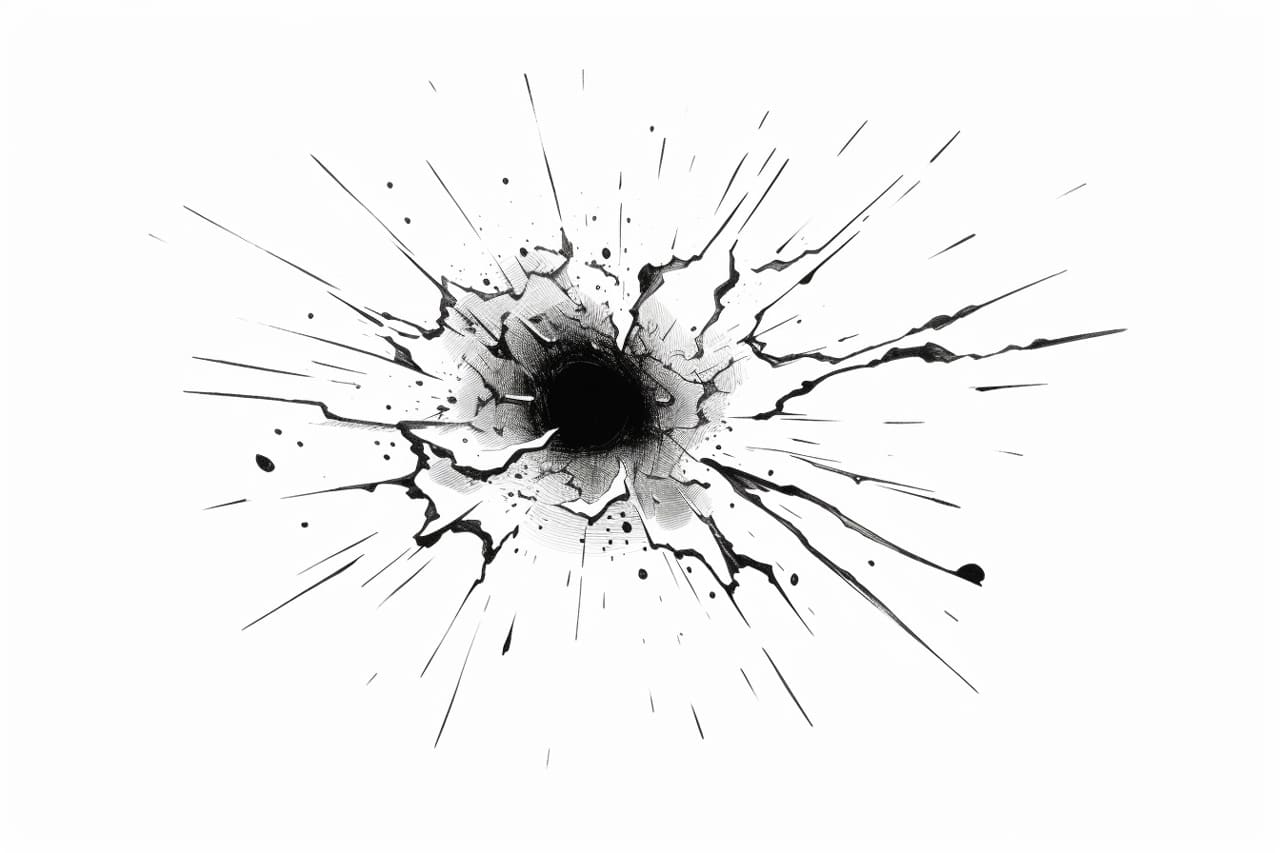
Welcome to this step-by-step guide on how to draw a bullet hole. Whether you are an aspiring artist or enjoy doodling, this tutorial will help you create an impressive bullet hole drawing that adds depth and realism to your artwork. So, grab your pencils, and let’s get started!
Materials Required
Before we begin, make sure you have the following materials ready:
- Drawing paper or sketchbook
- Pencils (HB, 2B, 4B)
- Eraser
- Blending stump (optional)
- Reference image of a bullet hole (for inspiration)
Now that you have everything you need, let’s dive into the step-by-step process of drawing a bullet hole.
Step 1: Sketch the Outline
Start by lightly sketching the basic shape of the bullet hole on your paper. You can use a reference image to help you visualize the details. Remember to keep the outline simple and clean, as we will be adding more details in the following steps.
Step 2: Add Texture
To give the bullet hole a realistic texture, start by adding some irregular lines around the edges of the outline. These lines should resemble cracks or fissures. Vary the length and thickness of the lines to create a natural look. This step will add depth and dimension to your drawing.
Step 3: Shade the Bullet Hole
Using a soft pencil (2B or 4B), start shading the interior of the bullet hole. Pay attention to the lighting in your reference image and replicate it in your drawing. Begin by shading the darkest areas and gradually build up the tones with gentle strokes. Remember to leave some areas lighter to create highlights and add realism.
Step 4: Add Details
To make the bullet hole look more authentic, it’s important to add small details. Using a sharp pencil (HB or 2B), lightly sketch tiny cracks and fractures on the edges of the hole. These details will enhance the overall illusion of damage and make your drawing more realistic.
Step 5: Create Depth
To create the illusion of depth, use a blending stump or your finger to softly blend the shading inside the bullet hole. This technique will smoothen the tones and add a subtle gradient effect. Be careful not to over-blend and lose the defined edges of the bullet hole.
Step 6: Darken the Edges
To make the bullet hole stand out, darken the edges with a soft pencil (4B or 6B). This will create a sense of depth and make the hole look more embedded in the surface. Gradually build up the darkness by layering and blending the graphite until you achieve the desired effect.
Step 7: Add Splatter Effect
To add extra realism to your bullet hole drawing, you can create a splatter effect around the hole. Dip an old toothbrush into a small amount of diluted black ink or acrylic paint. Position the toothbrush close to the paper and run your finger or a brush handle across the bristles, causing the ink/paint to splatter onto the paper. Experiment with the intensity and direction of the splatters until you are satisfied with the effect.
Step 8: Final Touches
Inspect your drawing and make any necessary adjustments. Add highlights or shadows as needed to enhance the overall realism. Clean up any smudges or unwanted marks using an eraser. Take your time to ensure a clean and polished finished drawing.
Conclusion
Congratulations! You’ve successfully learned how to draw a realistic bullet hole. By following these step-by-step instructions, you can create stunning bullet hole drawings that add a touch of drama to your artwork. Remember to practice regularly and experiment with different techniques to further improve your skills. So, grab your pencils and start creating impressive bullet hole drawings today!