Learning how to Draw a bonfire can be a fun and exciting activity that allows you to explore your creativity while capturing the warm and vibrant essence of a fiery blaze. Whether you’re an experienced artist or just starting out, this step-by-step guide will walk you through the process of creating a realistic and visually appealing bonfire drawing. So grab your pencil and paper, and let’s get started!
Materials Required
To create your bonfire drawing, you will need the following materials:
- A sheet of paper
- A pencil (preferably a medium or soft graphite pencil)
- An eraser
- Colored pencils or markers (optional, for adding color to your drawing)
Now that you have your materials ready, let’s dive into the steps of drawing a bonfire.
Step 1: Outline the Bonfire
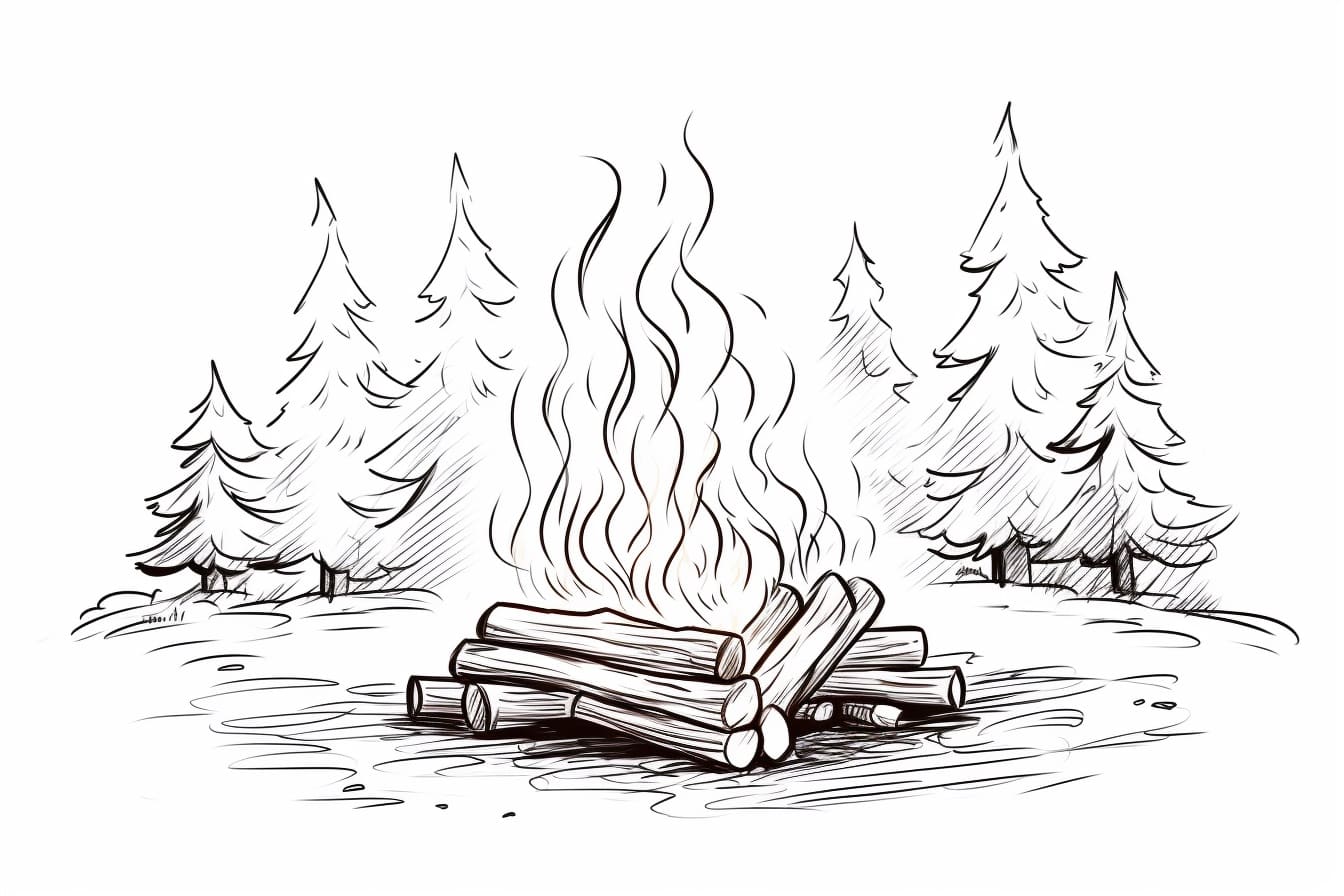
Start by sketching the outline of the bonfire using light and loose pencil strokes. Begin at the bottom of your paper and draw a slightly curved line to represent the ground. Then, draw a rough triangular shape to form the base of the bonfire. Don’t worry about adding too many details at this stage, as we will refine the shape in the subsequent steps.
Step 2: Add Logs
Next, draw the logs that form the structure of the bonfire. Begin by sketching a couple of vertical lines from the base of the bonfire, indicating the first two logs. Vary the length and thickness of these lines to create a more organic and realistic look. Then, add more logs around the base using a combination of vertical and slanted lines. Remember to leave gaps between the logs to represent the spaces where the flames will emerge.
Step 3: Define the Flames
Now it’s time to depict the flames of the bonfire. Start by drawing the base of the flames as a series of wavy lines that extend from the gaps between the logs. Make sure the lines are irregular and vary in length to give the flames a natural appearance. As you move upward, gradually increase the length of the lines to depict the rising flames. You can also add some smaller flames at the base for a more realistic effect.
Step 4: Refine the Bonfire Shape
Take a closer look at your bonfire outline and make any necessary adjustments to refine its shape. Pay attention to the curves and angles of the logs, ensuring they look natural and well-proportioned. You can also add more details like cracks and knots on the surface of the logs to enhance the overall texture.
Step 5: Add Details to the Flames
To bring the flames to life, it’s important to add some detail and depth. Begin by darkening the lines of the flames, making them thicker towards the base and tapering towards the tip. This will create a gradient effect, giving the flames a sense of volume and movement. You can also use your eraser to lighten some areas and create highlights within the flames.
Step 6: Shade the Logs
Now, let’s add some shading to the logs of the bonfire. Start by determining the light source in your drawing, which will influence the placement of shadows. Generally, the light source should be from the top or side, casting shadows on the undersides and sides of the logs. Use your pencil to add shading to these areas, gradually building up the tone to create depth and dimension. Blend the shading with your finger or a blending stump for a smoother transition.
Step 7: Create the Background
To complete your bonfire drawing, consider adding a background that complements the fiery atmosphere. You could sketch a simple landscape with trees or mountains, or even use colored pencils or markers to add a vivid sunset or a starry night sky. Experiment with different textures and colors to find the effect that resonates with you.
Conclusion
Drawing a bonfire can be a rewarding and enjoyable experience. By following these step-by-step instructions, you can create a realistic and captivating bonfire drawing that captures the warmth and energy of the fire. Remember to take your time, practice, and have fun with it. Now, go ahead and unleash your creativity as you bring this fiery scene to life on paper!