Welcome to this step-by-step guide on how to draw a Charizard! Whether you’re a beginner or an experienced artist, you’ll find this tutorial helpful in creating your own impressive rendition of this iconic Pokémon. So, grab your pencil and let’s get started!
Materials Required
To begin, gather the following materials:
- A piece of paper
- Pencil
- Eraser
- Fine-tipped black marker or pen
- Colored pencils or markers (optional)
Now that you have all your materials ready, let’s dive into the steps of drawing Charizard!
Step 1: Basic Shapes
Start by drawing a large circle in the middle of your paper. This will be the base for Charizard’s head. Then, draw a slightly curved line extending from the bottom of the circle, creating the neck. Next, draw a smaller circle on the upper right side of the head circle to represent the snout. Finally, add two small circles below the head circle for the body.
Step 2: Facial Features
Inside the snout circle, draw a horizontal line for the mouth. Add a small triangle shape at the tip of the snout for the nose, and two tiny circles above it for the nostrils. Now, let’s work on the eyes. Draw two large oval shapes on the head circle, leaving a small gap in between for the brow ridge. Inside each eye, draw a smaller oval for the iris, leaving a small white highlight at the top-right side of each iris.
Step 3: Detailing the Head
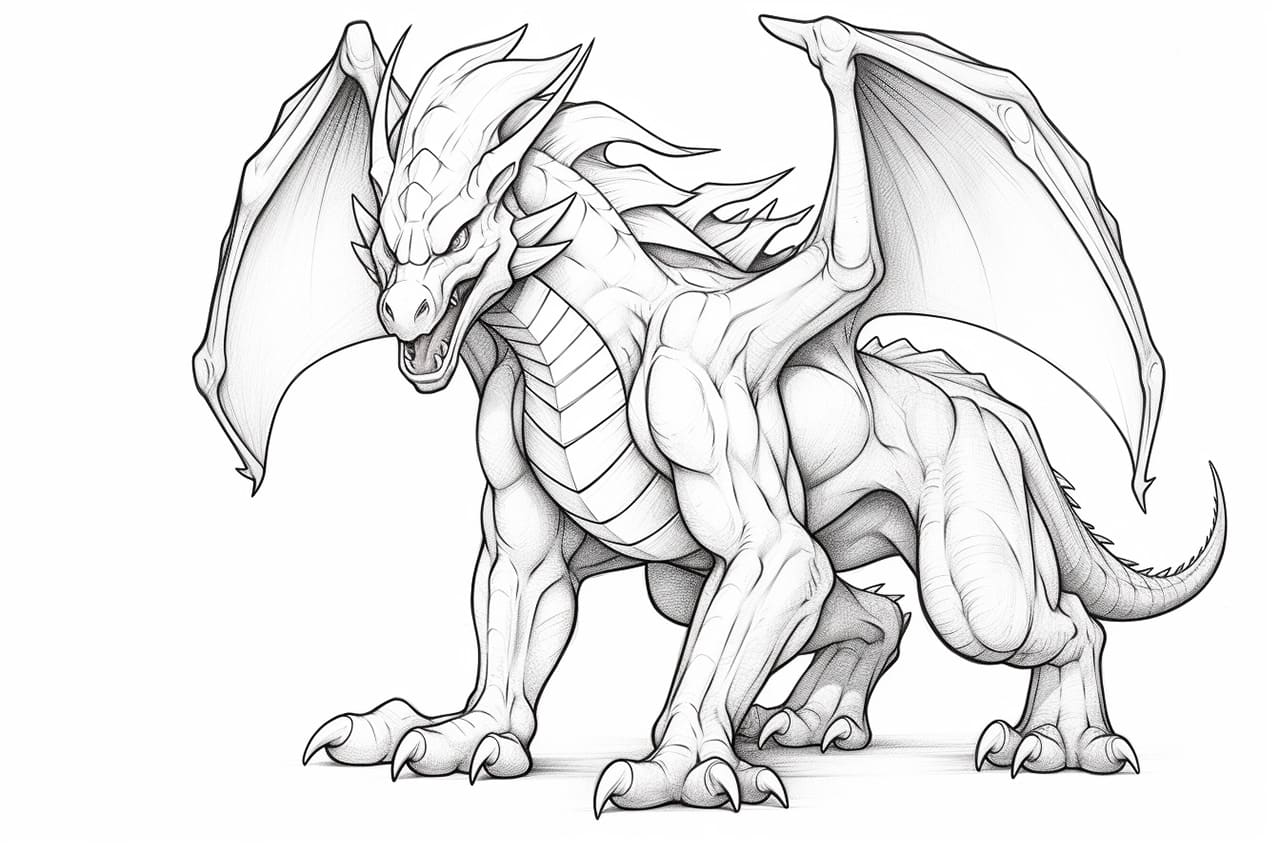
To give Charizard its iconic fiery look, draw some flames on either side of the head. Start by drawing a wavy line extending from the back of the head, curving upwards at the end. Repeat this step on the other side, making sure the flames are symmetrical. Next, draw a series of spikes along the top of Charizard’s head and neck, curving upwards. Finally, add some small teeth along the bottom of the mouth, showing a hint of its fierce nature.
Step 4: Wings and Arms
Moving on to the body, draw the first wing on the left side. Start by drawing a curved line that starts from the left side of the body circle and extends outwards. Then, draw a series of large, triangular-shaped feathers along the top of the line, creating the wing structure. Repeat this step on the right side, making sure the wings are symmetrical. Now, let’s add the arms. Draw two slightly curved lines extending from the body circle, ending with small circles representing the hands.
Step 5: Legs and Tail
Let’s bring Charizard to life by drawing its legs and tail! Start with the hind leg on the left side. Draw two slightly curved lines extending from the body circle, creating the leg structure. Repeat this step on the right side, making sure the legs are symmetrical. Then, draw the tail by extending a curved line from the back of the body circle, curving upwards at the end. Add some small spikes along the top of the tail to give it texture.
Step 6: Refining and Inking
Now that the basic structure of Charizard is complete, refine the lines and add details to enhance its appearance. Erase any unnecessary construction lines and darken the main outlines of Charizard’s body using your pencil. Once you’re satisfied with the pencil outline, go over the final lines with a fine-tipped black marker or pen. Take your time and make sure to keep the lines smooth and clean.
Step 7: Coloring (Optional)
If you want to add color to your artwork, now is the perfect time to do so! Use colored pencils or markers to bring Charizard to life. Charizard’s body is primarily orange with a cream-colored underbelly. Its wings have a gradient of orange and yellow, with purple hues on the top. The eyes are bright blue, and the flames are a vibrant yellow or red. Let your creativity guide you as you choose the colors and shading for your Charizard drawing.
Conclusion
Congratulations! You have successfully learned how to draw Charizard step-by-step. By following these simple instructions and using your own artistic flair, you can create a stunning Charizard drawing that showcases your skills. Keep practicing, exploring different styles, and adding your personal touch to your artwork. With time and dedication, your drawing abilities will continue to grow and improve. Enjoy the process and have fun capturing the fiery essence of Charizard on paper!