Dragons have always captured our imaginations with their fierce and majestic presence. One type of dragon that stands out is the fire dragon, with its scorching flames and powerful wings. If you’ve ever wanted to bring this mythical creature to life on paper, then you’re in luck! In this step-by-step guide, I will show you how to draw a fire dragon from start to finish. Grab your art supplies and let’s get started!
Materials Required
Before we begin, make sure you have the following materials handy:
- Pencil
- Eraser
- Drawing paper
- Fine-tipped black pen or marker
- Colored pencils or markers (red, orange, yellow, and black)
- Reference images of dragons (optional, but helpful for inspiration)
Now that you have everything you need, let’s dive into the exciting process of drawing a fire dragon!
Step 1: Basic Shape
Start by lightly sketching a large oval shape for the dragon’s body. This oval will serve as the foundation for the dragon’s torso. Don’t worry about making it perfect just yet; we’ll be adding details later on.
Step 2: Head and Neck
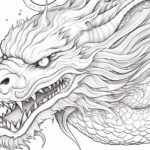
Add a smaller oval along the top curve of the body for the dragon’s head. Connect the head and body with a curved line to create the neck. Remember, fire dragons often have long, slender necks.
Step 3: Legs and Tail
Draw four lines extending from the bottom of the oval body to represent the dragon’s legs. Each leg should be slightly angled to give the dragon a dynamic pose. Add a long, curved line at the end of the body to form the tail.
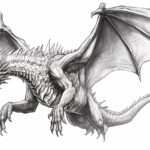
Step 4: Wings
Draw two triangular shapes on either side of the body to represent the wings. Make sure the wings are proportionate to the body, with the tips reaching slightly below the dragon’s tail.
Step 5: Details
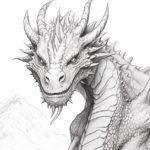
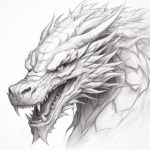
Now it’s time to add some details to your dragon. Sketch the facial features, such as the eyes, nostrils, and sharp teeth. Don’t forget to give your dragon some horns and spikes along its back for a fearsome appearance.
Step 6: Flames
To create the illusion of fire, draw fiery shapes around the body of your dragon. These shapes should be elongated and pointed, resembling flames. Be creative with the placement of the flames, allowing them to wrap around the dragon’s body and wings.
Step 7: Outlining
Using a fine-tipped pen or marker, carefully trace over your pencil lines to create a more defined outline. Pay close attention to the dragon’s features, making them bolder and sharper. Once you’re done outlining, let the ink dry completely before erasing any visible pencil marks.
Step 8: Coloring
Now comes the most exciting part – coloring your fire dragon! Start by coloring the body in shades of red, orange, and yellow, gradually transitioning from one color to another. Use darker shades along the back and tail to create depth.
Next, color the flames in vibrant shades of red, orange, and yellow. You can also add some hints of black to make the flames appear even hotter. Experiment with different coloring techniques like blending and shading to bring your dragon to life.
Step 9: Adding Texture
To enhance the dragon’s scales and give it a more realistic look, add texture using the tip of your colored pencil or marker. Use short, curved lines to create the illusion of overlapping scales throughout the dragon’s body. This step may require patience and attention to detail, but it will greatly enhance the overall effect.
Step 10: Final Touches
Take a step back and assess your drawing. Are there any areas that need refinement or adjustment? Add any final details or shading to bring your fire dragon to its full potential. Remember, the key to creating a stunning dragon drawing is in the details!
Conclusion
Congratulations on completing your fire dragon drawing! By following these step-by-step instructions, you’ve learned how to capture the fiery essence of this majestic creature. Keep practicing, experimenting with different poses and styles, and soon you’ll be able to create your own unique dragon drawings. So grab your art supplies and let your imagination soar as you continue your artistic journey!