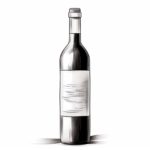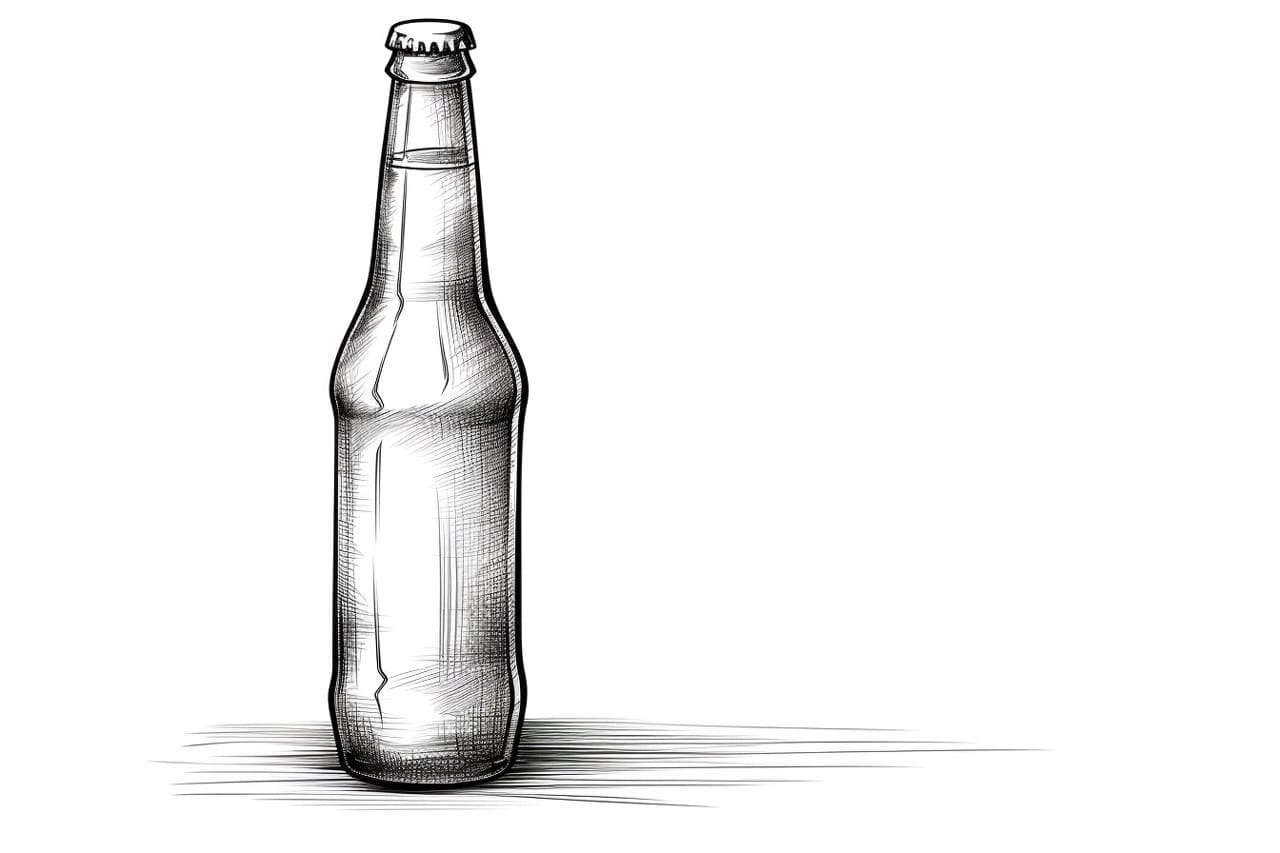
Drawing a beer bottle may seem daunting, but with the right guidance, anyone can create a realistic representation. In this step-by-step guide, we will walk you through the process of how to draw a beer bottle, from sketching the basic shape to adding intricate details. So grab your pencil and paper, and let’s get started!
Materials Required
Before we begin, make sure you have the following materials:
- Drawing paper: Choose a smooth, high-quality paper that is suitable for sketching and shading.
- Pencils: Have a range of pencils with different lead hardness, such as HB, 2B, 4B, and 6B.
- Eraser: Keep a soft eraser handy for making corrections and refining your drawing.
- Ruler: A straight ruler will help you maintain accurate proportions.
- Pencil sharpener: Make sure your pencils are sharp to achieve precise lines and details.
- Reference image: It’s always helpful to have a reference image of a beer bottle to guide your drawing.
Now that you have all the necessary materials, let’s dive into the step-by-step process of drawing a beer bottle.
Step 1: Outline the Basic Shape
Start by lightly sketching the basic shape of the beer bottle. Use a light pencil (such as an HB) to ensure that you can easily erase any mistakes or adjustments later. Begin with a vertical line that represents the center of the bottle. Then, draw a curved line around it to form the body of the bottle. Pay attention to the proportions and curves of the reference image as you outline.
Step 2: Add the Neck and Cap
Next, add the neck of the beer bottle. Draw a slightly curved line extending from the top of the body towards the top of the page. Then, draw a smaller circle on the top of the neck to represent the cap. Make sure the cap is centered and proportional to the bottle.
Step 3: Draw the Base
Now, let’s focus on the base of the bottle. Draw a horizontal line at the bottom of the body, connecting the two sides. Then, extend two diagonal lines from each end of the horizontal line to create a trapezoidal shape. This shape will serve as the foundation for the bottle.
Step 4: Refine and Adjust the Proportions
Take a step back and observe your initial sketch. Compare it to the reference image and make any necessary adjustments to the proportions and curves. Use your ruler to check if the lines are straight and parallel. Erase any unwanted lines or mistakes carefully, maintaining the basic shape you have outlined.
Step 5: Add Details
Now that we have a solid foundation, it’s time to add the details that will make your beer bottle look realistic. Start by sketching the label or logo on the body of the bottle. Pay attention to the size, placement, and orientation of the label. Use your darker pencils (2B or 4B) to create bolder lines for the logo.
Next, add the texture and shading to the bottle. Observe how light falls on the reference image and replicate it in your drawing. Use light, hatching strokes to create shading and depth. Pay close attention to the highlights and shadows on the bottle, which will bring out its form and make it appear three-dimensional.
Step 6: Refine and Shade
Take a moment to review your drawing and refine any areas that may need more attention. Use your pencil eraser to create highlights by gently lifting off the graphite from areas that need to appear brighter. This technique can be particularly effective for adding shine to the bottle’s surface.
Continue adding shading to create depth and dimension. Use a combination of light and dark pencil strokes to achieve realistic gradients. Take your time and blend the different shades smoothly to avoid any harsh transitions.
Step 7: Finalize the Drawing
Now that you have added all the necessary details, take a step back and evaluate your drawing as a whole. Make any final adjustments or corrections to ensure that your beer bottle looks as realistic as possible. Pay attention to the overall composition, proportions, and shading.
Conclusion
Drawing a beer bottle may seem challenging, but by following these step-by-step instructions, you can create a realistic representation. Remember to take your time, observe details, and make adjustments as needed. With practice, you will be able to master the art of drawing beer bottles and tackle more complex subjects.
So grab your drawing materials and start sketching! Cheers to your artistic journey of drawing a beer bottle!