Welcome to this step-by-step guide on how to draw a basketball net. Whether you’re an aspiring artist or just looking for a fun activity, drawing can be a great way to express your creativity. In this tutorial, I’ll walk you through the process of creating a realistic basketball net using simple shapes and lines. So grab your pencil and let’s get started!
Materials Required
To draw a basketball net, you will need the following materials:
- A pencil
- An eraser
- Paper
- A ruler (optional)
Now that you have your materials ready, let’s begin creating a vibrant basketball net.
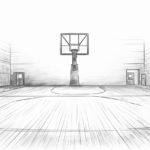
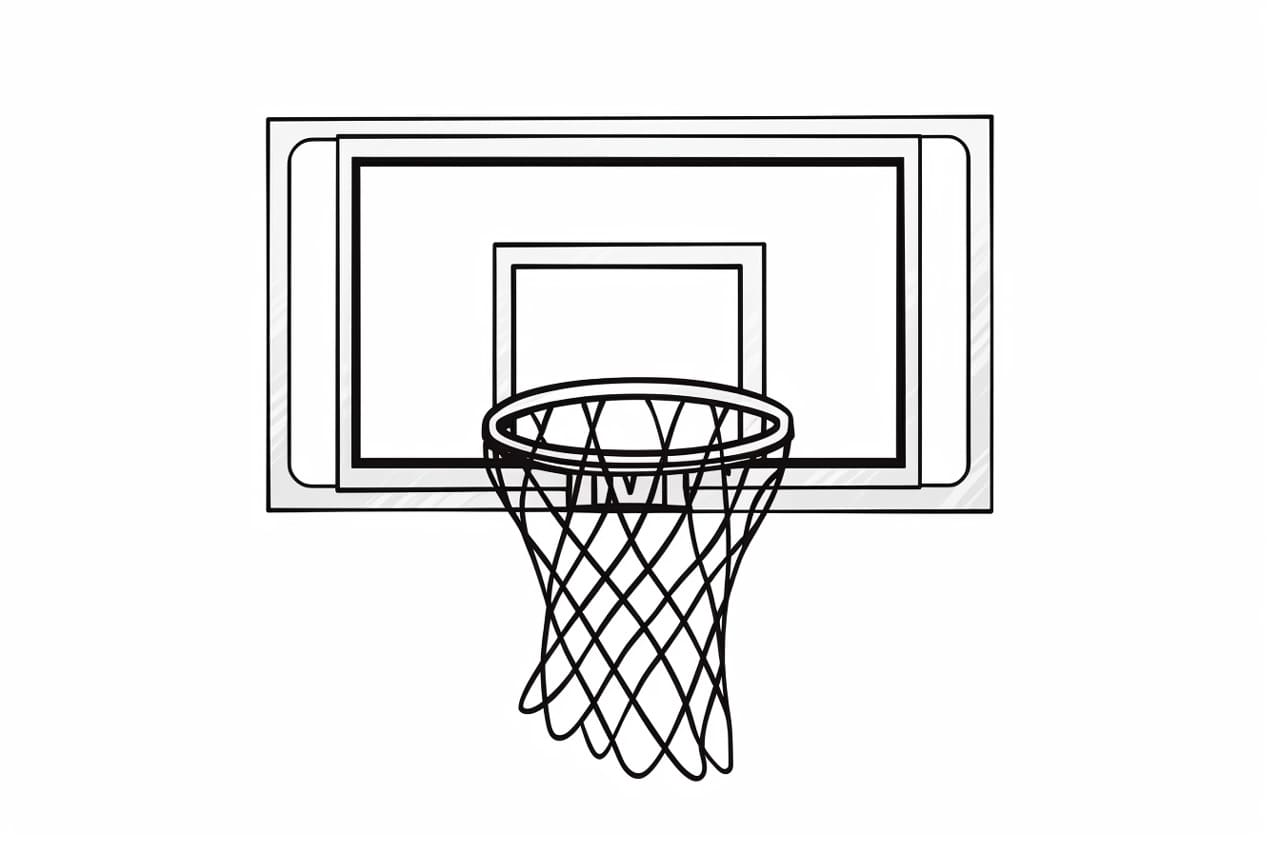
Step 1: Draw the Backboard
Start by drawing a rectangular shape to represent the backboard of the basketball net. Use your ruler to ensure the lines are straight and even. The size of the backboard can vary, so feel free to adjust it based on your preference.
Step 2: Add the Pole
Next, draw a vertical line extending down from the bottom center of the backboard. This line will serve as the pole that supports the net. Make sure the line is straight and extends a reasonable length below the bottom edge of the backboard.
Step 3: Sketch the Hoop
Moving on to the hoop, draw a circle overlapping the top part of the backboard. The size of the circle will depend on the size of your backboard. Again, you can use your ruler to help create an accurate shape. Make sure the top part of the circle aligns with the top edge of the backboard.
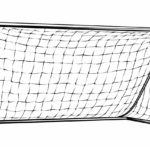
Step 4: Create the Net
Now it’s time to add the netting. Begin by sketching a series of curved lines that connect the top edge of the hoop to the bottom edge. These lines should follow the shape of the hoop and get progressively closer together towards the bottom. The netting will have a loose and flowing appearance, so don’t worry about making the lines too uniform.
Step 5: Refine the Net
To give the net a more realistic look, add some extra details. Draw small V-shaped lines along the curved lines to represent the individual strands of the net. These lines should be shorter towards the top of the net and longer towards the bottom. You can also add some shading to certain areas of the net to create depth and dimension.
Step 6: Add Shadow and Highlights
To make the drawing more dynamic, add some shadow and highlights. Shade the areas on the backboard, pole, and hoop where the light doesn’t hit as strongly. You can also add highlights to the parts of the net where the light is hitting, creating a contrast between light and shadow.
Conclusion
Congratulations on completing your basketball net drawing! Drawing can be both relaxing and rewarding, allowing you to unleash your creativity. By following these step-by-step instructions, you’ve successfully created a realistic basketball net on paper. Remember to practice regularly and experiment with different techniques to continue improving your drawing skills. Enjoy this creative journey, and keep exploring the world of art!