How to Draw a Baryonyx
Learn how to draw a realistic Baryonyx with this step-by-step guide. From basic shapes to shading and finishing touches, create a stunning dinosaur drawing.
Materials You'll Need
- Pencil
- Paper
- Eraser
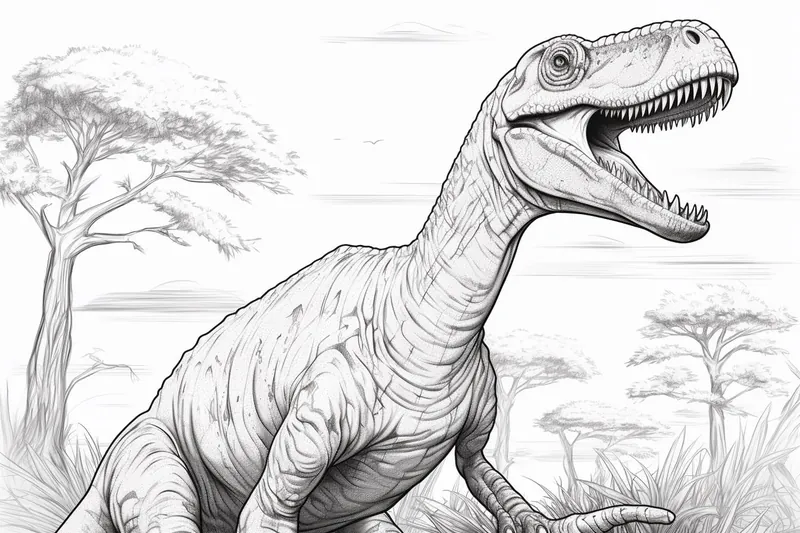
![]() Welcome to the thrilling world of drawing dinosaurs! Today, we'll embark on a creative journey to bring the mighty Baryonyx to life on paper. Known for its impressive size, long crocodilian snout, and distinctive clawed hands, the Baryonyx is a fascinating subject for any artist interested in prehistoric creatures.
Welcome to the thrilling world of drawing dinosaurs! Today, we'll embark on a creative journey to bring the mighty Baryonyx to life on paper. Known for its impressive size, long crocodilian snout, and distinctive clawed hands, the Baryonyx is a fascinating subject for any artist interested in prehistoric creatures.
In this step-by-step guide, we'll explore how to capture the essence of this ancient predator through careful sketching, dynamic shaping, and realistic shading. Whether you're a dinosaur enthusiast, a budding artist, or both, this tutorial will provide the techniques you need to illustrate the power and ferocity of this Jurassic icon.
So grab your pencils, clear some space for your prehistoric masterpiece, and let's dive into the exciting challenge of drawing the fearsome Baryonyx!
Materials Required
To draw a Baryonyx, you will need the following materials:
- Pencil: for sketching and outlining the initial shape of the dinosaur.
- Eraser: to correct any mistakes or make adjustments to your drawing.
- Paper: preferably sketch paper or drawing paper that can handle the shading and detailing required for the drawing.
- Fine-tip markers or pens: for adding details and defining the features of the Baryonyx.
- Colored pencils or markers: if you want to add color to your drawing.
- Reference images of a Baryonyx: to help you accurately depict the dinosaur's features and proportions.
With these materials, you should be able to create a detailed and accurate drawing of a Baryonyx dinosaur
How to Draw a Baryonyx: a Step-by-step Guide
Step 1: Gather Your Materials
- Get a pencil for sketching and a set of drawing pencils for shading.
- Have an eraser handy for corrections.
- Use a piece of paper or a sketchbook.
Step 2: Start with Basic Shapes
- Begin by sketching an oval for the body and a smaller oval for the head.
- Add a long, curved line for the spine and a shorter line for the tail.
Step 3: Outline the Body
- Connect the ovals with curved lines to create the body shape.
- Add a smaller oval for the hip area and connect it to the body.
Step 4: Draw the Limbs
- Sketch the upper limbs as long, curved lines attached to the body.
- Add smaller ovals for the hands and connect them to the limbs.
Step 5: Add Details to the Head
- Refine the head shape by adding a snout and eye socket.
- Draw the mouth and add teeth for a fierce look.
Step 6: Refine the Body
- Add details like scales along the body to give it texture.
- Include the claws on the feet and hands for a realistic touch.
Step 7: Shade and Add Depth
- Use your drawing pencils to shade the body, creating shadows and highlights.
- Pay attention to light source to add depth to your drawing.
Step 8: Final Touches
- Erase any unnecessary lines and refine any details that need adjustment.
- Add a background or setting to enhance your Baryonyx drawing.
Step 9: Practice and Refine
- Keep practicing drawing Baryonyx to improve your skills.
- Experiment with different poses and perspectives to enhance your drawings.
By following these steps and practicing regularly, you can create a detailed and realistic drawing of a Baryonyx.
Tip: To effectively capture the Baryonyx's unique features, start with a loose sketch using a light pencil to outline its overall shape, focusing on the elongated snout and robust body. Pay special attention to the proportions; the head should be roughly one-quarter of the body length, and the powerful arms should reflect its predatory nature. Utilize reference images to understand the subtle curves and angles of its form, particularly around the claws and tail. Once your outline is in place, gradually build up your details, like the textured scales and distinctive facial features, using finer pencils for precision. Lastly, consider layering your shading to create depth, particularly under the belly and around the limbs, which will enhance the three-dimensional quality of your drawing.
Conclusion
In conclusion, drawing a Baryonyx can be an exciting and rewarding experience for artists of all skill levels. By following the step-by-step guide and practicing key techniques such as sketching the basic shapes, adding details, and shading effectively, you can bring this prehistoric creature to life on paper. Remember to be patient with yourself, embrace mistakes as learning opportunities, and most importantly, have fun expressing your creativity through the art of drawing. With dedication and practice, you can master the art of capturing the unique characteristics of the Baryonyx and other fascinating subjects in your artwork.
Fun Facts About Baryonyxes
- Baryonyx was a theropod dinosaur that lived during the Early Cretaceous period, around 125 million years ago.
- Its name, Baryonyx, means "heavy claw" in reference to the large claw on its first finger, which measured up to 12 inches in length.
- Baryonyx is known for having a long, crocodile-like snout, which suggests it may have been a piscivore, primarily feeding on fish.
- It is one of the few known dinosaurs that had evidence of fish scales and bones in its stomach contents, supporting the theory that it was a fish-eating dinosaur.
- Baryonyx had a sail-like structure on its back formed by elongated neural spines, similar to other spinosaurid dinosaurs.
- It is estimated that Baryonyx grew to around 25-31 feet in length and weighed between 1.2 to 2 tons.
- Baryonyx had long, slender teeth that were ideal for catching and holding onto slippery fish, further supporting its piscivorous diet.
- The discovery of Baryonyx in the UK in 1983 was significant because it was one of the first evidence of a large theropod dinosaur in Europe.
- Baryonyx is closely related to other spinosaurid dinosaurs like Spinosaurus and Suchomimus, which also had adaptations for a semi-aquatic lifestyle.
- The study of Baryonyx has provided valuable insights into the diversity and adaptations of theropod dinosaurs, showcasing the variety of ecological niches they occupied during the Mesozoic era.
Suggestions for Scenes and Settings for Baryonyx Drawings
Of course! Here are some specific suggestions for scenes and settings featuring Baryonyx in your drawings:
- Prehistoric Swamp: Depict the Baryonyx wading through a murky prehistoric swamp, surrounded by ancient-looking trees, ferns, and other prehistoric plants. Add some mist or fog to create a mysterious atmosphere.
- Hunting: Show the Baryonyx stalking its prey, perhaps a group of small dinosaurs or a fish in a river. Capture the intensity and focus in its eyes as it prepares to make a strike.
- Nesting Ground: Illustrate a female Baryonyx guarding her nest filled with eggs. You can add some hatchlings peeking out of the eggs to add a touch of cuteness to the scene.
- Coastal Cliffs: Place the Baryonyx in a coastal setting, with rugged cliffs and crashing waves in the background. You can show it either resting on the cliffs or hunting for fish near the shoreline.
- Dinosaur Stampede: Create a dynamic scene of a stampede of various dinosaurs running past the Baryonyx. Capture the chaos and movement in the drawing to make it feel action-packed.
- Volcanic Landscape: Imagine the Baryonyx in a prehistoric landscape dominated by an active volcano. Show the tension and danger in the air as the volcano smolders in the background.
- Dusk or Dawn: Experiment with different lighting conditions by drawing the Baryonyx at dusk or dawn. Play with the warm, golden hues of the setting sun or the soft, cool light of early morning to set the mood.
- Fossil Dig Site: Place the Baryonyx in a scene where paleontologists are excavating its fossilized remains. You can show a mix of modern tools and equipment alongside the ancient creature for an interesting contrast.
Remember to have fun and let your imagination run wild as you bring these scenes to life in your drawings!