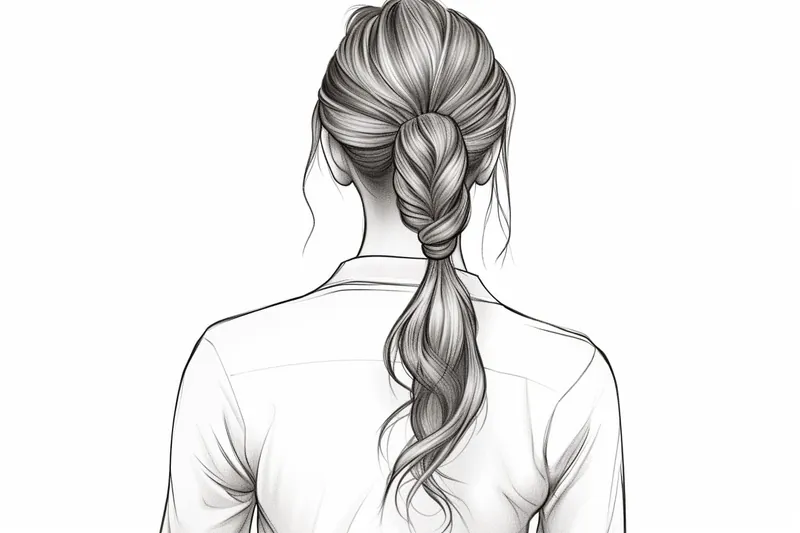
How to Draw a Back
Learn how to draw a realistic back with this step-by-step tutorial. Capture the contours and add depth to your drawings with these expert tips.

Materials You'll Need
- Pencil
- Paper
- Eraser
Mastering the human body is a cornerstone of becoming a skilled artist, and understanding how to draw the back is an essential part of that journey. The back is a fascinating area of human anatomy—full of flowing lines, powerful muscles, and subtle curves that change dramatically depending on posture, tension, and movement. Capturing these forms correctly adds realism, strength, and believability to your figure drawings.
In this tutorial, we'll focus on how to draw a back, covering key aspects like proportions, muscle structure, and shading techniques to create depth and form. Whether you're a beginner aiming to build a solid foundation or an experienced artist looking to sharpen your anatomy skills, these clear, step-by-step instructions will help you confidently draw the human back. Grab your pencils and sketchbook—let's dive into the art of bringing the human form to life!
Materials Required
Before we begin, make sure you have the following materials handy:
- Drawing paper or sketchbook
- Pencil (preferably a range of graphite pencils, such as HB, 2B, 4B, and 6B)
- Eraser (a kneaded eraser works well for this type of drawing)
- Blending tools (tortillons or blending stumps)
- Reference photo or model (for accurate representation)
With these materials ready, let's dive into the steps for drawing a back.
Step 1: Reference Observation
Start by closely observing your reference photo or model. Take note of the back's proportions, angles, and muscle structure. Pay attention to the curves and contours, as well as any unique features. This observation will help you capture the essence of the back in your drawing.
Step 2: Basic Shapes
Begin your drawing by lightly sketching the basic shapes that make up the back. Start with a vertical line to represent the spine. Add horizontal lines to indicate the shoulder blades and waistline. These shapes act as a guide for the overall proportions of the back.
Step 3: Outline the Shoulders
Next, outline the shoulders by sketching two triangular shapes on either side of the spine. These triangles represent the shoulder blades, which are an important feature of the back.
Step 4: Define the Spine
Refine the shape of the spine by adding curves and contours. Remember that the spine is flexible, so add slight curves to make it appear natural. Pay attention to the subtle variations in the width of the spine as it goes down the back.
Step 5: Add Muscle Definition
Using your reference, start adding the muscle groups to the back. Begin with the trapezius muscles, which run from the neck to the mid-back. Then, add the deltoid muscles on the shoulders and the latissimus dorsi muscles on the sides of the back. Take your time with this step, as accurately representing the muscle definition is crucial for a realistic drawing.
Step 6: Shading and Value
Tip: As you work through the steps of drawing the back, consider using a light touch when sketching initial shapes and outlines; this allows for easier adjustments as you refine your drawing. Don't hesitate to erase and modify the basic forms to achieve accurate proportions and contours, particularly around the shoulder blades, which are crucial for adding depth and realism to your figure. Regularly stepping back to assess your work can also help you maintain perspective and make necessary corrections.
Now it's time to add shading and value to your drawing. Start by identifying the primary light source in your reference photo or model. Imagine how the light falls on the back and create gradations of value accordingly. Use a range of graphite pencils to achieve different levels of darkness and depth. Begin with lighter strokes and gradually build up the darker areas.
Step 7: Blending and Smoothing
To create a seamless transition between values, use blending tools such as tortillons or blending stumps. Gently blend the graphite to create smooth gradients and soften any harsh lines or edges. Take your time with this step, as blending is essential to achieve a realistic and three-dimensional effect.
Step 8: Refine Details
Once you have established the basic shading and value, refine your drawing by adding finer details. Pay attention to the small muscle groups, wrinkles, or skin texture. Use your eraser to lighten certain areas and create highlights, adding further depth to your drawing.
Step 9: Final Touches
Take a step back and evaluate your drawing as a whole. Make any necessary adjustments to ensure the proportions and details are accurate. Add any final touches you feel are needed, such as additional shading or highlights.
Mistake Alert: A common mistake when drawing the back is underestimating the importance of the shoulder blades in defining the overall shape and structure. Beginners often flatten the back, neglecting the subtle curves and contours that the shoulder blades create, which can lead to stiff and unrealistic drawings. This usually happens because artists may focus too much on the spine or the outer lines, forgetting that the shoulder blades provide depth and movement. To avoid this pitfall, take the time to study the anatomy of the shoulder blades and how they interact with the spine and ribcage. Use reference images to observe these connections and practice sketching the back with an emphasis on how the shoulder blades rise and fall, giving your figure a more natural and dynamic appearance.
Conclusion
Drawing the human body can be a challenging yet rewarding experience. By following these step-by-step instructions, you've learned how to draw a realistic back. Remember to practice regularly and observe the human form in various poses and lighting conditions. With time and patience, you'll continue to improve your artistic skills. So grab your materials and start exploring the beauty of the human body through your drawings!
Gallery of Back Drawings

