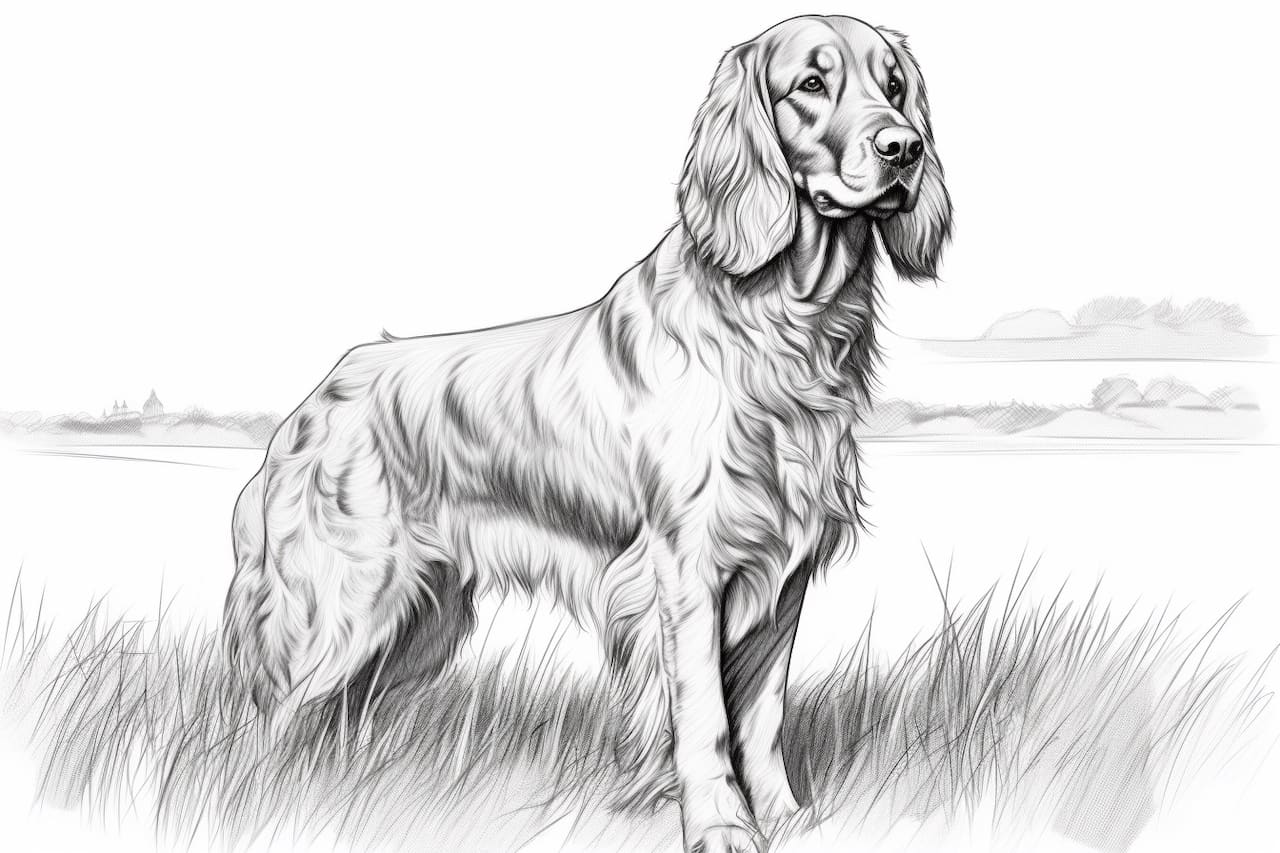
Are you a fan of Irish Setters and want to learn how to draw them? Look no further! In this step-by-step guide, we will walk you through the process of how to draw an Irish Setter, capturing its distinctive features and elegant posture. Whether you are a beginner or an experienced artist, follow along with these instructions, and soon, you’ll have a beautiful representation of this beloved dog breed. So, let’s grab our pencils and get started!
Materials Required
Before we dive into the step-by-step instructions, let’s gather the materials you’ll need to draw an Irish Setter:
- Drawing paper or sketchbook
- Pencils of varying hardness (HB, 2B, 4B, and 6B are recommended)
- Eraser
- Sharpener
- Blending stump or tortillon (optional)
- Reference photo of an Irish Setter
Make sure your pencils are sharp, your eraser is clean, and you have a comfortable and well-lit workspace. With your materials ready, let’s begin drawing an Irish Setter!
Step 1: Sketch the Basic Shape
Start by lightly sketching an oval shape for the head of the Irish Setter. This oval should be slightly tilted to one side, as if the dog is looking at something. Then, draw a smaller oval beneath the first one for the body. Add two angled lines for the neck and a curved line for the back. Remember, these initial lines are just guidelines, so keep them light and easy to erase later.
Step 2: Define the Proportions
Using the guidelines you sketched in the previous step, begin refining the shape of the Irish Setter. Add a snout by extending a triangular shape from the head oval, and sketch two almond-shaped eyes above the snout. The ears of an Irish Setter are long and floppy, so draw two curved lines on the sides of the head oval.
Now, outline the body using the smaller oval as a guide. Pay attention to the natural curves and proportions of the breed. Irish Setters are known for their sleek and athletic bodies, so emphasize the elegant lines in your drawing.
Step 3: Add Details to the Head
Let’s focus on the head now. Start by refining the shape of the snout and adding a small, triangular nose at the end of it. Sketch the mouth slightly open, with the tongue visible if you’d like to give your drawing a friendly expression. Draw the eyes in more detail, adding pupils and shading around them to create depth.
Next, add the ears. Irish Setters have long, feathery ears that flow with their movements. Capture this by sketching in the details of the ears, emphasizing the curves and texture. Take your time and observe your reference photo to ensure accuracy.
Step 4: Define the Chest and Limbs
Moving on to the body, define the shape of the chest, using curved lines to indicate the muscular structure. Sketch the front legs, paying attention to the angles and proportions. Irish Setters have slim, athletic legs, so be sure to capture that in your drawing. Remember to keep your lines light, as you will be refining them later.
Step 5: Add the Tail and Hind Legs
Irish Setters are known for their long, flowing tails. Sketch the tail using loose, curved lines that follow the organic motion of the breed’s tail. Extend these lines from the back of the body, making sure they flow naturally with the overall composition of your drawing.
Now, move on to the hind legs. Pay attention to the angles and proportions, sketching in the muscles and joints. Observe the reference photo closely to capture the correct structure and movement of the legs. Remember to keep your lines light and adjust them as necessary.
Step 6: Refine the Outline
At this stage, you should have a basic outline of the Irish Setter. Take a step back and evaluate your drawing. Look for any areas that need adjustment and make any necessary corrections. Once you are satisfied with the overall proportions and composition, it’s time to refine the lines.
Using a darker pencil (2B or 4B), carefully go over your initial sketch, gradually darkening the lines and adding more detail. Pay attention to the contours of the body, the texture of the fur, and the overall form of the Irish Setter. Take your time, and remember that practice makes perfect.
Step 7: Add Fur Texture and Shading
To bring your drawing to life, it’s important to add texture and shading to the fur of the Irish Setter. Start by lightly sketching in the direction of the fur using short, flicking strokes. This will create the illusion of individual hair strands.
Next, focus on adding shading to create depth and dimension. Observe the reference photo for areas of light and shadow, and use a softer pencil (4B or 6B) to gradually build up the shadows. Blend the shading with a blending stump or tortillon for a smoother appearance if desired.
Step 8: Final Touches
Take a moment to step back and assess your drawing. Make any final adjustments or additions to enhance the overall look of your Irish Setter. Add any necessary details, such as whiskers or small highlights in the eyes, to make your drawing truly come alive.
Conclusion
Congratulations on completing your drawing of an Irish Setter! By following these step-by-step instructions, you have learned how to capture the distinctive features and elegance of this beautiful dog breed. Remember, practice and patience are essential when it comes to art, so don’t be discouraged if your first attempt isn’t perfect. Keep honing your skills, and soon you’ll be creating stunning drawings of Irish Setters with ease.
Keep exploring different techniques and experimenting with various materials to continue improving your drawing abilities. With each drawing, you’ll develop your unique style and discover new ways to capture the beauty of the Irish Setter.
We hope you enjoyed this guide and found it helpful in creating your drawing. Happy sketching!