As an artist, mastering the art of drawing hands can be quite challenging. There is a certain level of intricacy involved in capturing the details and gestures of hands, especially when they are positioned in different poses. In this guide, we will focus on drawing hands on hips, a common and expressive pose. By following these step-by-step instructions, you will develop the skills needed to learn how to draw hands on hips with confidence and precision.
Materials Required
Before we begin, gather the following materials:
- Drawing paper
- Pencil (HB or 2B)
- Eraser
- Ruler (optional)
- Reference images of hands on hips (optional)
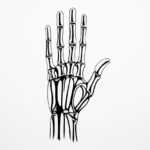
Step 1: Understand the Structure of the Hand
To accurately draw hands on hips, it is important to have a solid understanding of the hand’s basic structure. The hand consists of the palm and fingers, with each finger comprising three phalanges, except for the thumb, which has two. Familiarize yourself with the various joints and how they move to create different hand poses.
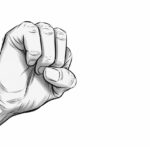
Step 2: Start with Basic Shapes
Begin by lightly sketching a rectangle for the palm of the hand. This will serve as the foundation for the rest of the hand. Then, add a rough triangle shape on top of the rectangle to represent the base of the thumb.
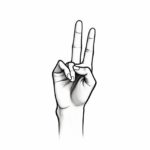
Step 3: Outline the Fingers
Next, draw elongated shapes for the fingers extending from the palm. Remember that the fingers are slender and taper towards the tips. Use light, curved lines to define the shape of each finger.
Step 4: Add Details to the Thumb
Focus on the thumb by adding more definition to its shape. Observe how the thumb connects to the palm and curves slightly towards the other fingers. Refine the triangular shape created earlier, ensuring it looks natural and proportional.
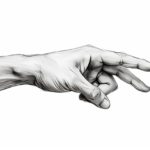
Step 5: Sketch the Hand on Hips Pose
Now that you have a basic framework, it’s time to position the hand on the hips. Imagine the hand resting comfortably on the waistline with the fingers overlapping. Use light, loose lines to outline the overall shape of the hand in this pose.
Step 6: Refine the Hand Shape
With the main pose in place, start refining the shape of the hand. Pay attention to the curves and angles of the palm and fingers. Adjust the lines as necessary to achieve a more accurate representation.
Step 7: Define the Fingers
Focus on each finger individually, adding more definition to their shapes and lengths. Observe how they overlap slightly and how the knuckles create subtle bumps on the back of the hand.
Step 8: Refine the Thumb
Refine the shape of the thumb, ensuring it looks natural and proportional to the rest of the hand. Pay close attention to the joint at the base of the thumb, which connects it to the palm.
Step 9: Add Details and Texture
Now that the basic hand shape is complete, it’s time to add finer details and texture. Study the reference images or your own hand to observe any unique features, such as wrinkles, lines, or creases. Incorporating these elements will add depth and realism to your drawing.
Step 10: Finalize the Drawing
Take a step back and assess your drawing as a whole. Make any necessary adjustments to ensure the hand looks balanced and proportional. Erase any extraneous guidelines, and darken the lines to give your drawing a finished appearance.
Conclusion
Drawing hands on hips can be a challenge, but with practice and patience, you can master this pose. By understanding the basic structure of the hand, starting with simple shapes, and gradually adding details, you’ll be able to create realistic and expressive hands on hips in your artwork. Remember to reference images or even your own hands for accuracy and to incorporate unique features. With these step-by-step instructions, you’re well on your way to becoming a skilled artist in capturing hands on hips.