
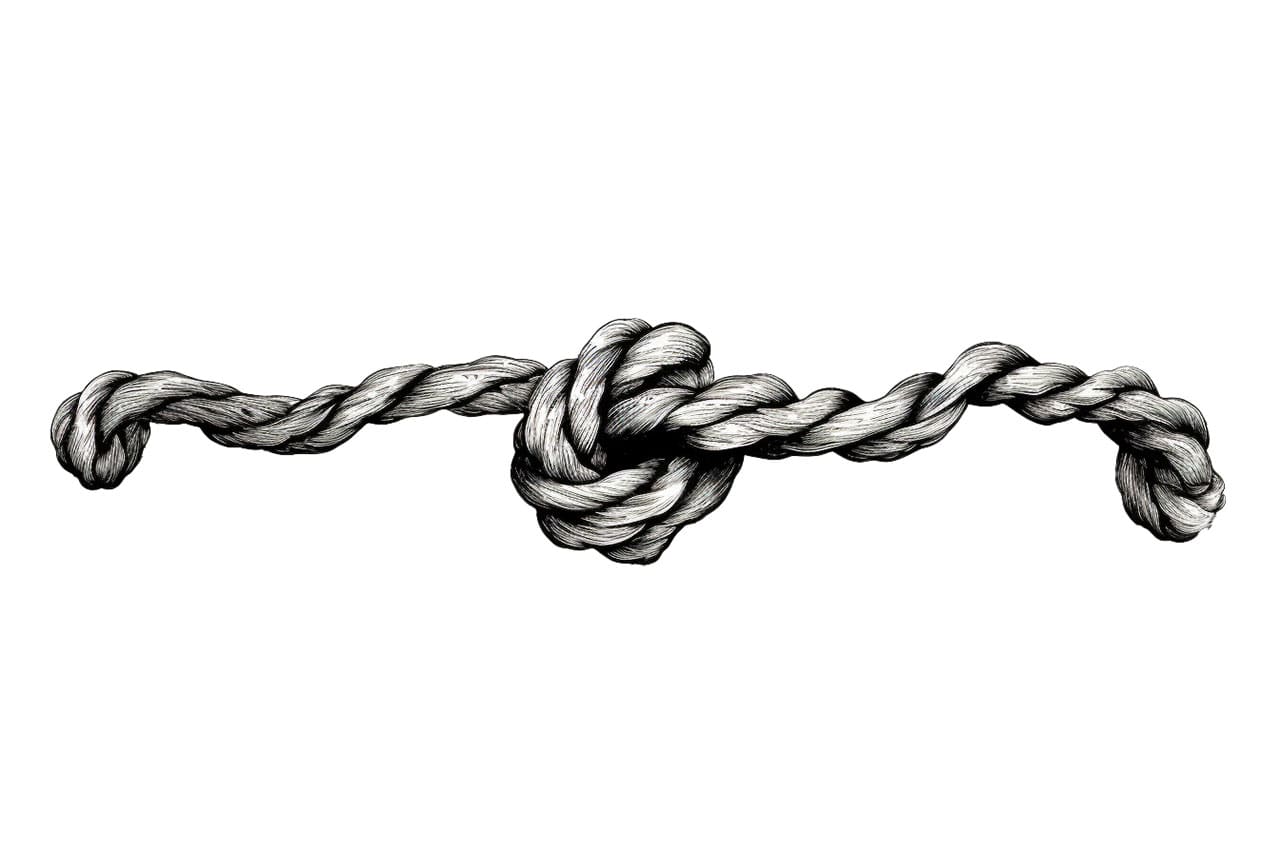
Ropes are a common element in many drawings, whether you’re creating a nautical scene, a cowboy portrait, or simply want to add some texture to your artwork. Mastering the art of drawing rope can be challenging, but with the right techniques and a bit of practice, you can create realistic and detailed rope illustrations. In this step-by-step tutorial, we will guide you through the process of drawing rope in a clear and concise manner. So grab your drawing supplies and let’s get started!
Materials Required
Before we dive into the tutorial, let’s make sure you have all the necessary materials:
- Drawing paper or sketchbook
- Pencil (preferably an HB or 2B)
- Eraser
- Fine-tipped pen or marker (optional)
Now that you have your materials ready, let’s begin the tutorial!
Step 1: Outline the Basic Shape
Start by lightly sketching the outline of the rope’s basic shape. Think about how you want the rope to curve and twist. You can draw a straight line, a loop, or any other shape you prefer. Remember, ropes are rarely perfectly straight, so adding curves and bends will make your drawing look more realistic.
Step 2: Add Depth with Shadows
To give your rope drawing depth and dimension, we will add shadows. Imagine a light source coming from one direction and use hatching or crosshatching to shade one side of the rope. Start with light pressure and gradually darken the shadows as you move towards the center of the rope. This will create a sense of volume and make the rope appear more three-dimensional.
Step 3: Create Texture with Wraps
Ropes are made up of multiple strands wrapped around each other. To capture this texture, draw small curved lines along the length of the rope. These lines should flow in the same direction as the rope’s curves and twists. Make sure to vary the length and thickness of the lines to mimic the irregularity of real rope.
Step 4: Refine the Outline
Once you’ve added texture, go back to the initial outline and refine it. Clean up any stray lines or areas that don’t align with the shape you envisioned. Pay attention to the curves and make sure they flow smoothly. You can use an eraser to gently lighten the initial sketch, or simply sketch over it with a darker pencil or pen.
Step 5: Enhance Details
To make your rope drawing more realistic, add some additional details. Ropes often have knots or loops, so feel free to incorporate them into your drawing. You can also add frayed ends or loose strands for extra authenticity. Remember to keep your lines light and delicate when adding these details, as ropes are usually made of thin fibers.
Step 6: Darken Shadows
Now it’s time to go back to the shadows and darken them further. This will intensify the contrast and make your rope stand out. Be mindful of the light source and continue shading one side of the rope, gradually darkening the shadows as you move towards the center. Take your time and build up the darkness gradually to achieve a smooth transition.
Step 7: Finalize the Texture
To complete the rope drawing, refine the texture even further. Add more curved lines and emphasize the twists and turns of the rope. Don’t be afraid to experiment with different line lengths and thicknesses to create a realistic effect. Remember to keep the lines flowing in the same direction as the rope’s curves for consistency.
Step 8: Ink or Finalize
If you prefer a clean and finished look, you can outline your drawing with a fine-tipped pen or marker. This step is optional but can add a polished touch to your artwork. Take your time and carefully trace over the pencil lines, paying attention to the curves and details. Once the ink is dry, erase any remaining pencil marks to complete your rope drawing.
Conclusion
Drawing rope may seem challenging at first, but with the right techniques, practice, and attention to detail, you can create stunning rope illustrations. In this step-by-step tutorial, we covered the process of drawing rope, from outlining the basic shape to adding depth, texture, and details. Remember to take your time, observe real-life ropes for inspiration, and don’t be afraid to experiment. With patience and practice, you’ll be able to master the art of drawing rope and incorporate it into your future artworks.
We hope you found this tutorial helpful in improving your drawing skills. Happy creating!
Related posts:
 How to Draw a Cornucopia: A Step-by-Step Guide
 How to Draw a Dove: A Step-by-Step Guide
 How to Draw Bulbasaur: A Step-by-Step Guide
 How to Draw a Monkey Step by Step
 How to Draw Popcorn: A Step-by-Step Guide
 How to Draw a Boxing Ring
 How to Draw a Bulldog: A Step-by-Step Guide
 How to Draw a Realistic Snake: A Step-by-Step Guide