Are you an ice cream enthusiast with a passion for art? If so, you’re in for a treat! Learning how to draw an ice cream cone is not only a delightful way to indulge your artistic side, but it also allows you to capture the whimsical essence of one of summer’s favorite desserts. With a few simple tools and a bit of guidance, you’ll soon be able to create mouthwatering illustrations that bring smiles to faces.
In this step-by-step tutorial, I’ll walk you through the fun process of drawing a delicious ice cream cone. Whether you’re a beginner or an experienced artist looking to shake things up, you’ll enjoy exploring your creativity as you design a treat that’s as visually appealing as it is delightful. So, gather your materials—your pencils, paper, and a dash of imagination—and let’s embark on this artistic journey together!
Get ready to unleash your inner artist and create something cool and refreshing on paper. With just a few steps, you’ll learn how to construct a charming ice cream cone that not only showcases your skills but also makes your mouth water just looking at it! Let’s dive in and start sketching!
Materials Required
To create your own mouthwatering ice cream cone drawing, you’ll need the following materials:
- Drawing paper
- Pencils (HB and 2B)
- Eraser
- Ruler
- Colored pencils (optional)
Now that you have all the necessary materials, let’s dive into the step-by-step instructions!
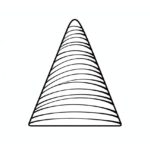
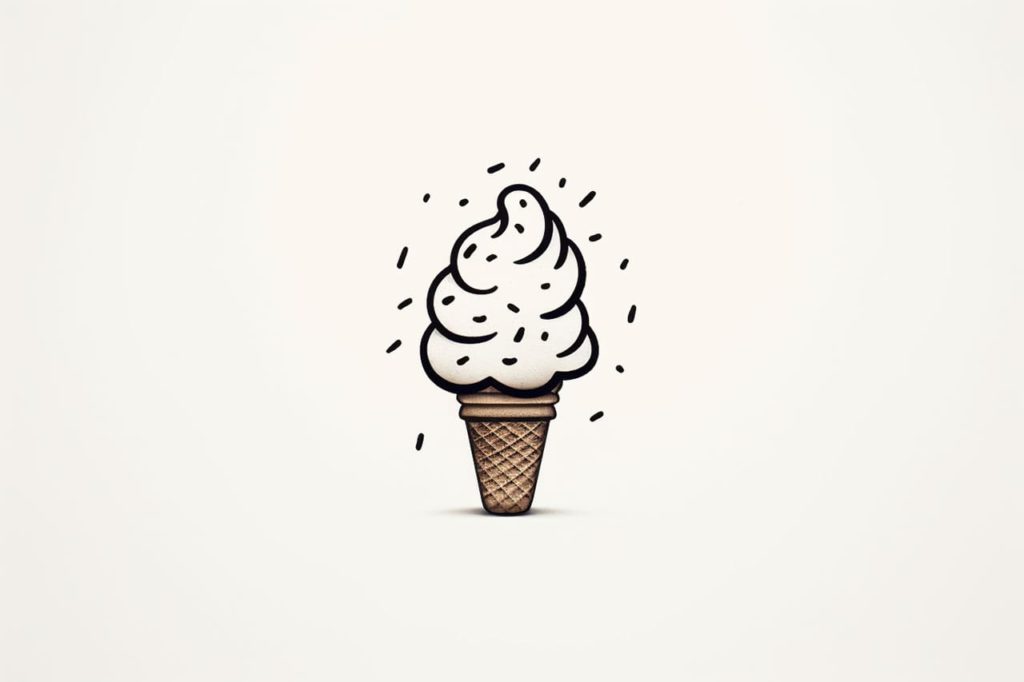
Step 1: Sketch the Cone
Start by drawing a small triangle shape at the center of your paper. This will be the base of the ice cream cone. Make sure to leave enough space at the top for the ice cream scoop.
Step 2: Add Texture to the Cone
Use your pencil to add some texture to the cone. Draw diagonal lines across the triangle shape to create a crisscross pattern. This will give your cone a realistic look.
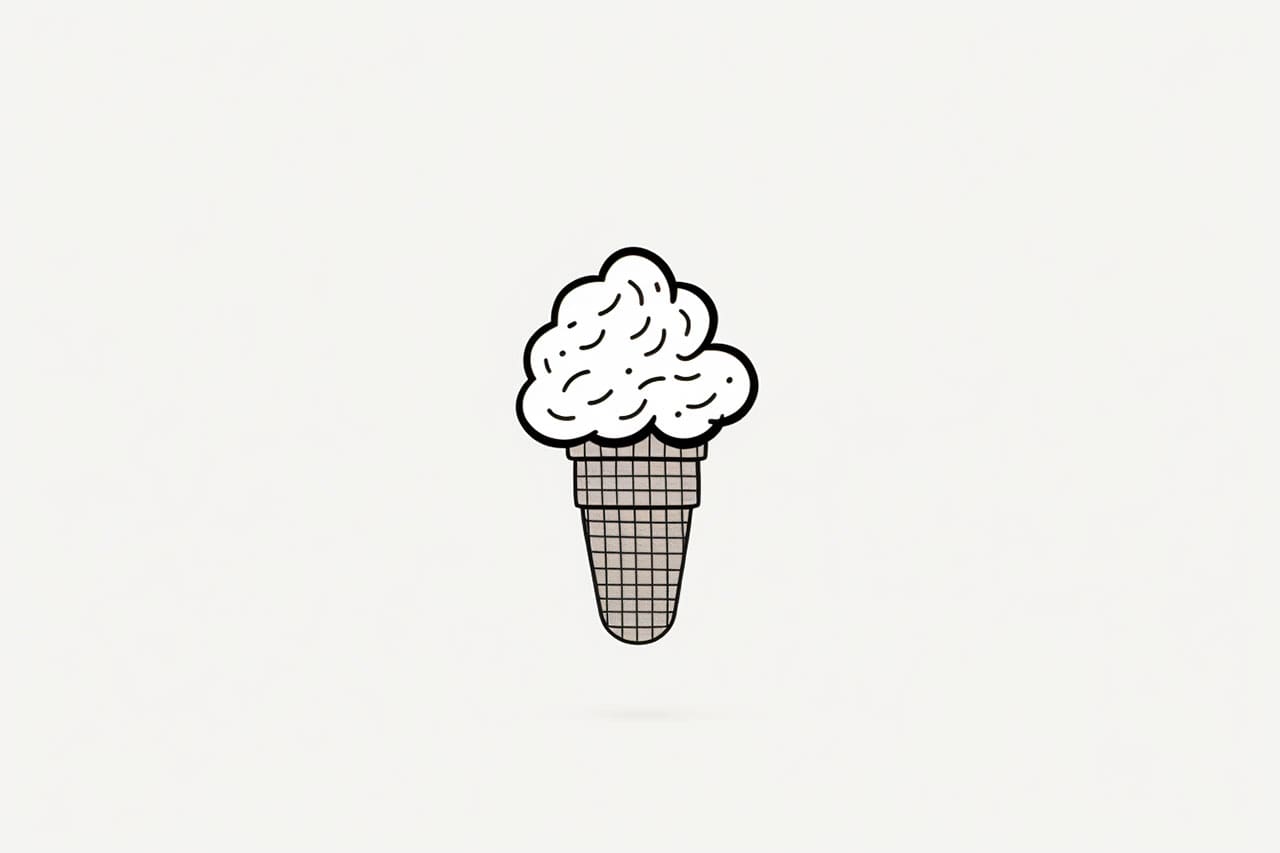
Step 3: Draw the Ice Cream Scoop
Now it’s time to draw the delicious ice cream scoop on top of the cone. Start by drawing a large curved shape above the cone. This will be the top of the scoop. Then, connect it to the cone by drawing a curved line on each side.
Step 4: Add Details to the Scoop
To give your ice cream scoop some texture, draw small curved lines across the surface. These lines will represent the swirls and ripples of creamy ice cream. Be creative and experiment with different patterns!
Step 5: Draw the Waffle Pattern (Optional)
If you want to add more detail to your ice cream cone, you can draw a waffle pattern on the cone. Use your ruler to draw small diagonal lines across the cone, creating a grid-like pattern. This will make your cone look even more appetizing!
Step 6: Erase Unnecessary Lines
Now that you’ve finished drawing the main elements of your ice cream cone, it’s time to clean up your drawing. Use your eraser to remove any unnecessary guidelines or overlapping lines. This will make your drawing look neat and polished.
Step 7: Color Your Drawing (Optional)
If you want to take your ice cream cone drawing to the next level, you can add some color! Use colored pencils or markers to bring your drawing to life. Experiment with different flavors and toppings to make your ice cream cone as delicious and vibrant as possible.
Conclusion
Congratulations! You’ve successfully learned how to draw a mouthwatering ice cream cone. By following this step-by-step tutorial, you’ve created a delicious treat on paper. Remember to have fun and be creative with your drawing. With practice, you’ll be able to draw ice cream cones that look good enough to eat! Enjoy your artistic journey and keep experimenting with different flavors and toppings.
Gallery of Ice Cream Cone Drawings


Fun Facts About Ice Cream Cones
- Ice cream cones were first introduced at the 1904 World’s Fair in St. Louis, where they quickly became a popular treat.
- The Guinness World Record for the largest ice cream cone is over 10 feet tall!
- Originally, cones were made by hand-rolling waffles into cone shapes immediately after baking.
- There are several types of cones: waffle, sugar, and cake cones are among the most common.
- Ice cream cones are an eco-friendly option compared to cups and spoons, as they are fully edible.
- In some parts of the world, ice cream cones are referred to as “cornets.”
- July is National Ice Cream Month in the U.S., and National Ice Cream Cone Day is observed on September 22nd.
- The phrase “ice cream cone” can also refer to the entire treat—ice cream scooped into a cone.
- Italian immigrants were instrumental in popularizing ice cream cones in America during the early 20th century.
- The idea of edible cones dates back to medieval times, where similar concepts were used for foods like pastries.
Suggestions for Scenes and Settings for Ice Cream Cone Drawings
- Sunny Beach Scene: Draw a group of ice cream cones lounging on the sand under tiny umbrellas with frosty waves in the background.
- Ice Cream Carnival: Illustrate a fun fairground with ice cream cones on rides, playing games, and enjoying sweet treats.
- Ice Cream Mountain: Depict an epic landscape with towering ice cream cones resembling a mountain range, dripped with chocolate “lava.”
- Cozy Café Corner: Picture an ice cream cone reading a book by a window in a quaint café, surrounded by cookies and coffee cups.
- Celebration Party: Design a festive scene with a collection of decorated cones, each unique with toppings and sprinkles, gathered around a cake.
- Under a Starry Sky: Create a serene nighttime scene with ice cream cones gazing at a chocolate-chip dotted sky, holding sparklers.
- City Stroll: Show ice cream cones taking a walk through a bustling city, passing iconic landmarks made of sugary sweets.
- Fantasy World: Imagine a magical realm where trees are made of waffle cones and rivers flow with melted chocolate.
- Winter Sledding: Illustrate ice cream cones sledding down a whipped cream hill, with marshmallow snowmen nearby.
- Tropical Getaway: Picture a relaxing island paradise where ice cream cones are sunbathing near a sherbet waterfall.