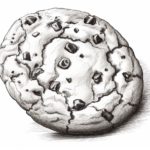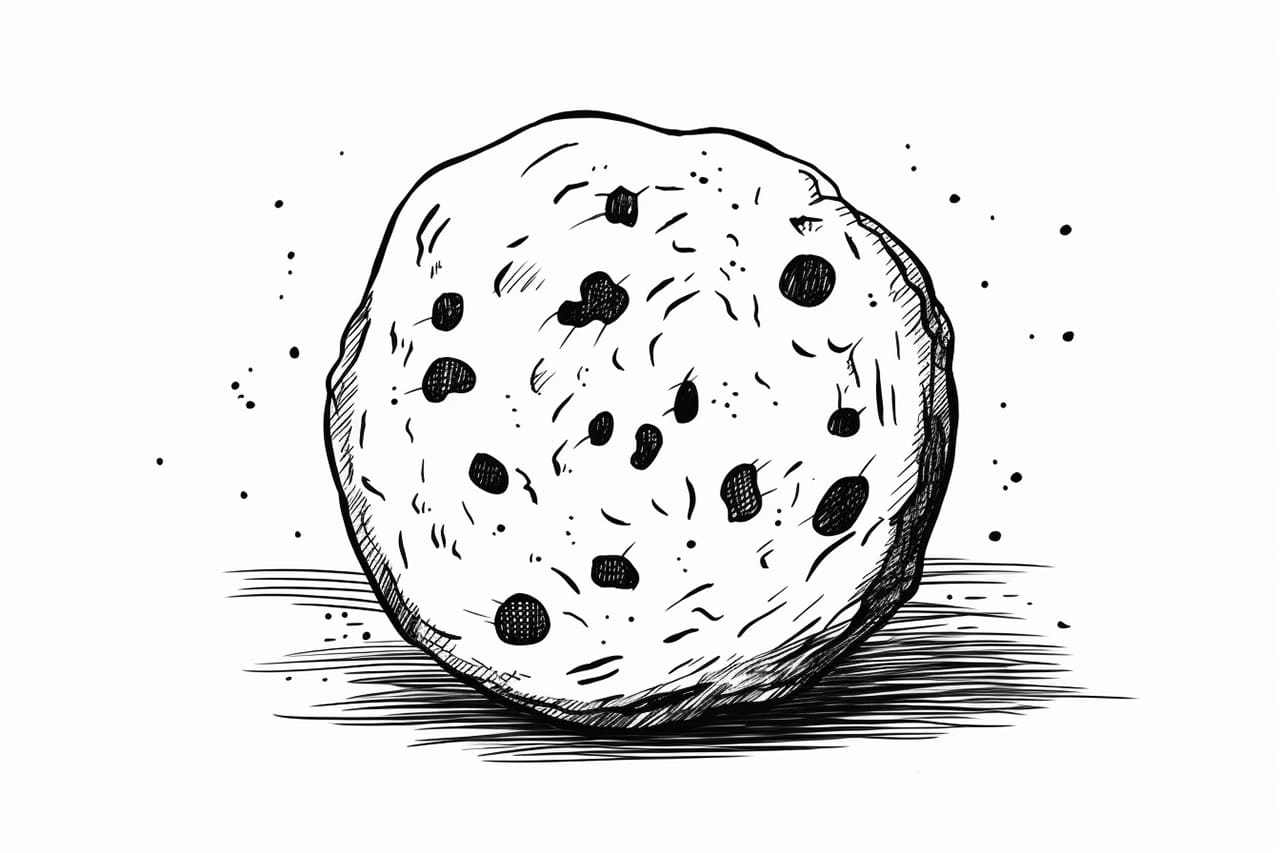
Welcome to this step-by-step tutorial on how to draw a cookie. Whether you want to add this delightful treat to a food-themed illustration or simply practice your drawing skills, this guide will help you create a mouthwatering cookie right on your paper!
Materials Required
Before we dive into the steps, let’s gather the materials you will need for this drawing:
Now that you have everything ready, let’s get started and bring that cookie to life!
Step 1: Outline the Basic Shape
Begin by lightly sketching an oval shape on your paper. This oval will act as the base of your cookie. Don’t worry about perfection at this stage, as we will be refining the details in later steps. Keep your lines light so they are easier to erase if needed.
Step 2: Create Texture with Cracks
To make your cookie look more realistic, add some texture by incorporating cracks. Start by drawing a few curved lines crossing over the surface of the cookie. The cracks can be irregular and varying in length and direction. Remember, cookies come in different shapes and sizes, so let your creativity flow!
Step 3: Add Texture with Chips
Next, let’s give our cookie some delicious-looking chocolate chips. Draw small and irregular shapes all over the surface of the cookie to represent the chips. You can scatter them randomly or group them together, depending on the style you prefer. Be creative with the sizes and angles of the chips to give your cookie an appetizing appearance.
Step 4: Shade the Cookie
Now it’s time to add some shading to bring depth to your drawing. Begin by determining the light source and imagine where the shadows would fall on the cookie. With a light pencil stroke, shade the opposite side of the cracks and chips to create a three-dimensional effect. Gradually build up the shading by adding more layers until you achieve the desired level of realism.
Step 5: Refine the Cookie Shape
Take a close look at your cookie sketch and refine the shape as needed. Smooth out any uneven lines and make sure the oval shape is symmetrical. Adjust the curves of the cracks and chips if necessary. Remember, these details will enhance the overall appearance of your cookie.
Step 6: Add Color (Optional)
If you want to add color to your drawing, now is the time to do so. Select shades of brown for the cookie and dark brown or black for the chocolate chips. Use colored pencils or markers to carefully fill in the shapes, paying attention to the shading you created earlier. Adding color will make your cookie even more enticing, but if you prefer a black and white illustration, it will still look fantastic!
Conclusion
Congratulations! You have successfully learned how to draw a delicious cookie. With a few simple steps, you were able to create a realistic and mouthwatering treat on paper. Remember to practice and experiment with different shapes, textures, and colors to make your cookies truly unique. So grab your pencils and start drawing some scrumptious cookies today!