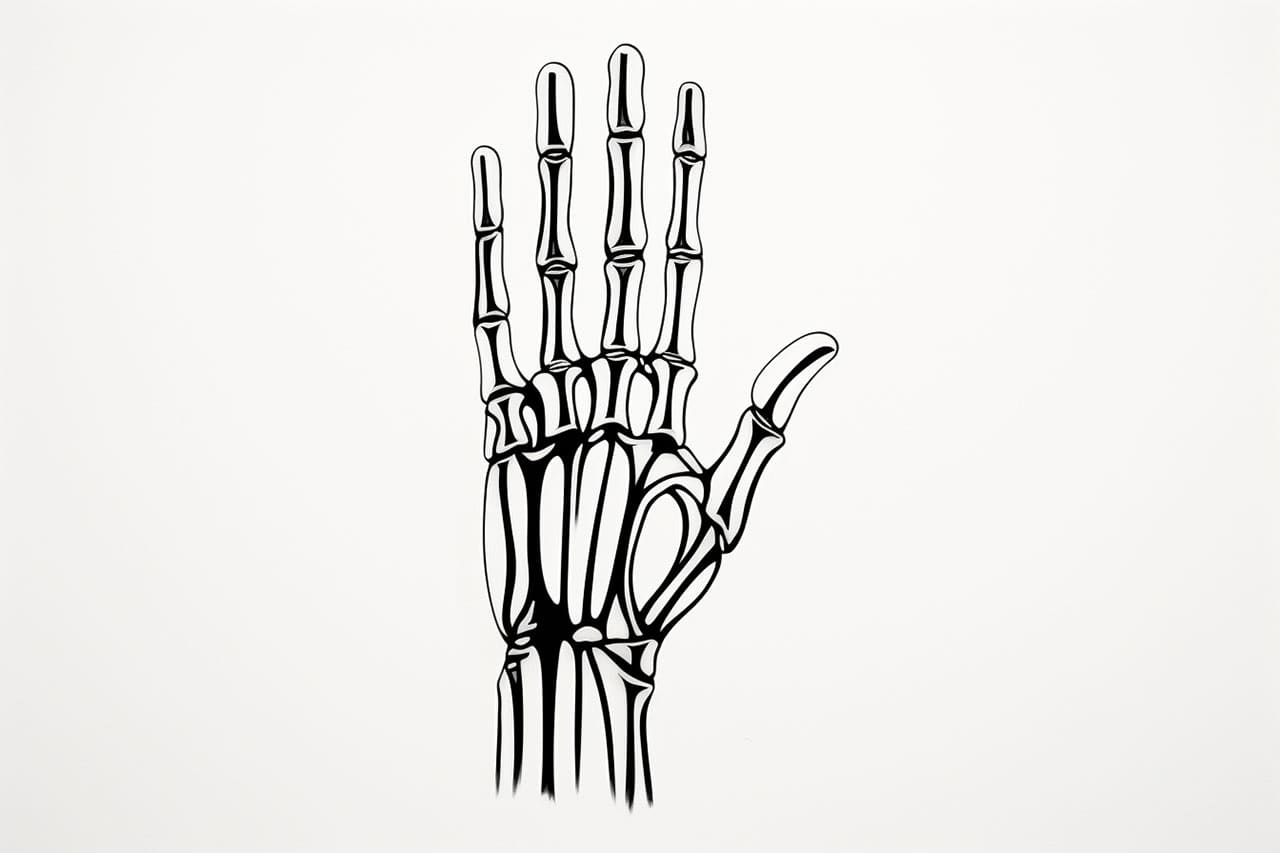
Welcome to this step-by-step guide on how to draw a skeleton hand. Whether you are an experienced artist or just starting out, this tutorial will provide you with the necessary instructions to create a spooky and anatomically accurate skeleton hand drawing. So let’s get started!
Materials Required
Before we begin, gather the following materials:
- Pencil
- Eraser
- Paper
- Fine-tip black pen or marker (optional)
With these materials in hand, you are ready to embark on your skeleton hand drawing journey.
Step 1: Basic Hand Shape
Start by drawing a rough outline of the basic shape of a hand using a pencil. Begin with a rectangular shape for the palm and add four elongated shapes for the fingers. Remember, we are drawing a skeleton hand, so keep the lines loose and sketchy. Don’t worry about details at this stage; we will refine the drawing later.
Step 2: Finger Joints
Now, let’s add more definition to the fingers by drawing the joints. Start by drawing small circles where the joints are located: one near the base of each finger and three more along the length of each finger. These circles will represent the knuckles of the skeleton hand.
Step 3: Finger Proportions
Next, we need to establish the proportions of the fingers. Pay attention to the length of each finger in relation to the others. Keep in mind that the middle finger is generally the longest, followed by the index finger and ring finger, while the pinky finger is usually the shortest. Adjust the length of the fingers as needed to achieve a realistic and balanced look.
Step 4: Bone Structure
Now it’s time to add the bone structure to our skeleton hand drawing. Start by making the lines of the fingers more angular, indicating the shape of the underlying bones. Imagine the bones inside the fingers and use your pencil to create a bumpy appearance along the length of each finger, representing the joints.
Step 5: Thumb Placement
The thumb of the skeleton hand is positioned slightly differently than the other fingers. To draw the thumb, start by adding a trapezoid shape near the palm. Then, connect the trapezoid to the rest of the hand by drawing a curved line. Remember to focus on the bone structure of the thumb and make the lines more angular.
Step 6: Finger Tips
Give the fingers a skeletal appearance by drawing each finger tip as a slightly curved square shape. Again, imagine the bones within the fingertips and create a bumpy texture with your pencil strokes.
Step 7: Palm Details
Let’s add some details to the palm of the skeleton hand. Draw curved lines across the palm to represent the tendons and ligaments beneath the skin. These lines should follow the contours of the palm, giving it a realistic look.
Step 8: Refine the Drawing
Now that the basic structure of the skeleton hand is complete, it’s time to refine the drawing. Use your pencil to smooth out any rough lines and add more definition to the bones and joints. Pay attention to the varying thicknesses of the bones and the subtle curves within the fingers and palm. This is where the details really start to bring your skeleton hand drawing to life.
Step 9: Ink the Drawing (Optional)
If you’re confident with your sketch, you can now outline your drawing with a fine-tip black pen or marker. This step is optional, but it can give your skeleton hand a bold and finished look. Be careful not to smudge the ink as you work by starting from the top of the drawing and moving down or starting from left to right if you’re left-handed.
Conclusion
Congratulations! You have successfully learned how to draw a realistic skeleton hand. By following these step-by-step instructions, you can create an impressive and haunting drawing that will impress your friends and family. Remember to practice and fine-tune your drawing skills, as every artist’s style is unique. Enjoy the process and have fun exploring the world of art!
Skeletons and skeleton parts are a great thing to practice for Halloween doodles and drawings. Check out our Pumpkin Face and Witch Hat tutorials for more holiday fun.