Drawing an Oreo may seem simple at first glance, with its iconic black and white design, but there is a deliciously intricate artistry to capturing its delectable details on paper. From the crisp ridges and smooth curves of the cookie to the creamy swirl of the filling peeking out between the layers, each element of an Oreo cookie offers a unique challenge and opportunity for artistic expression. Join me as we explore the techniques and tips to bring this beloved treat to life on your canvas, creating a mouthwatering masterpiece that will satisfy both your artistic cravings and your sweet tooth.
Materials Required
To draw a realistic Oreo cookie, you will need the following materials:
- Drawing paper or sketchbook
- Pencil (preferably a mechanical pencil for fine details)
- Eraser
- Black colored pencil or charcoal for shading
- White colored pencil or gel pen for highlights
- Blending stump or tortillon for blending shading
- Reference image of an Oreo cookie for accuracy
With these materials, you can create a detailed and realistic drawing of an Oreo cookie.
How to Draw an Oreo: a Step-by-step Guide
Step 1: Gather Your Materials
- Gather all the necessary materials for drawing, including a piece of paper, a pencil, an eraser, and black and white drawing utensils such as markers or colored pencils.
Step 2: Sketch the Basic Shape
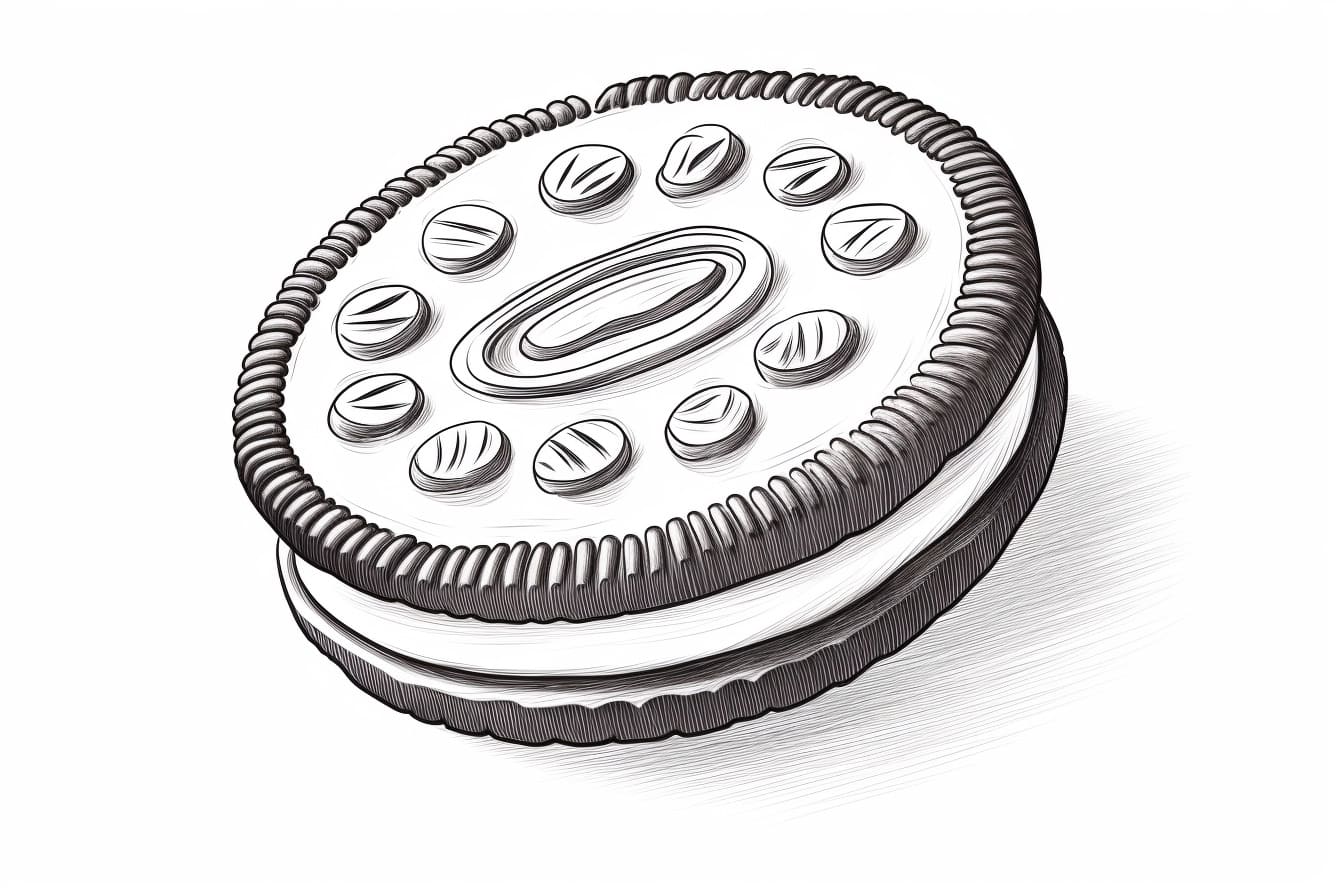
- Start by drawing a large, circular shape in the center of your paper. This will be the outer shape of the Oreo cookie. Make sure the circle is smooth and even.
Step 3: Add the Filling
- Inside the outer circle, draw another smaller circle that represents the creamy filling of the Oreo. Leave a small gap between the outer circle and the inner circle to create a realistic look.
Step 4: Create the Cookie Texture
- To give the Oreo cookie its characteristic texture, lightly sketch small, curved lines around the outer edge of the outer circle. These lines should be evenly spaced and curve in the same direction to represent the cookie’s ridges.
Step 5: Add the Oreo Logo (Optional)
- If you want to add the Oreo logo to your drawing, carefully sketch the word “OREO” in the center of the filling circle. You can also add small details like the leaf emblem if desired.
Step 6: Shade and Add Details
- Using your black and white drawing utensils, start by shading the outer circle and the filling to create depth and dimension. Use light strokes to indicate highlights and darker strokes for shadows.
- Add shading to the cookie texture lines to make them stand out and give the cookie a realistic appearance.
- Use your white drawing utensil to add highlights to the creamy filling and brighten up certain areas of the cookie for a more three-dimensional look.
Step 7: Refine and Finalize
- Take a moment to review your drawing and make any necessary adjustments. Erase any stray lines or smudges, and refine any details that may need more definition.
- Once you are satisfied with your drawing, you can choose to outline the main shapes with a black marker for a bold and clean look.
Step 8: Share and Enjoy
- Share your completed Oreo drawing with others and enjoy the satisfaction of creating a realistic and detailed depiction of this iconic cookie. You can also experiment with different variations, such as drawing multiple Oreos or adding a glass of milk for a fun composition.
Conclusion
In conclusion, learning how to draw a realistic Oreo can be a fun and rewarding artistic exercise. By following the step-by-step instructions and practicing your shading and blending techniques, you can create a mouthwatering drawing that captures the delicious details of this iconic treat. Remember to take your time, pay attention to light and shadow, and enjoy the process of bringing your artwork to life. With patience and dedication, you can master the art of drawing a perfect Oreo cookie.
Fun Facts About Oreos
- Oreos were first introduced by the National Biscuit Company (now known as Nabisco) in 1912.
- The name “Oreo” is believed to come from the French word “Or,” meaning gold, which was a common color on early Oreo packaging.
- Oreos are the best-selling cookie in the United States and are enjoyed in over 100 countries worldwide.
- The classic Oreo cookie consists of two chocolate wafers with a sweet cream filling in between.
- There are many different varieties of Oreos available, including Double Stuf, Golden Oreos, Mint Oreos, and limited-edition flavors like Birthday Cake and Pumpkin Spice.
- The traditional way to eat an Oreo is to twist it open, lick the filling, and then dunk the cookie in milk.
- Oreos have inspired a wide range of merchandise, from clothing and accessories to home decor and even Oreo-themed events.
- The Oreo has a dedicated fan base and has become a pop culture icon, with references in movies, TV shows, and music.
- In 2012, Oreo celebrated its 100th anniversary with a special limited-edition Birthday Cake flavor and a social media campaign that encouraged fans to share their favorite Oreo moments.
- The Oreo has become a versatile ingredient in baking and cooking, with recipes ranging from Oreo cheesecake to Oreo truffles and even Oreo-stuffed chocolate chip cookies.
Suggestions for Scenes and Settings for Oreo Drawings
Absolutely! Here are some fun and creative scenes and settings you can consider for your drawings featuring Oreo:
- Oreo at the beach: Draw Oreo enjoying a sunny day at the beach, playing in the sand or splashing in the waves.
- Oreo in a magical forest: Create a whimsical scene of Oreo exploring a mystical forest filled with colorful flowers and friendly animals.
- Oreo on a space adventure: Imagine Oreo as an astronaut exploring outer space, surrounded by stars and planets.
- Oreo at a music festival: Draw Oreo at a lively music festival, grooving to the music with a crowd of animals.
- Oreo in a cozy café: Capture Oreo sitting in a charming café, sipping on a cup of hot cocoa or enjoying a sweet treat.
- Oreo in a winter wonderland: Illustrate Oreo frolicking in a snowy landscape, perhaps building a snowman or ice skating on a frozen pond.
- Oreo as a superhero: Transform Oreo into a superhero with a cape and mask, ready to save the day in a bustling cityscape.
- Oreo in a fairy tale castle: Draw Oreo as a royal pet exploring a majestic castle with towering turrets and lush gardens.
- Oreo at a carnival: Illustrate Oreo amidst the bright lights and colorful rides of a festive carnival, enjoying cotton candy and games.
- Oreo on a tropical island: Create a scene of Oreo lounging under a palm tree on a sandy beach with crystal-clear waters and tropical birds.
Feel free to get creative and have fun exploring different scenes and settings for your drawings of Oreo!