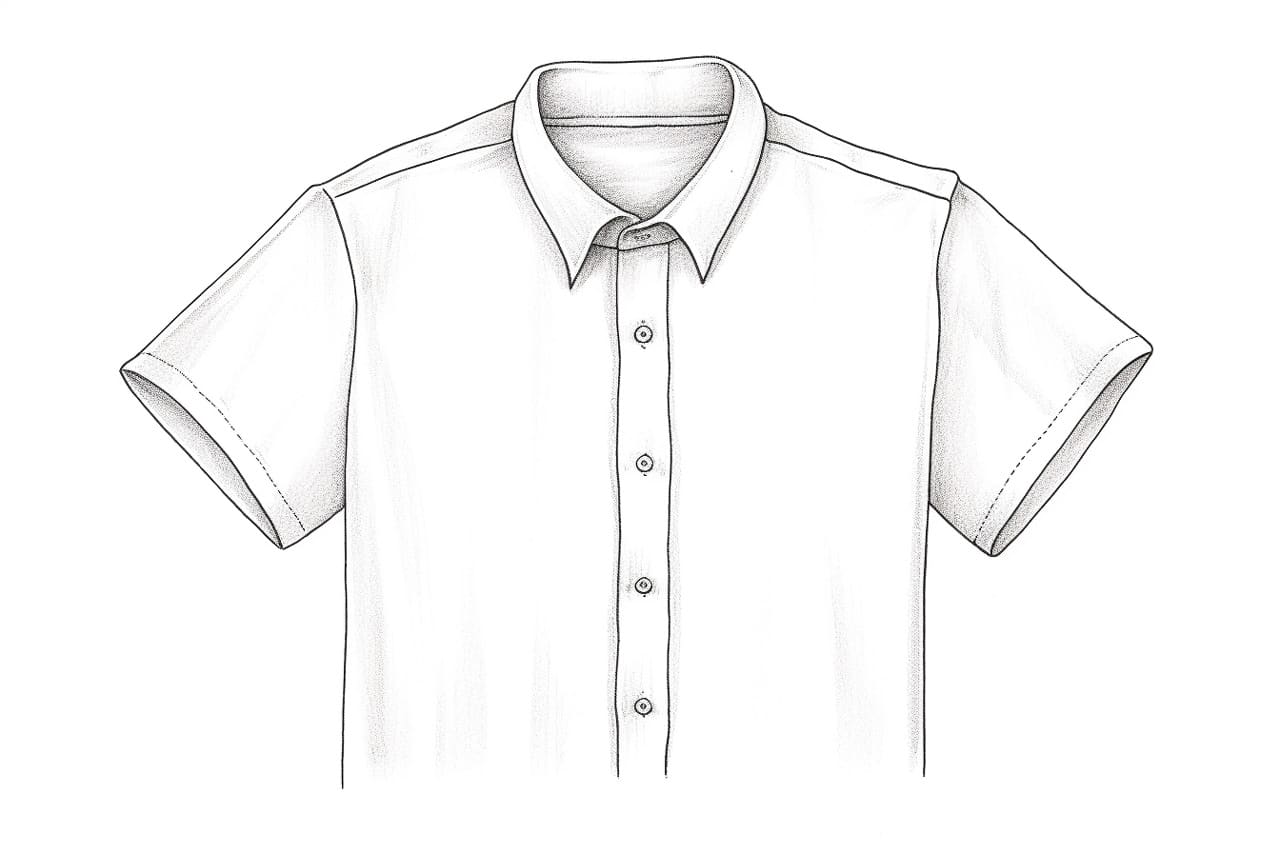
Drawing a collared shirt can be a fun and creative exercise for both beginner and experienced artists. Whether you’re looking to add clothing to your fashion sketches or simply want to practice your drawing skills, this step-by-step guide will show you how to draw a collared shirt in a clear and concise manner. So grab your sketchbook and let’s get started!
Materials Required
To draw a collared shirt, you will need the following materials:
- Pencil
- Eraser
- Paper
- Ruler (optional)
- Colored pencils or markers (optional)
Now that you have your materials ready, let’s begin the process of drawing a collared shirt!
Step 1: Draw the Basic Shape
Start by drawing the basic shape of the shirt. You can do this by drawing a slightly curved horizontal line across the middle of your paper. This line will represent the collar of the shirt.
Step 2: Add the Collar
Extend the collar by drawing two diagonal lines that come down from each end of the horizontal line. These lines should be slightly longer than the width of the collar. Connect the two diagonal lines at the bottom using a curved line to form the front portion of the collar. This will give your shirt a more three-dimensional appearance.
Step 3: Outline the Neckline
Draw a curved line starting from the bottom left corner of the collar and extend it to the right, creating the neckline of the shirt. Repeat this step on the other side, mirroring the curve. The neckline should connect smoothly with the collar.
Step 4: Draw the Shoulders
Extend two lines from the top ends of the collar, curving downwards to create the shoulders of the shirt. These lines should meet the sides of the shirt below the collar, forming a triangle-like shape.
Step 5: Define the Sleeves
Next, draw the sleeves of the shirt. Starting from the shoulders, draw two slightly curved lines that extend downwards. The length of the lines will depend on the desired length of the sleeves. Connect the lines at the bottom using a curved line to form the cuffs.
Step 6: Add Details
Now it’s time to add some details to your collared shirt. Use short, horizontal lines to draw buttons on the front of the shirt, starting from the collar and going down to the bottom. Add some shading or patterns to the shirt if desired, using colored pencils or markers.
Step 7: Erase Unnecessary Lines
Take your eraser and carefully remove any unnecessary lines or overlapping parts that are no longer needed. This will help clean up your drawing and make it look more polished.
Step 8: Final Touches
Once you have erased the unnecessary lines, take a moment to evaluate your drawing. Add any additional details or refine any areas that need improvement. Remember, practice makes perfect, so don’t be afraid to make mistakes!
Conclusion
Drawing a collared shirt is a great way to enhance your artistic skills and expand your drawing repertoire. By following these step-by-step instructions, you can create a realistic and detailed depiction of a collared shirt. Remember to practice regularly and experiment with different styles and variations. So grab your pencil and start sketching your very own fashionable collared shirts!

