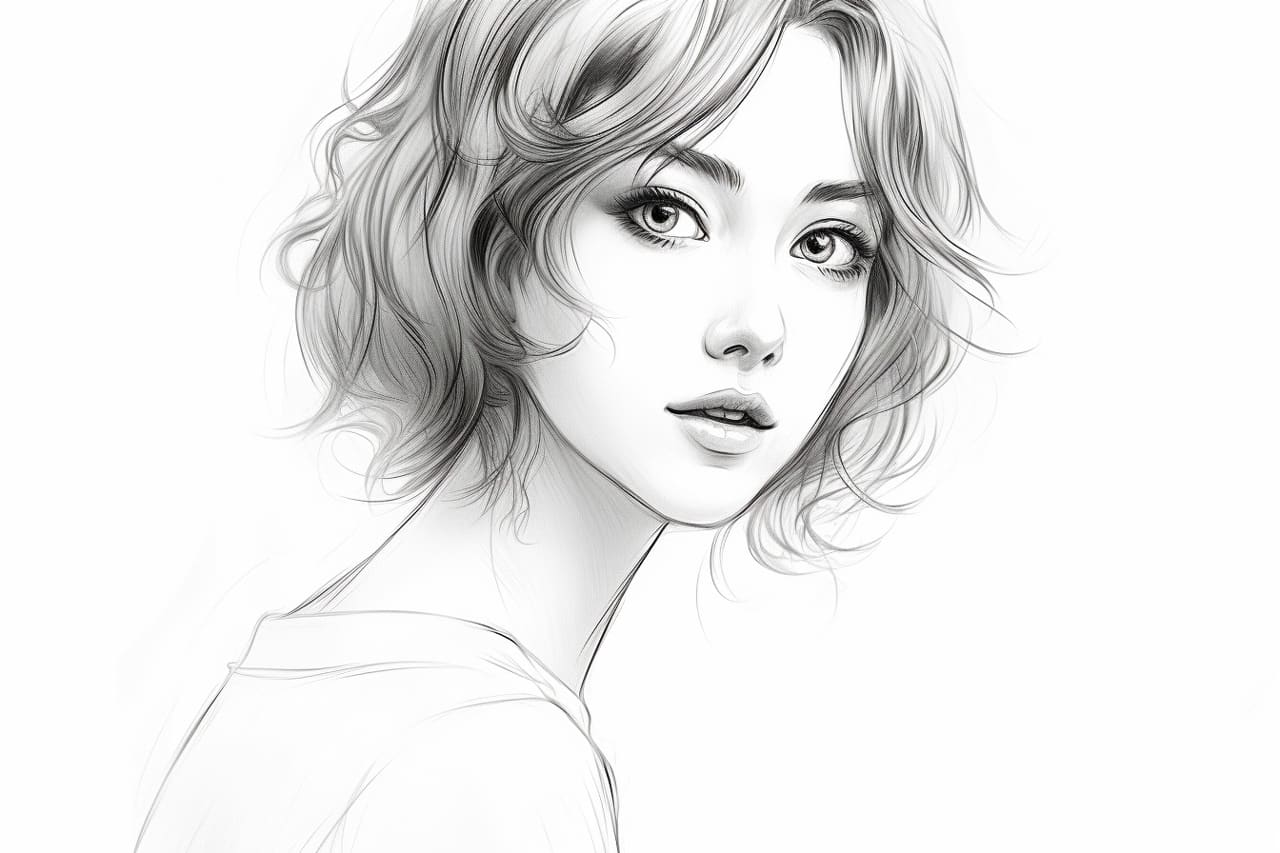
Drawing a friend can be an enjoyable and meaningful activity. It allows you to capture the essence of your friend’s personality and create a lasting tribute to your friendship. Whether you are a beginner or an experienced artist, this step-by-step guide will help you create a beautiful portrait of your friend. So, grab your art supplies and let’s get started!
Materials Required
Before we begin, gather the following materials:
- Drawing paper
- Pencil (HB or 2B)
- Eraser
- Sharpener
- Set of colored pencils or markers (optional)
Now that you have your materials ready, let’s dive into the process of drawing a friend.
Step 1: Reference Photo
To create a realistic and accurate drawing of your friend, start by choosing a reference photo. Select a photo where your friend’s face is well-lit and clear. This will make it easier to observe the facial features and capture their likeness.
Step 2: Basic Face Shape
On your drawing paper, lightly sketch an oval shape for the head. Divide the oval vertically and horizontally to create guidelines. These guidelines will help you accurately place the facial features.
Step 3: Eyes
Draw two almond-shaped eyes on the horizontal guideline, leaving enough space between them. Pay attention to the size and shape of your friend’s eyes as you draw. Add details such as the iris, pupil, and eyelashes to make the eyes come to life. Remember to keep the eyes symmetrical.
Step 4: Nose
Beneath the eyes, draw a small curved line to represent the bridge of the nose. Then, continue with two nostrils on each side of the nose. Observe your friend’s nose shape and size to ensure accuracy. Erase any guidelines that intersect with the nose.
Step 5: Mouth
Place the mouth slightly below the nose. Draw a horizontal line to indicate the mouth’s width. Pay attention to the shape of your friend’s lips and draw them accordingly. Add details such as the upper and lower lip, as well as any creases or dimples.
Step 6: Ears
Extend two curved lines from either side of the head, starting from the top of the eyes to the bottom of the nose. Add details to the ears, considering their shape and size. Ears vary greatly among individuals, so take your time in capturing their unique features.
Step 7: Hair
Now it’s time to draw your friend’s hair. Observe the hairstyle in the reference photo and sketch the outlines accordingly. Pay attention to the hairline, parting, and any distinctive features of their hair. Add texture and volume by using short, light strokes or longer flowing lines.
Step 8: Facial Features
Refine the facial features by darkening the lines and adding more detail. Observe the reference photo carefully and focus on capturing the unique characteristics of your friend. Pay attention to details such as eyebrows, eyelashes, and any freckles or birthmarks.
Step 9: Face Shadows and Highlights
To add depth and dimension to the portrait, observe the lighting in the reference photo. Notice where the light is hitting the face and where the shadows fall. Use shading techniques to create these shadows and highlights, giving your drawing a realistic appearance.
Step 10: Clothing and Background
If desired, you can add clothing and a background to your drawing to further personalize it. Sketch the clothing carefully, paying attention to folds and texture. Consider incorporating elements such as your friend’s favorite hobbies or interests into the background to make the drawing even more special.
Conclusion
Drawing a friend is a wonderful way to celebrate your friendship and create a unique piece of art. By following these step-by-step instructions, you can create a realistic and heartfelt portrait of your friend. Remember to pay attention to details and take your time to capture their likeness accurately. With practice and patience, you can create a beautiful drawing that your friend will cherish for years to come.