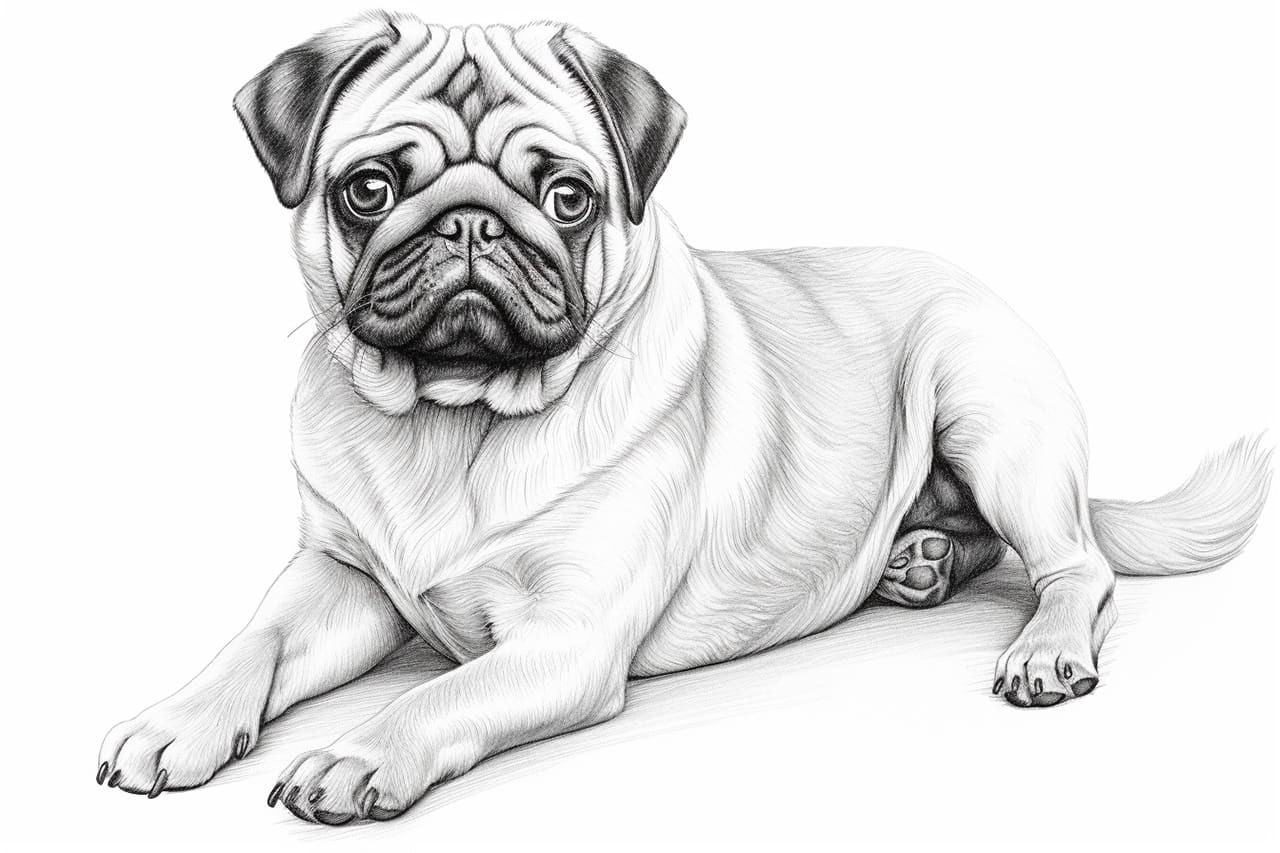
Welcome to this step-by-step guide on how to draw a pug! Pugs are adorable and unique dogs that make for wonderful subjects in artworks. Whether you are a beginner or an experienced artist, this tutorial will walk you through the process of creating a realistic and charming pug drawing. So grab your drawing materials and let’s get started!
Materials Required
Before we begin, make sure you have the following materials ready:
- Drawing paper or sketchbook
- Pencils (preferably a range of 2B to 6B)
- Eraser
- Blending stump or cotton swabs
- Reference image of a pug (you can use a photograph or find one online)
Having these materials prepared will ensure a smooth and enjoyable drawing experience.
Step 1: Basic Guidelines
To start, lightly sketch the basic guidelines for the pug’s head and body. Begin by drawing a circle for the head and add a slightly elongated oval shape for the body. Position the head slightly tilted to give it a lively and playful look. These guidelines will serve as the foundation for the pug’s proportions.
Step 2: Outline the Head
Using the basic guidelines as your reference, outline the shape of the pug’s head. Pay attention to the unique features of a pug, such as the wrinkled forehead and a small snout. Keep your lines light and loose, as we will refine them later.
Step 3: Sketch the Facial Features
Next, focus on the pug’s facial features. Start by drawing the eyes, which are typically large and round. Add the eyebrows slightly above the eyes to capture the pug’s expressive look. Then, sketch the small triangular nose and a smiling mouth with a slightly protruding tongue. Take your time and observe the reference image closely to capture the pug’s unique facial expressions.
Step 4: Define the Ears and Wrinkles
Pugs are known for their adorable floppy ears and wrinkled skin. Draw the pug’s ears on either side of the head, making them slightly curved and droopy. Then, carefully add the wrinkles on the forehead, around the eyes, and the folds on the side of the head. These details will bring more depth and realism to your drawing.
Step 5: Outline the Body
Moving on to the body, refine the outline by adding curves and contours to give the pug a chubby appearance. Pay attention to the belly, chest, and the shape of the legs. Pugs have short legs, so make sure to capture their proportions accurately. Take your time to ensure everything looks balanced and in harmony with the head.
Step 6: Add Fur Details
Pugs have a short and smooth coat, so we will use subtle lines to indicate the fur. Start by adding short, gentle strokes around the face, body, and ears. Gradually build up the fur texture by using a cross-hatching technique. Be careful not to overdo it, as we want to maintain the pug’s smooth appearance.
Step 7: Refine and Shade
With the basic outlines and fur details complete, it’s time to refine your drawing and add shading. Use a softer pencil (like a 4B or 6B) to darken the necessary areas. Shade the pug’s eyes, nose, and mouth to create depth and dimension. Pay attention to the areas where the light hits the pug, as well as the shadows created by the wrinkles and ears. Use a blending stump or cotton swab to smooth out the shading and create a more realistic look.
Step 8: Final Details
Now that your pug drawing is taking shape, it’s time to add the final details. Darken the eyes and add highlights to make them appear glossy. Fine-tune the wrinkles and fur texture by adding subtle lines and shadows. Take a step back to assess your drawing and make any necessary adjustments to ensure accuracy.
Conclusion
Congratulations! You have successfully learned how to draw a pug. Pugs are delightful creatures, and capturing their unique features on paper can be a rewarding experience. Remember to be patient and practice regularly to improve your skills. Don’t forget to sign your artwork and share it with others. Enjoy the process and have fun unleashing your creativity!