Do you have a vivid imagination and a desire to bring your creative ideas to life? Drawing a world is a fantastic way to express your creativity and showcase your artistic skills. In this step-by-step guide, we will walk you through the process of drawing your own world, from the landscapes and landmarks to the creatures that inhabit it. So grab your pencil, paper, and let’s dive into the world of drawing!
Materials Required
Before we begin, let’s gather all the materials you’ll need to create your masterpiece:
- Paper: Start with a blank sheet of paper. You can use any type of paper, but a sketchbook or drawing paper is recommended for a smoother drawing experience.
- Pencils: A set of graphite pencils ranging from 2H to 6B will give you a wide range of values to work with. The harder pencils (2H, 4H) are lighter and ideal for sketching, while the softer pencils (2B, 4B, 6B) will create darker lines and shading.
- Eraser: A good quality eraser is essential for correcting mistakes and smudges. A kneaded eraser is perfect since it can be shaped to suit your needs.
- Sharpener: Keep your pencils sharp for precise lines and details. A handheld sharpener or a mechanical pencil with lead refills will do the job.
- Fine-tip Pens: Optional, but useful for adding fine details and inking your final drawing.
- Reference Images: Gather some inspiration from real landscapes, architecture, and animals. These will help you add realism and accuracy to your world.
Now that you have all your materials ready, let’s begin the journey of drawing your own world!
Step 1: Imagine Your World
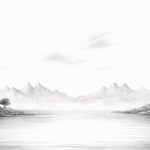
Close your eyes and let your imagination run wild. Visualize the landscapes, architecture, and creatures that make up your world. Are there towering mountains, vast oceans, or floating islands? Is it inhabited by mythical creatures or fantastical beings? Take a moment to form a clear picture in your mind.
Step 2: Begin with Basic Shapes
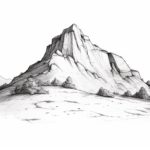
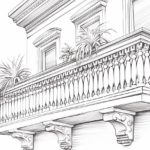
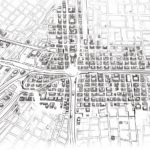
Start by sketching the basic shapes that will form the foundation of your world. Use light, simple lines to create the outlines of the landscapes, such as mountains, hills, or rivers. Add circles, squares, and rectangles for the architecture and landmarks.
Step 3: Refine the Outlines
Once you’re satisfied with the basic shapes, start refining the outlines of your world. Use slightly darker lines to define the contours of the landscapes and add details to the architecture. Pay attention to proportion and symmetry as you work.
Step 4: Add Depth with Shading
Shading adds depth and dimension to your drawings. Identify the direction of the light source in your imaginary world, and use light and dark values to create highlights and shadows. Gradually build up the shading by using different pencil grades, starting from the lighter ones and gradually moving to the darker ones.
Step 5: Bring Your World to Life
Now it’s time to add texture and details to your world. Use different pencils to create textures like grass, trees, or rocks. Experiment with cross-hatching, stippling, or blending techniques to achieve the desired effects. Add intricate details to architecture, such as windows, doors, or decorative elements. Let your imagination guide you as you bring your world to life on paper.
Step 6: Introduce Inhabitants
No world is complete without its inhabitants. Let your creativity soar as you draw the creatures, animals, or people that inhabit your world. Whether they are fantasy creatures or based on real-life animals, take your time to sketch their forms and add details to their features.
Step 7: Finalize the Details
Review your drawing and make any necessary adjustments and refinements. Use an eraser to remove any unwanted lines or smudges. Fine-tune the details and add any final touches to make your world truly unique and captivating.
Conclusion
Congratulations! You have successfully created your own world on paper. Drawing a world allows you to explore your imagination, develop your artistic skills, and showcase your unique vision. Remember, practice makes perfect, so don’t be afraid to experiment and try new techniques. So grab your materials, let your creativity flow, and embark on new artistic adventures!