Welcome to this step-by-step guide on how to draw a wasp! Whether you’re an aspiring artist or simply interested in enhancing your drawing skills, this tutorial will help you create a detailed and realistic representation of this fascinating creature. By following these easy-to-understand instructions, you’ll be able to capture the essence of a wasp on paper. So, let’s get started!
Materials Required
Before we dive into the drawing process, let’s gather the materials you’ll need:
- Drawing paper: Opt for a high-quality paper that is suitable for your chosen drawing medium. A smooth surface works best for pencil or pen drawings.
- Pencils: Have a range of pencils with different lead hardness, such as HB, 2B, 4B, and 6B. These will allow you to create varying degrees of shading.
- Eraser: Keep a kneaded eraser or a soft vinyl eraser handy to correct any mistakes or lighten areas of your drawing.
- Fine-line pen: You may want to use a fine-line pen, such as a technical or micron pen, for adding intricate details to your drawing.
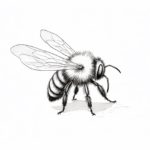
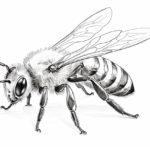
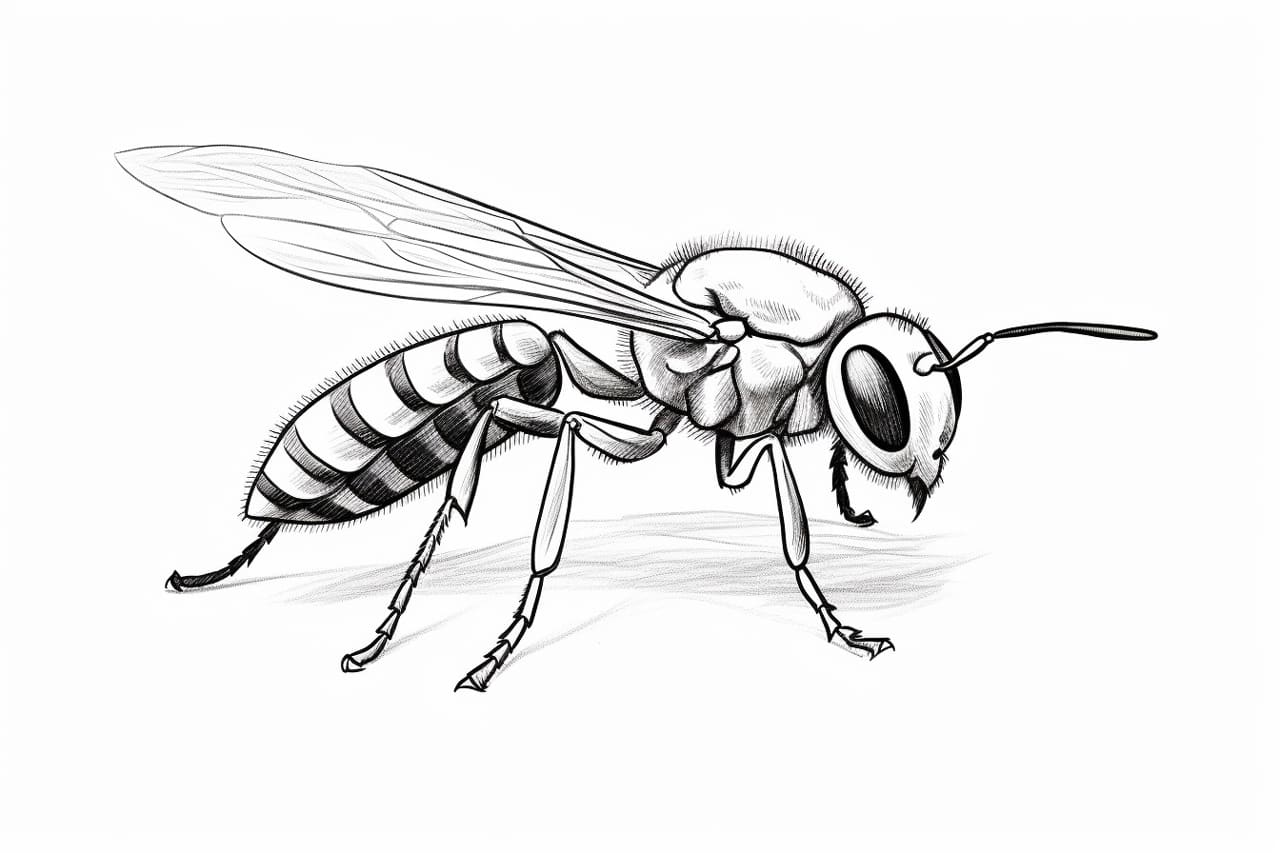
- Reference image: Find a clear and well-lit photograph or illustration of a wasp to use as a reference. This will help you capture the unique characteristics of this insect accurately.
Now that you have all the necessary materials, let’s start drawing your very own wasp!
Step 1: Basic Shapes
Begin by drawing the basic shapes that will serve as a framework for your wasp. Draw a medium-sized oval shape for the body, followed by a smaller oval for the head. Position the head slightly above the body to create a natural-looking angle. Add a slightly curved line for the abdomen, connecting it to the body oval.
Step 2: Eyes and Antennae
Next, focus on the head of the wasp. Draw two large oval shapes for the eyes, positioning them on both sides of the head. Leave some space between the eyes to make room for the antennae. Add two long, curved lines extending from the upper part of the head for the antennae. At the tip of each antennae, draw a small bulbous shape.
Step 3: Legs and Wings
Move on to drawing the legs and wings of the wasp. Starting from the lower part of the body, draw three pairs of curved lines that will serve as the legs. Make sure to divide each leg into three sections, gradually tapering towards the end to create the thin wasp legs.
To draw the wings, sketch two elongated, teardrop-like shapes on the upper portion of the body. Position them symmetrically, slightly overlapping each other to give the impression of depth.
Step 4: Body Details
Now it’s time to add some details to the body of the wasp. Start by drawing a curved line to divide the head in half horizontally, marking the separation between the face and the back of the head. Add a circle at the tip of the abdomen line to represent the stinger. Draw a zigzag pattern on the lower part of the wasp’s abdomen to depict the stripes.
Step 5: Eyes and Mouth
Let’s refine the features of the wasp’s face. Within each eye, draw a smaller oval shape to represent the iris. Leave a tiny space for the highlight in each eye to give it a more lifelike appearance. Add two curved lines within the head oval to create a mouth-like opening.
Step 6: Adding Shading and Texture
To add depth and dimension to your drawing, it’s time to incorporate shading and texture. Begin by shading the areas of the wasp’s body that are farthest away from the light source. Use your pencils with varying degrees of hardness to achieve different tones, making the darker areas of the body appear more prominent. Pay close attention to the contours of the body and the wings, shading accordingly to create a sense of volume.
To give the wings a translucent and delicate appearance, use a light touch when shading them. Gradually build up layers of shading, using lighter pencils, until you achieve the desired effect.
Step 7: Final Details
Now that the basic structure and shading are complete, it’s time to add the final details to your wasp drawing. With a fine-line pen, carefully outline the various parts of the wasp, emphasizing the contours and edges. Add tiny lines to the wings to indicate veins and small details. You can also add some dots or lines on the stripes of the abdomen to enhance its texture.
Conclusion
Congratulations! You’ve successfully learned how to draw a wasp from start to finish. By following these step-by-step instructions and using your creativity, you’ve created a realistic representation of this intriguing insect. Remember, practice makes perfect, so don’t be afraid to experiment with different techniques and styles as you continue your artistic journey. Happy drawing!
That concludes our tutorial on how to draw a wasp. We hope you found it helpful and enjoyable. Now, grab your materials and let your creativity take flight as you create your own stunning wasp drawings!