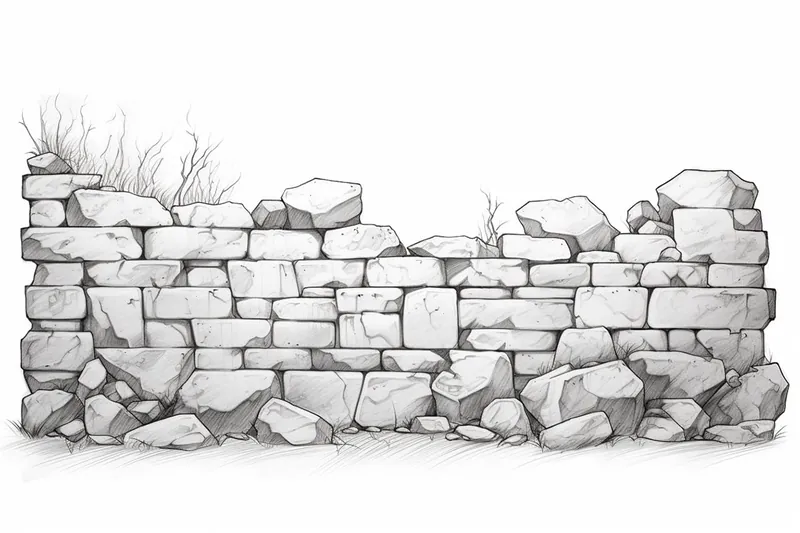
How to Draw a Stone Wall
Learn how to draw a realistic and detailed stone wall with this step-by-step drawing tutorial. Enhance your artistic skills and add texture to your artwork.
Materials You'll Need
- Pencil
- Paper
- Eraser
Stone walls have been used throughout history not only as functional structures but also as beautiful elements in landscapes and architecture. Their rugged shapes, varied tones, and unique textures can bring a sense of realism and atmosphere to your drawings, making them an excellent subject to master. Whether you're aiming to depict an ancient ruin overgrown with ivy, a quaint cottage garden, or a dramatic fortress wall, knowing how to draw a stone wall gives you the ability to create visually captivating scenes that tell a story and add depth to your artwork.
Learning how to draw a stone wall is a valuable skill for artists of all levels. Beginners can focus on simple shapes and shading to establish the basic structure, while more experienced artists can experiment with light, shadow, and intricate details to achieve a lifelike effect. This subject offers a great opportunity to practice observation, develop your understanding of texture, and improve your ability to render three-dimensional forms. Throughout this tutorial, you'll discover techniques for sketching irregular stone shapes, layering shading for depth, and adding highlights and cracks for authenticity.
Whether you're adding a stone wall as a central feature or a subtle background detail, mastering this skill will expand your artistic repertoire and enhance your creative projects. Remember, every stone wall is unique, and so is every artist's approach. With patience and practice, you'll soon feel confident in depicting these timeless structures. Let's get started and unlock the secrets of drawing stone walls together!
Materials Required:
- Drawing paper
- Pencil
- Eraser
- Fine-tip black pen or marker
- Charcoal or graphite pencils of different grades (optional)
- Blending stump or cotton swabs (optional)
- Colored pencils or markers (optional)
Step 1: Start with the Outline
Begin by lightly sketching the outline of the stone wall using a pencil. Determine the shape and size of the wall you want to draw. It could be a straight wall, a curved wall, or even a crumbling old wall.
Step 2: Add the Base Stones
Using your pencil, sketch the base stones of the wall. Start by drawing irregular shapes that resemble rocks. Remember, stones in a real wall are rarely uniform in size or shape. Vary the sizes and shapes of the stones to create a more realistic effect.
Step 3: Define the Stones
Once you have the basic outline and base stones, go over the pencil lines with a fine-tip black pen or marker. This will help define the shape and texture of each stone. Add details such as cracks and lines to make each stone look more realistic.
Step 4: Shade the Stones
To give the stones a three-dimensional look, add shading. Determine the direction of the light source and shade one side of each stone. Use cross-hatching or stippling techniques with your pencil or charcoal to create the illusion of depth. If you prefer a smoother look, you can blend the shading with a blending stump or cotton swab.
Step 5: Add Texture
To make the stone wall appear more rough and textured, add additional details. Sketch small cracks, chips, and imperfections on the surface of the stones. You can also create a weathered appearance by adding moss or lichen on some of the stones.
Step 6: Create Shadows
To make the stone wall look more realistic, add shadows. Determine the direction of the light source and shade the areas where the stones cast shadows. This will give the drawing depth and make the stones stand out.
Step 7: Fine-Tune the Details
Take a step back and assess your drawing so far. Look for any areas that need refinement or additional detail. Add any missing elements such as small stones or variations in color. Pay attention to the overall composition and balance of the drawing.
Step 8: Optional Coloring
If you want to add color to your drawing, now is the time to do so. Use colored pencils or markers to add subtle shades and variations to the stones. You can also experiment with different colors to create a more artistic or stylized rendering of the stone wall.
Tip: To effectively capture the essence of a stone wall in your drawing, start by choosing a variety of reference images that showcase different types of stone structures. Use a soft pencil, like a 2B or 4B, to lightly sketch the basic outline and shape of the stones, focusing on irregular forms rather than perfect rectangles. As you begin to shade, layer your pencil strokes to create depth—use a range of values from light to dark to mimic the natural variations in stone color and texture. To enhance realism, incorporate highlights with an eraser to depict light reflecting off the stone surfaces, and consider adding fine lines or cracks with a sharp pencil to suggest age and wear. Finally, don't be afraid to experiment with blending tools or your fingers to soften certain areas, giving your stone wall that rough, tactile quality that invites viewers to reach out and touch it.
Conclusion
Drawing a stone wall can be a challenging but rewarding exercise in observation and technique. By following these step-by-step instructions, you can create a realistic and detailed stone wall in your artwork. Remember to have patience, practice regularly, and experiment with different materials and techniques to develop your own unique drawing style.
So, grab your pencils and get started on your stone wall masterpiece today!
Fun Facts About Stone Wall
- The oldest known stone walls, such as Hadrian's Wall in the UK, date back nearly 2,000 years.
- Dry stone walls, built without mortar, are a traditional technique still used in places like Croatia and the British countryside.
- Stone walls can serve as important habitats for wildlife, providing shelter for insects, reptiles, and small mammals according to the RSPB.
- The Inca civilization constructed remarkable stone walls at Machu Picchu using precisely cut stones that fit together without mortar.
- Stone walls are often used as property boundaries and are protected as cultural heritage in regions like Ireland.
- Some stone walls, like the stone walls of New England, were built by early American settlers to clear fields for agriculture.
- Stone walls can last for centuries with minimal maintenance, as noted by the National Park Service.
- In Japan, ancient castle stone walls called ishigaki were engineered to withstand earthquakes and attacks.
- Stone walls are featured in many famous works of art and literature, symbolizing strength.
Suggestions for Scenes and Settings for Stone Wall Drawings
- An ancient stone wall in a misty forest, partially covered with moss and twisting tree roots.
- A medieval castle rampart with crenellations, overlooking a dramatic mountain valley.
- A charming cottage garden enclosed by a low, irregular stone wall bursting with blooming flowers.
- An old farm boundary wall in the countryside, with wild grasses and livestock nearby.
- A ruined monastery wall, featuring arched windows and trailing ivy.
- [A seaside stone breakwater battered by waves, with driftwood and seaweed](https://yonderoo.com/how-to-draw-seaweed/) scattered along its base.
- A quaint village street lined with stone walls, lanterns, and cobblestones.
- A fairytale-inspired scene with a winding stone wall leading to an enchanted woodland gate.
- An urban park with a decorative stone retaining wall, benches, and climbing roses.
- A moonlit scene of a mysterious stone wall in a field, casting long shadows and hinting at hidden secrets.