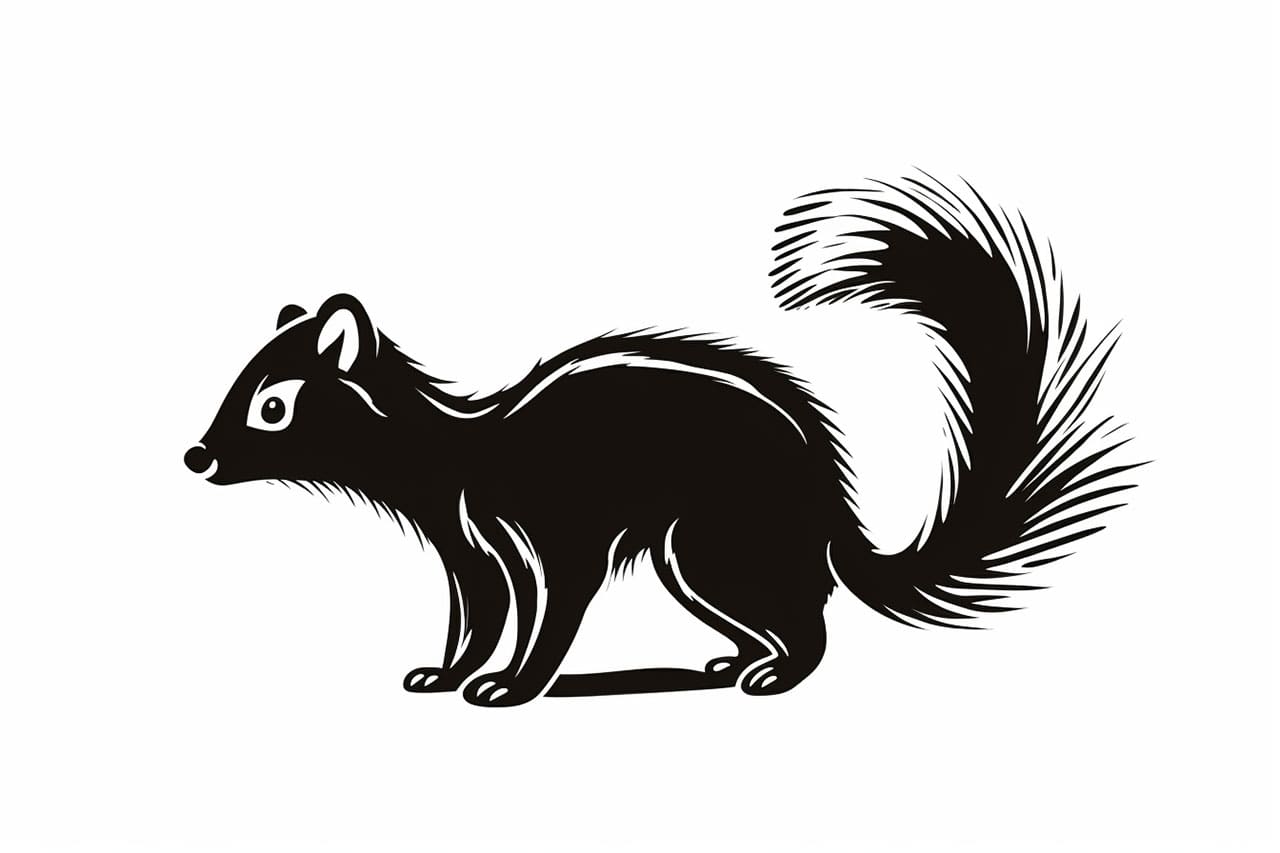
Welcome to this step-by-step guide on how to draw a skunk! Skunks are fascinating creatures known for their unique appearance and distinctive odor. In this tutorial, I will guide you through the process of creating a realistic skunk drawing. By following these instructions, you will be able to capture the essence of a skunk in your artwork.
Materials Required
Before we begin, let’s gather the necessary materials for drawing a skunk:
- Drawing paper or sketchbook
- Pencils (HB, 2B, and 4B)
- Eraser
- Blending stump or cotton swabs
- Fine-tip black marker
- Colored pencils or markers (optional)
Now that we have our materials ready, let’s dive into the step-by-step process of drawing a skunk.
Step 1: Sketch the Basic Shapes
To start, lightly sketch the basic shapes that make up the skunk’s body. Begin with an oval for the head, a larger oval for the body, and smaller circles for the ears and limbs. Position them in a way that represents the skunk’s natural stance.
Step 2: Refine the Outline
Using the basic shapes as a guide, carefully refine the outline of the skunk’s body. Pay attention to the proportions and curves, ensuring they resemble the shape of a skunk. Add a long, fluffy tail extending towards the back.
Step 3: Add Facial Features
Now, let’s tackle the skunk’s facial features. Draw two almond-shaped eyes, slightly slanted towards the center. Place a small round dot within each eye to represent the pupils. Below the eyes, draw a small, triangular-shaped nose. Add a smile line extending from the nose to indicate a gentle expression.
Step 4: Illustrate the Ears and Fur
Next, draw the skunk’s ears on top of the head. They should be pointy and slightly curved. To depict the skunk’s fluffy fur, use short, curved lines around the head, body, and tail. Ensure the lines follow the natural contours of the skunk’s anatomy.
Step 5: Define the Stripes
One of the most distinctive features of a skunk is its black and white stripes. Draw thick, curved lines across the skunk’s body, following the contours. The stripes should be evenly spaced and extend from the head to the tail.
Step 6: Shade the Body
Using your pencils, start shading the skunk’s body to create depth and dimension. Begin with the lighter shades (HB pencil) and gradually build up to darker tones (2B and 4B pencils). Pay attention to the areas where shadows naturally occur, such as under the body, tail, and ears. Blend the shading using a blending stump or cotton swab for a smooth transition.
Step 7: Finalize the Details
Now it’s time to add the final touches to your skunk drawing. Darken the eyes and define the pupils using a fine-tip black marker. Add small whisker details around the nose area using the same marker or a black colored pencil. If you prefer, you can also use colored pencils or markers to add a touch of color to your skunk drawing.
Conclusion
Congratulations! You have successfully learned how to draw a skunk from scratch. By following these step-by-step instructions and using your creative abilities, you’ve brought this fascinating creature to life on paper. Remember, practice makes perfect, so don’t be afraid to experiment and refine your techniques. Enjoy the process and have fun creating your skunk drawings!