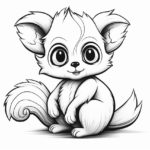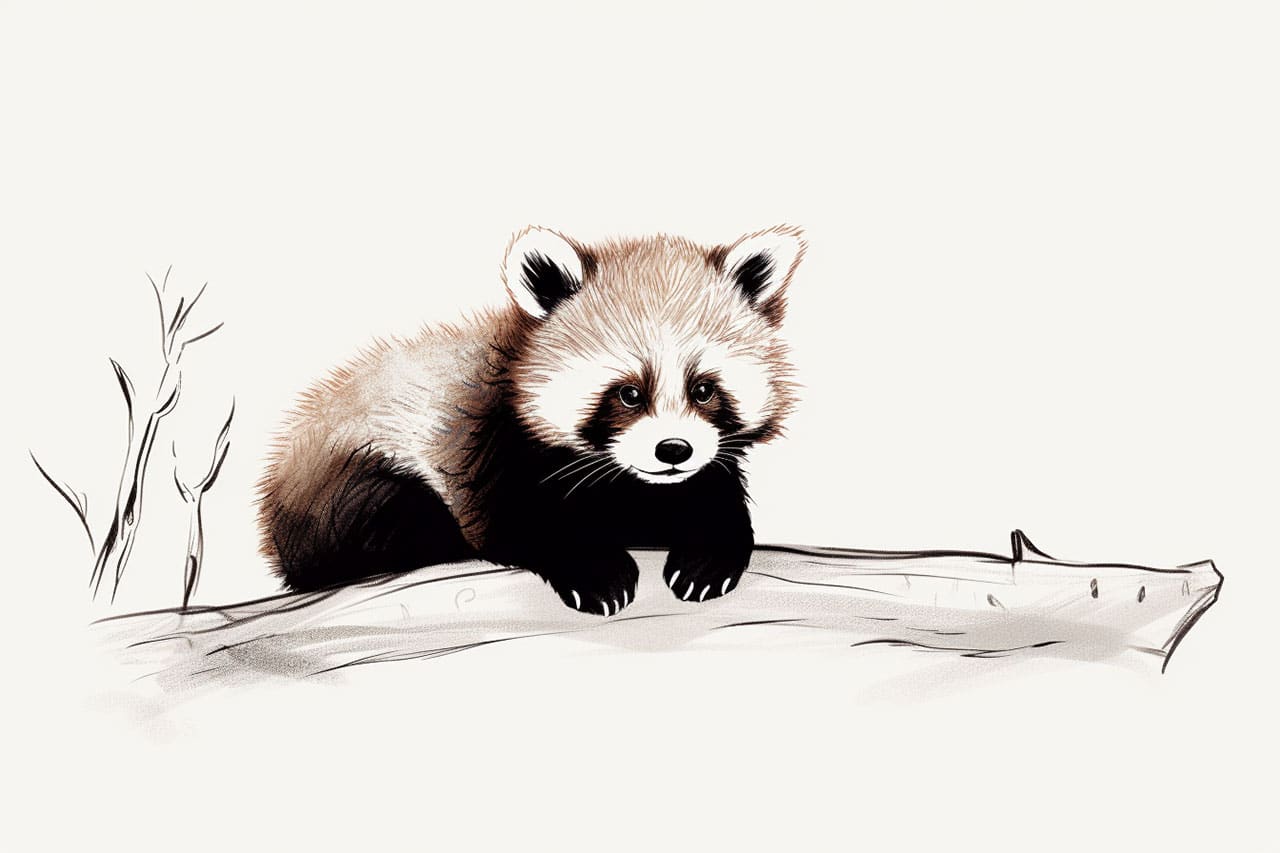
Welcome to this step-by-step guide on how to draw a red panda! Red pandas, also known as lesser pandas or red bear-cats, are adorable creatures native to the eastern Himalayas and southwestern China. With their fluffy tails and unique markings, they make for a charming subject to draw. Whether you’re a beginner or an experienced artist, this tutorial will help you capture the beauty of a red panda on paper.
Before we dive into the steps, gather the following materials to ensure a smooth drawing process:
- Drawing paper or sketchbook
- Pencil
- Eraser
- Fine-tipped black pen or marker
- Colored pencils or markers (optional)
With your materials ready, let’s get started on our red panda drawing adventure!
Step 1: Basic Outline
Begin by lightly sketching a circle for the red panda’s head, followed by an oval shape for the body. Adding a small oval underneath the body will serve as a guideline for the back leg. Position the shapes to your liking, as these initial sketches will form the foundation of your red panda drawing.
Step 2: Facial Features
Now, let’s add the facial features. Sketch two almond-shaped eyes within the circle, leaving enough space between them for the nose and mouth. Add a small triangular nose at the center, slightly below the eyes. Extend a short line downwards from each side of the nose to form the mouth. Draw small curved lines above the eyes to indicate the eyebrows.
Step 3: Ears and Fluffy Cheeks
Red pandas have distinctive ears and fluffy cheeks. Sketch two semi-circular shapes on top of the head to represent the ears. From the sides of the head, extend curved lines downward to form the red panda’s cheeks. These lines should gradually connect with the body to create a seamless transition.
Step 4: Tail and Limbs
Moving on to the limbs, draw four lines extending from the bottom of the oval body shape. These lines will serve as guides for the red panda’s legs. Connect each line with small circles to form the paws. Don’t forget to include the characteristic long and bushy tail! Sketch a curved line starting from the back of the body, flowing towards the right side. Add fluffy details to the tail by drawing small curved lines along its length.
Step 5: Refine the Outline
Take your pencil and refine the outline of the red panda by gradually erasing unnecessary guidelines. Pay close attention to the shape of the head, body, and limbs, ensuring they align with the proportions you desire. This step will give your drawing a more polished and defined look.
Step 6: Face Details
Now that you have the basic structure, let’s focus on the red panda’s face. Darken the outer edges of the eyes and add small circles within them to represent the pupils. Enhance the eyebrows by adding more detail and texture with short, upward strokes. Using a fine-tipped black pen or marker, outline the nose, mouth, and other facial features to make them stand out.
Step 7: Fur Texture
The fluffy fur is one of the key features that make red pandas so adorable. To capture this texture, use your pencil or fine-tipped pen to draw short, curved lines all over the red panda’s body. Pay attention to the direction of the fur, which typically flows downwards. By adding these fine details, you will bring your red panda drawing to life.
Step 8: Color and Shading (optional)
Now comes the fun part – adding color! If you have colored pencils or markers, you can choose shades that closely resemble the red panda’s fur. Layer the colors gradually, starting with lighter tones and adding darker shades for depth. Blend the colors smoothly to create a realistic effect. Alternatively, you can stick with the black and white drawing for a striking monochrome look that highlights the texture of the fur.
Conclusion
Congratulations on completing your red panda drawing! By following these step-by-step instructions, you’ve captured the adorable essence of this captivating creature. Remember, practice makes perfect, so don’t hesitate to try drawing red pandas in different poses or settings. Keep exploring your artistic abilities and embrace the joy of creating beautiful artwork!