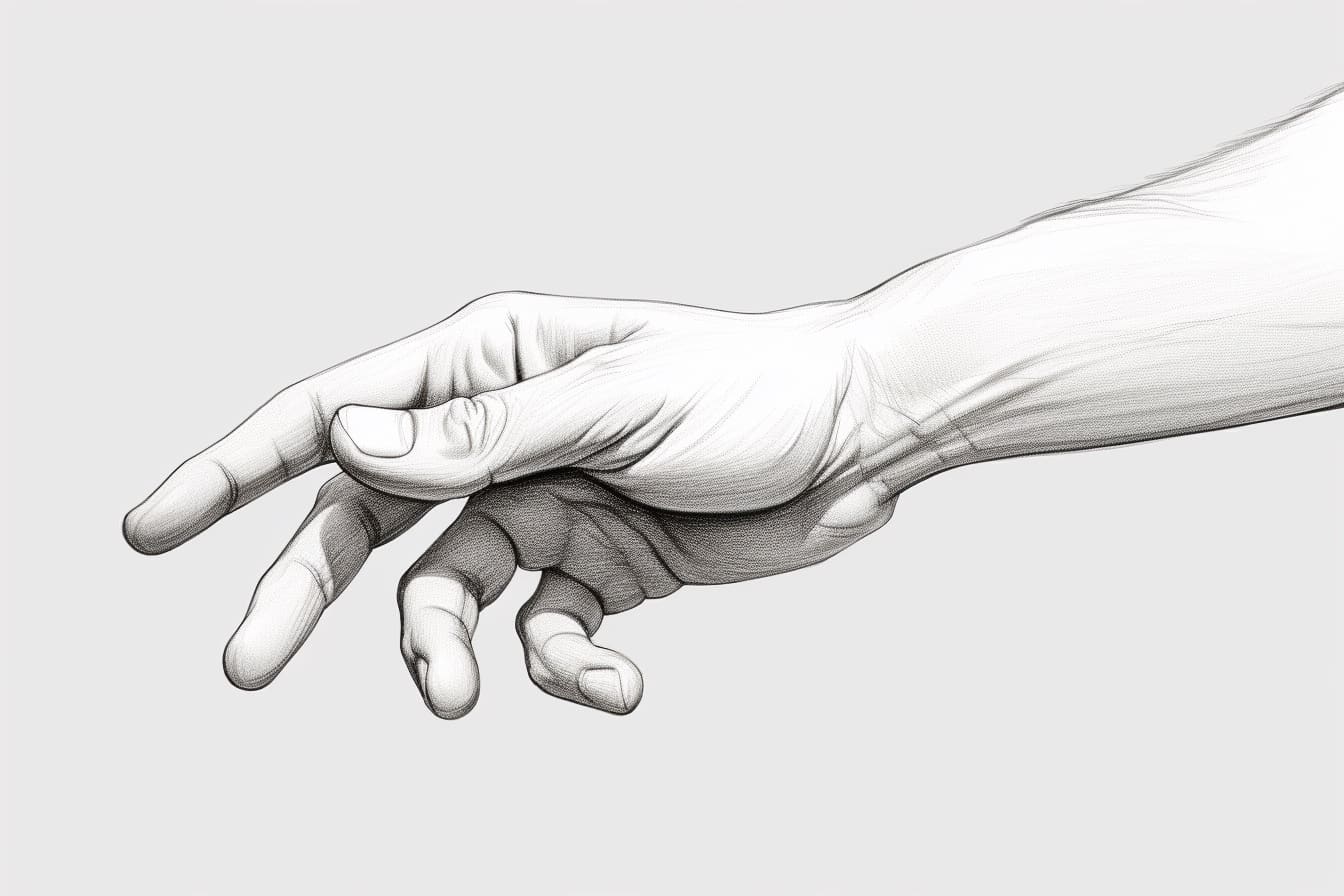
Creating a detailed and realistic drawing of a human hand can be a challenging task for many artists. However, with the right techniques and a step-by-step approach, anyone can learn to draw a hand with accuracy and confidence. In this article, we will guide you through the process of drawing a human hand from scratch, providing you with essential tips and tricks along the way.
Materials Required
Before we begin, let’s gather the necessary materials for this drawing tutorial:
- Drawing paper – Choose a smooth and sturdy paper suitable for your preferred drawing medium, such as pencil or charcoal.
- Pencils – A range of graphite pencils, including HB, 2B, 4B, and 6B, will be useful for shading and adding details.
- Erasers – Have both a kneaded eraser and a white vinyl eraser on hand to correct mistakes and add highlights.
- Blending tools – You can use blending stumps, tortillions, or even a simple tissue to blend and soften the shading.
- Reference image – Find a clear and well-lit photograph of a hand to use as a reference throughout the process.
Now that we have our materials ready, let’s dive into the step-by-step process of drawing a human hand.
Step 1: Basic Shapes
Start by lightly sketching the basic shapes that make up the hand. Begin with a rectangular shape for the palm, and then add a circle on top of the rectangle for the base of the thumb. Next, sketch the fingers as long oval or tube-like shapes extending from the palm. Pay attention to the proportions and size relationships between the shapes.
Step 2: Outlining the Hand
Using your initial shapes as a guide, begin outlining the hand with more defined lines. Outline the contours of the palm, adding curves and angles to indicate the underlying structure. Then, draw the outlines of the fingers, making sure to capture the tapering and bending of each digit. Take your time in this step to ensure accuracy in proportion and shape.
Step 3: Adding Details
Now that you have the basic outline of the hand, it’s time to add more details. Start by sketching the joints of each finger, indicating their position and proportion. Then, carefully draw the individual bones in each finger, paying attention to their curves and angles. Remember to keep your lines light and easy to adjust if needed.
Step 4: Shading and Rendering
To give the hand a more three-dimensional appearance, we will add shading and rendering. Start by identifying the main light source in your reference image. Use lighter shading on the areas that catch the light and darker shading on the areas in shadow. Gradually build up the values, using various tones of graphite, to create a sense of depth and form.
Step 5: Refining and Smoothing
In this step, focus on refining the details and smoothing out any rough areas of your drawing. Use your blending tools, such as blending stumps or tortillions, to blend the shading and create a seamless transition between light and shadow. Pay attention to the subtle variations in tone and texture to achieve a more realistic depiction of the hand.
Step 6: Adding Finishing Touches
To complete your drawing, add the final touches that will bring your hand to life. Look closely at your reference image and observe any small details, such as wrinkles, creases, or veins, that may be present on the hand. Use a sharp pencil or an eraser to highlight these details, adding texture and dimension to your drawing.
Conclusion
Drawing a human hand may seem daunting at first, but by breaking down the process into manageable steps, anyone can learn to create a lifelike hand drawing. Remember to practice regularly, as each attempt will bring you closer to mastering this challenging subject matter. With patience, observation, and attention to detail, you’ll be amazed at the progress you can make. So, grab your pencils and begin exploring the intricacies of the human hand.