Welcome to this step-by-step guide on how to draw a bird cage! Whether you’re an aspiring artist or just looking for a fun drawing project, this tutorial will provide you with easy-to-follow instructions to create a beautiful bird cage illustration. With a few simple materials and some patience, you’ll be able to bring your bird cage drawing to life. So let’s get started!
Materials Required
Before we begin, gather the following materials:
- Paper: A sheet of plain white paper or a sketchbook will work perfectly fine.
- Pencil: You’ll need a pencil for sketching the initial outlines and details.
- Eraser: Having an eraser handy will help you make corrections and adjustments to your drawing.
- Fine-tip Pen or Marker: Once you’re satisfied with your pencil sketch, a pen or marker can be used for inking your final lines. This step is optional, but it can add a nice finished look to your artwork.
- Coloring Supplies: If you wish to add color to your bird cage drawing, you can use colored pencils, markers, or any other coloring medium of your choice.
Now that you have your materials ready, let’s dive into the step-by-step process of drawing a bird cage!
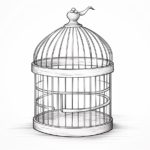
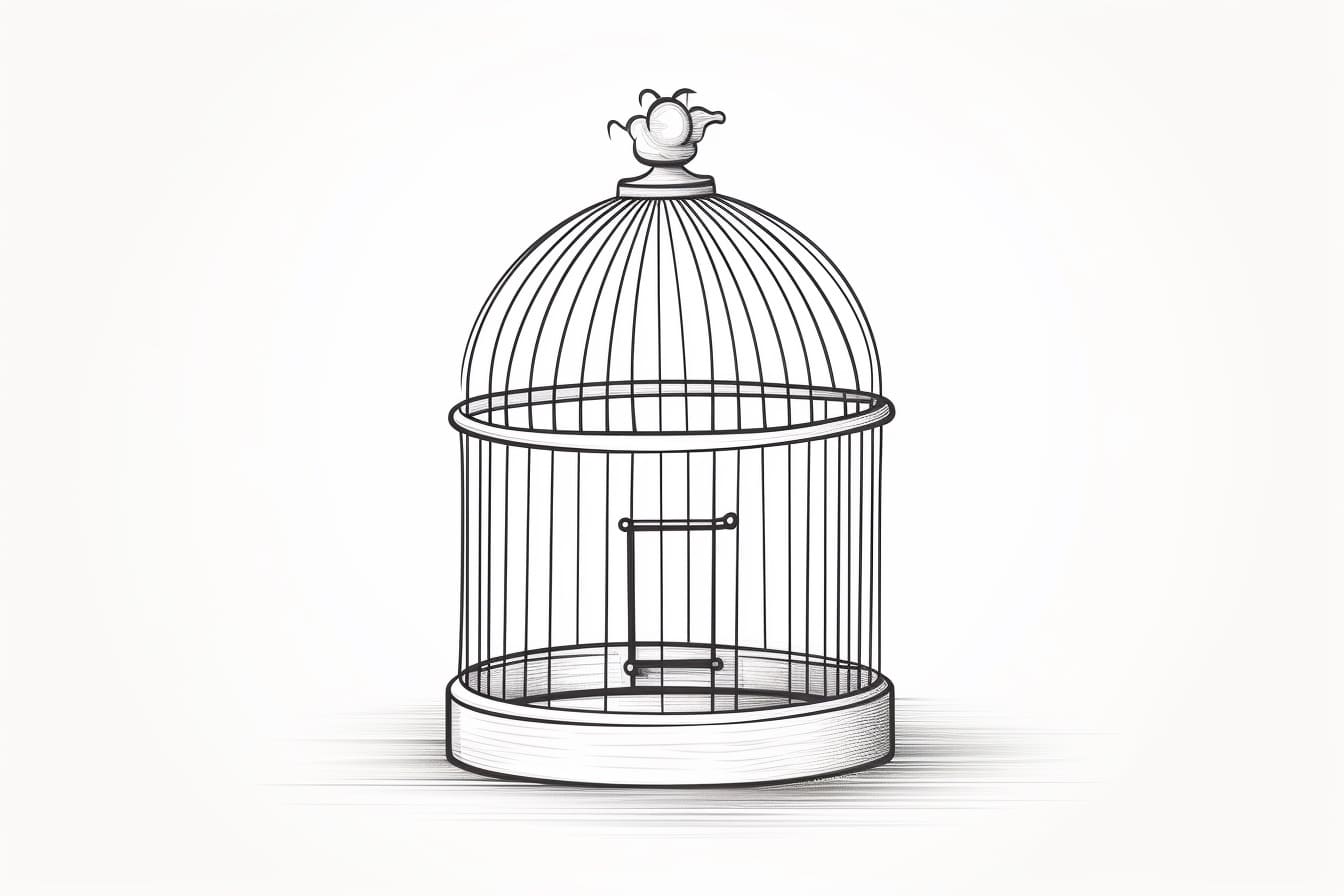
Step 1: Draw the Top Dome of the Bird Cage
Start by drawing an oval shape at the top of your paper. This will form the dome of the bird cage. Keep in mind that the size of the oval will determine the overall proportions of your bird cage, so adjust accordingly.
Step 2: Add the Vertical Lines for the Cage Bars
From the bottom of the oval shape, draw several evenly spaced vertical lines that extend downwards. These lines will represent the bars of the bird cage. Make sure to leave enough space between each line to create a visually pleasing design.
Step 3: Connect the Cage Bars with Horizontal Lines
Next, connect the vertical lines you just drew with short, horizontal lines. These lines will form the actual bars of the bird cage. To create a three-dimensional effect, make the bars slightly wider at the top and narrower towards the bottom.
Step 4: Sketch the Bottom Portion of the Bird Cage
Draw a curved line at the bottom of the vertical lines to complete the base of the bird cage. This line should follow the shape of the dome but with a smaller radius. This will create a rounded effect for the cage’s bottom.
Step 5: Add Details to the Cage Bars
To give your bird cage more depth and texture, draw small curved lines along the length of each vertical bar. These lines will simulate the horizontal wires connecting the bars.
Step 6: Create the Door of the Bird Cage
Decide on the position of the door for your bird cage and draw a small rectangle within the cage bars. You can place it anywhere you like, but a common placement is near the bottom of the cage.
Step 7: Draw the Perch
Inside the bird cage, draw a small, horizontal line to represent the perch where the bird would sit. Place it midway between the top and bottom of the cage, and make sure it is securely attached to the bars.
Step 8: Outline the Bird Cage with a Fine Pen or Marker
If you want to make your drawing more defined and polished, go over your pencil lines with a fine-tip pen or marker. This step is optional but can give your artwork a more finished look.
Step 9: Add Shading and Color to Your Drawing (Optional)
To add depth and dimension to your bird cage, you can use shading techniques with pencils or add colors using markers, colored pencils, or any other coloring supplies you have available. Experiment with different shading techniques to create a realistic or stylistic effect.
Conclusion
Congratulations! You have successfully learned how to draw a bird cage. Using simple shapes and lines, you can create a delightful illustration suitable for various art projects or simply for the joy of drawing. Remember, practice makes perfect, so don’t hesitate to try drawing bird cages of different shapes and sizes. Enjoy the process, unleash your creativity, and have fun with your newfound drawing skills!